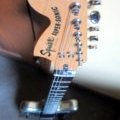
65/66 Musicmaster II body in original red finish


66 Mustang neck


60's MM pickguard

and the rest of the parts

Moderated By: mods


Thanks for all the info! I have all of the tools I need, I think. The soldering iron I have is a good one, but I only have one tip for it. Hopefully, it will be okay. I'm actually only going to wire one pickup for now. I thought it would be easier for me to start out that way. I didn't want to be overwhelmed, so I'm taking it kind of slow. I may eventually turn it into a Duo-Sonic, though, depending on how things go with this.DGNR8 wrote:Kick the ass! Good going with parts. I have been on that same treasure hunt before. I painted and assembled one a few weeks ago and it only took me two days, start to finish. Assembly doesn't take long, once you do a few. But you may have to monkey with the setup. Fenders are the easiest, IMO.
Here's the best diagram for that model. SS has more info on the wiki. I learned how to solder clean with cloth wires by looking there. Don't be afraid to waste wire or cut the cloth or vinyl shielding. You want to have enough wire to be able to move parts around for assembly, but long lengths increase resistance. A good shirt allows full reach, but isn't baggy.
Have you bought the tools yet? Get an iron with several tips. Some prefer high heat, but a standard Weller is fine. I also use an Exacto knife for trimming the cloth, nippers, needle nose pliers, and copper desoldering braids to wick of the old solder, or if you overload it. I have had to redo entire harnesses before. Keep a range of screwdrivers handy, and keep extra screws around. I keep several of those cheap plastic string winders within reach. I always need them after I am already caught in a tightly wound string trap. I like the heat shrink tubing for grafts. Electrical tape is a gummy black mess.
I have never seen it written anywhere, but I don't mind having wood glue on my fingers in case I burn myself. Soldering is a ritual for me. I am always aware of the dangers.


Possibly, but I haven't had a chance to get anything else done on it yet. Hopefully one day soon, I'll have some time to finish it up. I only have wiring the pickup/electronics left to do, but it will be my first attempt at it, so it might take a while to figure everything out. We'll see...wetbelly wrote:Any chance for a demo video once you get it all wired up? Looks pretty sweet.