Is a Jaguar/LesPaul out of bounds for this site?
Moderated By: mods


Next job was to drill my tuning holes, and route the thickness for the headstock.

had my dad work the pocket corners a little with his carving tools to get them fit just right. I was really pleased with the fit of the neck in the pocket, and when I checked for centering down the body they were dead on the money. Lovin it.


So now I can let the necks set a while and get busy on the bodies. Want to get them stained and finished soon so they will be dry and ready by Christmas.
I made a template out of some finish grade plywood scrap.
Hogged the holes out with a Forstner bit, then had at it with the router. Also used a forstner bit on the selector switch hole.


Then made another template for the cover cavities on the back.


I also drilled the control and switch holes.

finally hit it with the round over bit

Here is my dog millie modeling my three bodies, next is contouring and on to sand and stain.

My dilemma

Two of the three bodies came out at exactly 4 pounds with contouring still left to do. The third body as you can see, came in at a whopping 6 lbs 4 oz.
I am planning on using dark walnut wood for the cavity covers, and pickup rings, and was considering cutting one out that looked like a mock f-hole, and inlaying it into the one body that I was gonna keep for myself. I really like the look of the f-hole.
My dilemma is, Since that one body is so heavy, should I forgo the contouring on it, and route out a chamber from the back side and make a cover plate for it out of walnut, and then actually put in a real f-hole. I'm thinking this may help me lose as much as a pound on weight which would make it a more manageable 5 1/4 lbs. I think I could still do the front contouring, but would not be able to to the back belly cut, since there will be a cover plate there.
What opinions are out there?
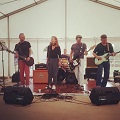
Me and the guys
This is from after playing worship last Sunday at church. Our band is called CrossTracks. We were missing two of the girls.


Here is a belt sander that I use to put in the belly cut and round the top corner. So thankful that my dad has so many tools.


I used the same jig I made to route the inlays and used it as a guide for my radius too. My dad and I made the radius board out of some Hickory on my last guitar build. It really works well. I just wish it was a little longer, but you can't have everything I guess.

I used double sided tape to hold the neck down to the Jig.

-
JohnnyTheBoy

- .

- Posts: 542
- Joined: Fri Feb 04, 2011 2:39 pm
- Location: Middle England
- Contact:


So, I was drilling the wiring passage from the 1/4 inch jack, thru the control cavity and both pickup cavities and into the selector switch cavity with a 2 foot long drill bit that I have. I thought everything was lined up, but the bit took a turn for the top and reared it's ugly head out the front of the guitar. My first reaction was to be sick, but after sitting back and thinking it through, I think I have a solution. I was originally gonna inlay a mock f-hole into this body, but instead I am gonna inlay a mock shark fin out of walnut. By doing that I can go ahead and route the channel between the pickup cavities and the selector seitch cavity, then inlay a shark fin.
It seems like whenever I screw something up, it just inspires me to come up with something even better. Now I'm really pumped about this idea.

Here is the walnut that I sliced down to make the shark fin out of. it's about 3/32 inch thick and should lay in real good.


As you can see, compared to my previous post, I didn't like it. The Amber had a slight green hue to it. I sanded it way back, then added some reds to the amber to make it more orange, then did the brown and black a lot less to better define the shape of the guitar. I haen't looked at it yet tonight, but may start with the lacquer if I like what I see.

as for shark fin, I put on four coats of lacquer last night. I absolutely love the look of this body. It's kind of an oxblood color that I think goes great with the shark fin idea.


-
Fakir Mustache

- .

- Posts: 4362
- Joined: Wed Sep 25, 2013 5:23 pm
I'm doing the stew-mac dye in distilled water and hand rubbing in with rags.sunshiner wrote:I take my hat off to you. It turns out great and is pleasure to watch.
Do you spray that amber sunburst or you put it somehow with a sponge?
It really swells the grain the first time and has to be sanded a lot.
by third coat, grain doesn't raise much any more.
seems to be working real good. just takes a lot of patience and time.