
JK, serious and dangerously stiff boners.
Moderated By: mods


Lol, talk about it. I bought a '76 Musicmaster that had been erm.. routed by a dog, or so it seemed. Splinters everywhere just for a 'bucker.fullerplast wrote:HAHA! Yeah... and routed it out with a srewdriver and hammer for some hambackers....


Thanks!Aeon wrote:Looking superb.
What is the exact process that you use to shoot your paint? Do you just shake the bottle up and give it a few coats? Any special techniques?

Fuller, would you know how thin you need to dilute the grain filler?fullerplast wrote:Thanks!Aeon wrote:Looking superb.
What is the exact process that you use to shoot your paint? Do you just shake the bottle up and give it a few coats? Any special techniques?
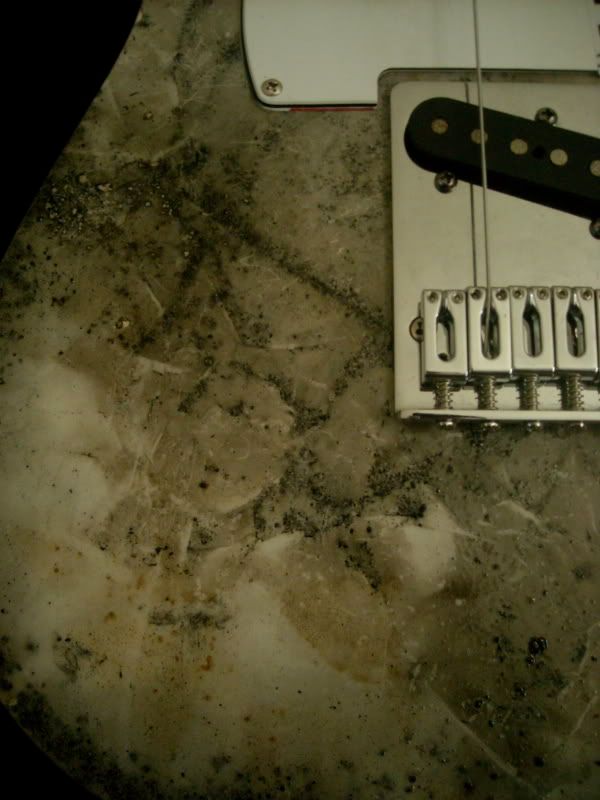
But any painter will tell you that prep is the most important thing. It has to be smooth and clean. One thing I learned from this project is not to skip the grain filler... even on alder. Some people will tell you that you only need it on ash or mahogany. But any type of wood is going to have imperfections and raised grain. Alot of blems show on this body at the right angle to the light. But I'm trying to make this look 40 something years old, so I'm not overly concerned. Still, I do wish I had filled it.
It isn't red enough to be fiesta, or pink enough to be coral! My goal was faded fiesta red... but this just looks orange to me. I experimented with shooting some of it on a piece of white baseboard and then spraying yellow-tinted clear over it, but it didnt change the color much at all.Looks coral to my eyes, not close to fiesta red at all. Good job though!
i got some grain filler but its a really thick paste. I think you can dilute it a bit, to make it easier to lay down. How thick is the stuff you're using? Pix?fullerplast wrote:Looks coral to my eyes, not close to fiesta red at all. Good job though!
As for the grain filler, I use Bartley's right out of the can.


I bought it bits and it lacks a scratchplate, pickup and electronics so I've not had chance to play it, though I played RobRoe's and it did sound great. It's also painted yellow and has a few dings that need ironing out (or in I suppose), so I'm going to get on sanding it either tomorrow or next week, think I'm going to go for either surf green or daphne blue, and ideally in nitro, but I'll have to see what the supply is like UK side for that business.fullerplast wrote:Those are great... I bought a black one off eBay for $125 a few years after they came out.BobArsecake wrote:Looks ace :D I'm going to have a proper go this week a that Vista Musicmaster I bought from James last summer.
I was amazed how resonant it was!