it was a slightly transparent dakota, supposedly.DGNR8 wrote:Nice collection shot! Jazzies galore. I may has to do a comp stripe. What color would they be on orange? Dakota?
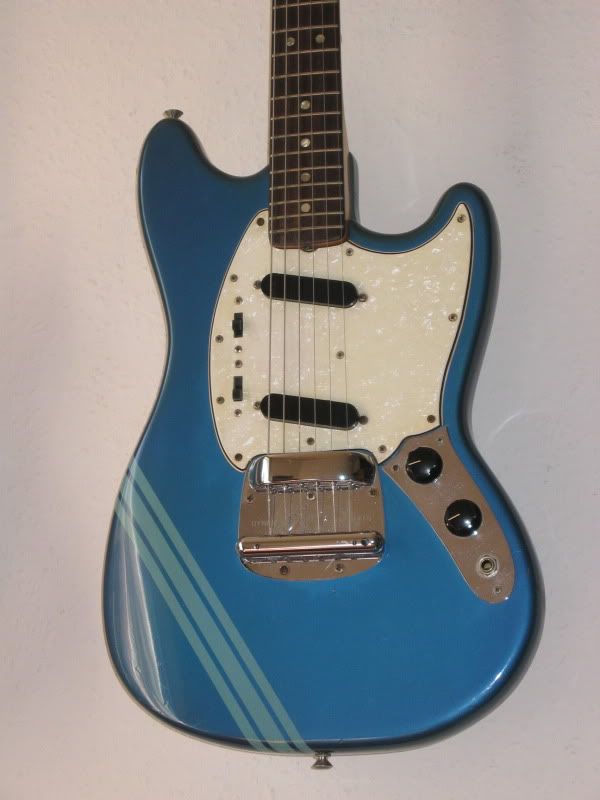
Restoring a CIJ Stang into aged LPB Comp Stang COMPLETE!
Moderated By: mods

@Mike
Thanks man!
@Stewart
Aging the pickguard
1. Lightly sand the pickguard with 800 or even 1000 grit sand paper
2. 1 light coat of clear lacquer
3. 1 or 2 light coats of tinted lacquer (from ReRanch)
4. 1 coat of regular lacquer
@DGNR8
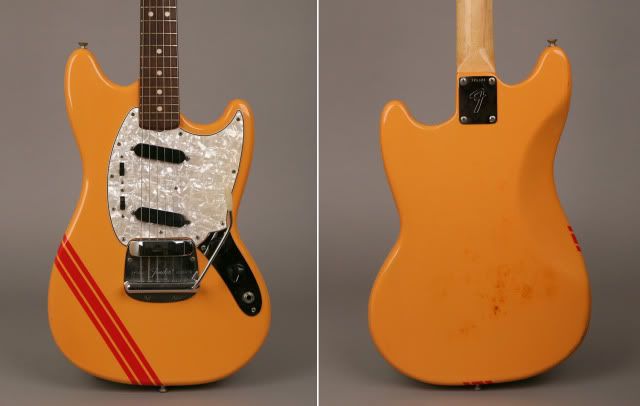
That would be my guess. This photo from a recent ebay orange comp stang shows some of the red coming through on the back. I love when this happens
Thanks man!
@Stewart
Aging the pickguard
1. Lightly sand the pickguard with 800 or even 1000 grit sand paper
2. 1 light coat of clear lacquer
3. 1 or 2 light coats of tinted lacquer (from ReRanch)
4. 1 coat of regular lacquer
@DGNR8
That would be my guess. This photo from a recent ebay orange comp stang shows some of the red coming through on the back. I love when this happens
-
stewart

- Cunning Linguist
- Posts: 17644
- Joined: Mon Jul 14, 2008 7:33 pm
- Location: Edinburgh, Scotland
- Contact:
handy to know, i've got a white aftermarket one for an early 60s duo that i want to be tinted and don't fancy the 'staining-in-coffee' method.prospect wrote:Aging the pickguard
1. Lightly sand the pickguard with 800 or even 1000 grit sand paper
2. 1 light coat of clear lacquer
3. 1 or 2 light coats of tinted lacquer (from ReRanch)
4. 1 coat of regular lacquer

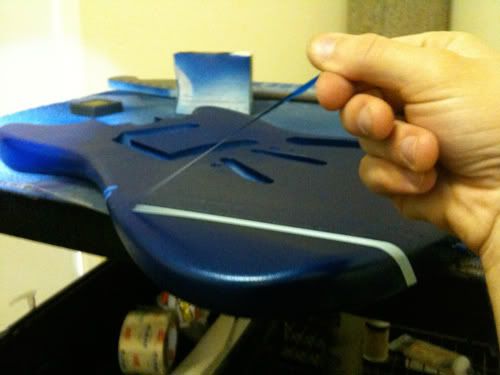
Update; masking take removal!
This was a scary process because I didn't know what to expect.
I'd say on a scale of 1 to 10, 10 being perfect, the stripes are a 9.
There are a few imperfections but nothing I can't fix and/or deal with.
The photos were taken with a phone so they're not the best.
Also no clear coat has been applied yet so the color coats have that weird pre-clear rough sandy texture.
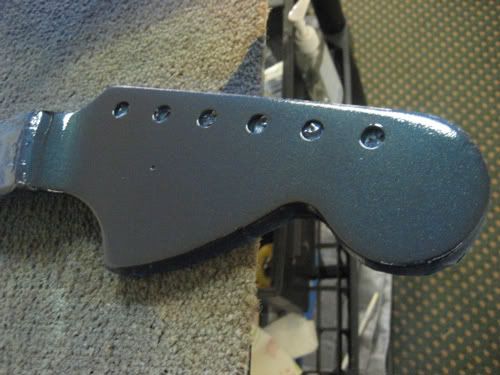
The headstock got a little bit of hazing on the first coat of clear.
Florida is a humid, wretched place.
I used "blush out" to reconstitute the lacquer.
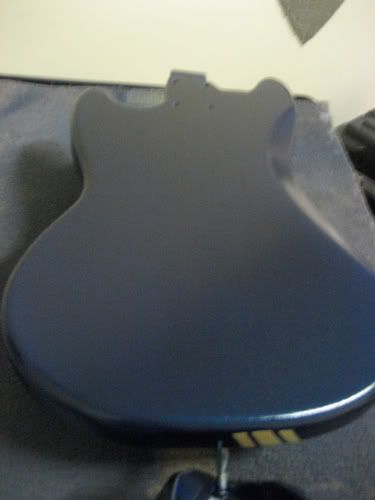
Once that cures for 24-48 hours I'm going to lightly sand it to apply the decal.
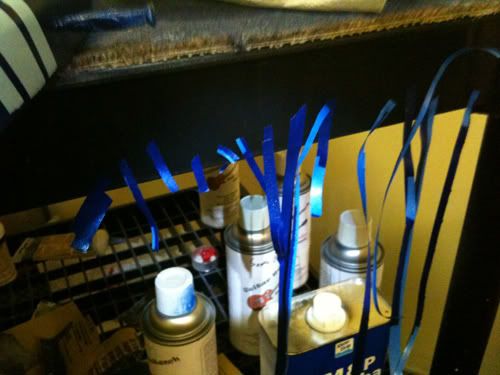
I already started spraying down a few light coats of clear to protect the color coats.
After this... the tinted lacquer will get sprayed! This is the part I'm looking forward to most... followed by the stripes.
This was a scary process because I didn't know what to expect.
I'd say on a scale of 1 to 10, 10 being perfect, the stripes are a 9.
There are a few imperfections but nothing I can't fix and/or deal with.
The photos were taken with a phone so they're not the best.
Also no clear coat has been applied yet so the color coats have that weird pre-clear rough sandy texture.
The headstock got a little bit of hazing on the first coat of clear.
Florida is a humid, wretched place.
I used "blush out" to reconstitute the lacquer.
Once that cures for 24-48 hours I'm going to lightly sand it to apply the decal.
I already started spraying down a few light coats of clear to protect the color coats.
After this... the tinted lacquer will get sprayed! This is the part I'm looking forward to most... followed by the stripes.
Last edited by prospect on Sun Sep 27, 2009 6:31 am, edited 1 time in total.
-
damienblair17

- .

- Posts: 1069
- Joined: Fri Oct 24, 2008 6:31 pm
- Location: San Francisco
- Contact:


mr. prospect! so YOU got that beater comp'stang! congrats and thanks cuz i was ABOUT to get it... hmm...
looks nice, congrats on that too... but... i think the comp' stripes were PAINTED OVER the blue color, originally. weren't they?
still, looks great. are you gonna age/relic it or leave as is?
rock on,
Pat.
looks nice, congrats on that too... but... i think the comp' stripes were PAINTED OVER the blue color, originally. weren't they?
still, looks great. are you gonna age/relic it or leave as is?
rock on,
Pat.
my name is Pat.
Hi Pat!
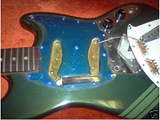
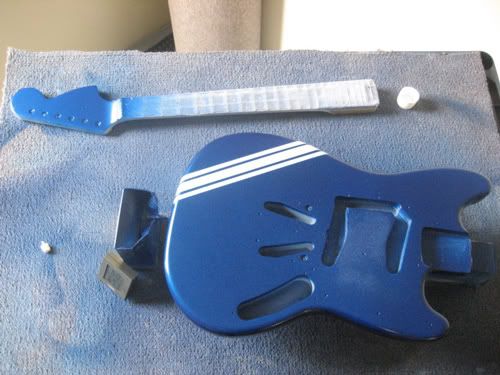
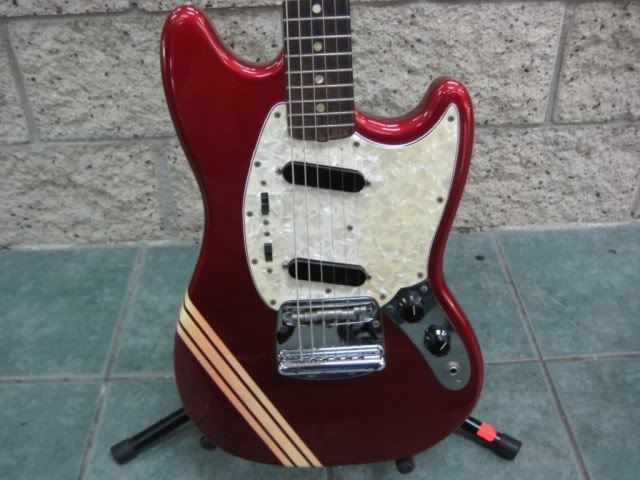
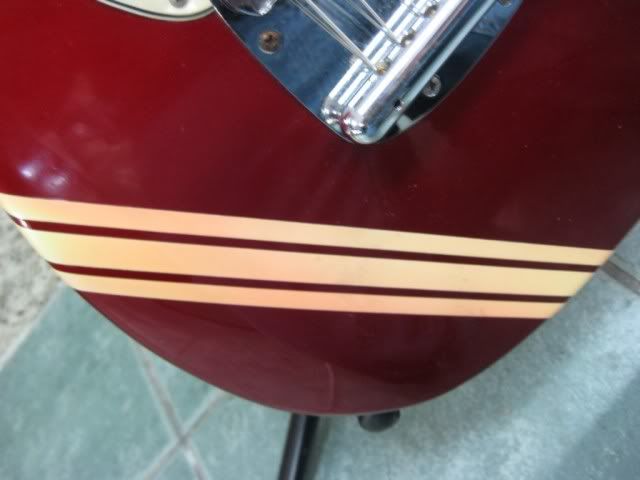
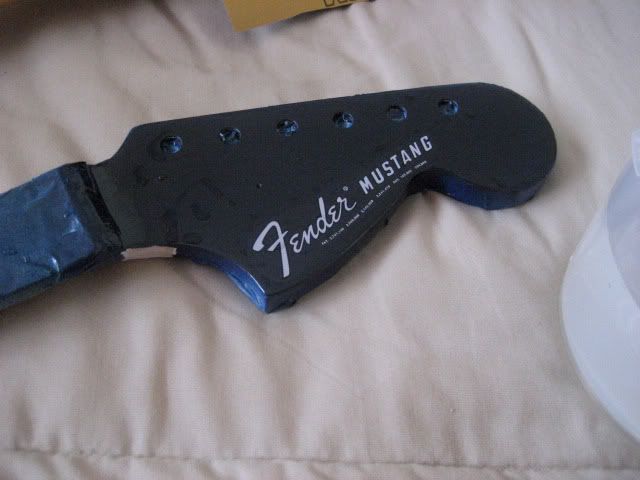
Underneath the factory LPB there was an entire coat of Sonic Blue.
Take a look at this

Every nick on the rear (that isn't exposed to wood) is sonic blue (ie same color as the stripe).
Now look at this
Notice that the wear spots on the rear are starting to reveal (dakota?) red, same as the stripes.
The Sonic Blue coat also served as an excellent primer coat for the factory finish (both vintage and RI)
Because I went over the factory poly and the nick repairs; I used an actual white primer so that the I could do some further filling and also have a better base for the sonic blue coat.
In regards to relic'ng
Because I'm still new at repairs and refins I feel that my slight flaws will look like slight relic marks
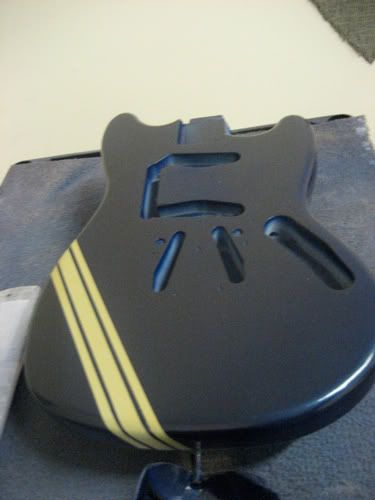
The one thing I am doing is spraying a LOT of yellow tinted clear so that blue essentially turns green like Cobain's Mustang, and Frusciante's Jaguar
Going for this
Found my camera, now for updated photos.
1 light color of tinted clear so far below. A ton more to follow
Underneath the factory LPB there was an entire coat of Sonic Blue.
Take a look at this
Every nick on the rear (that isn't exposed to wood) is sonic blue (ie same color as the stripe).
Now look at this
Notice that the wear spots on the rear are starting to reveal (dakota?) red, same as the stripes.
The Sonic Blue coat also served as an excellent primer coat for the factory finish (both vintage and RI)
Because I went over the factory poly and the nick repairs; I used an actual white primer so that the I could do some further filling and also have a better base for the sonic blue coat.
In regards to relic'ng
Because I'm still new at repairs and refins I feel that my slight flaws will look like slight relic marks
The one thing I am doing is spraying a LOT of yellow tinted clear so that blue essentially turns green like Cobain's Mustang, and Frusciante's Jaguar
Going for this
Found my camera, now for updated photos.
1 light color of tinted clear so far below. A ton more to follow
-
hotrodperlmutter

- crescent fresh
- Posts: 16665
- Joined: Sat Apr 04, 2009 10:29 pm
- Location: Overland Park, KS, USA


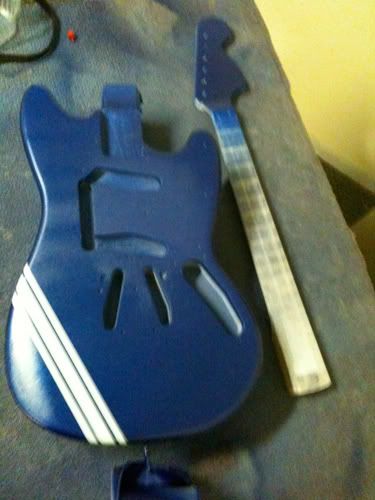
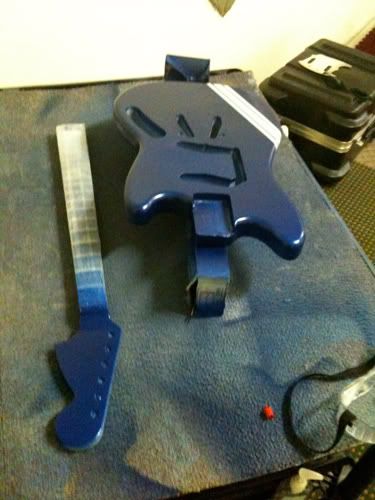
Decal time.
Now that the color coats and most of the tinted coats have been applied I can say that it's going to be darker than what I was going for. ReRanch Lake Placid Blue is much richer and darker than Fender's. That's okay. It's still going to look awesome.
Final coats of clear will be applied this week and then we can start counting down the 30 days of curing time before final polishing.

What type of filler did you use for those deep cuts? Did you have any trouble when you put on the sealer, with the filler shrinking/expanding?
I've used a solder gun to raise deep dings outta the wood. Just soak the area with water, then lay a wet rag down over the damaged area, turn the solder gun up the highest setting, steam the dents out while spraying more water on the area.
I'm not a huge fan of drop filling dents w/ sanding sealer because lacquer takes forever to harden when you really lay it down like that. I've been looking for a true body "filler" for some time, I wonder if oil based gain filler qualifies. I'm sure Dan Earlwine would scream "epoxy" at this question, but that stuff is hard.... you end up taking more finish off the surrounding area then you do the drop fill... not fun to blend glues in.
