Vintage PartsMaster Project

Painting? Routing? Set-up tips? Or just straight-up making a guitar from scratch? Post here, and post pics!

Moderated By: mods

User avatar
Dice
.
.
Posts: 278
Joined: Thu May 14, 2009 5:36 am
Location: Montana

Vintage PartsMaster Project

Post by Dice »

Well, it is time for me to get some of these parts I have lying around into usable form!

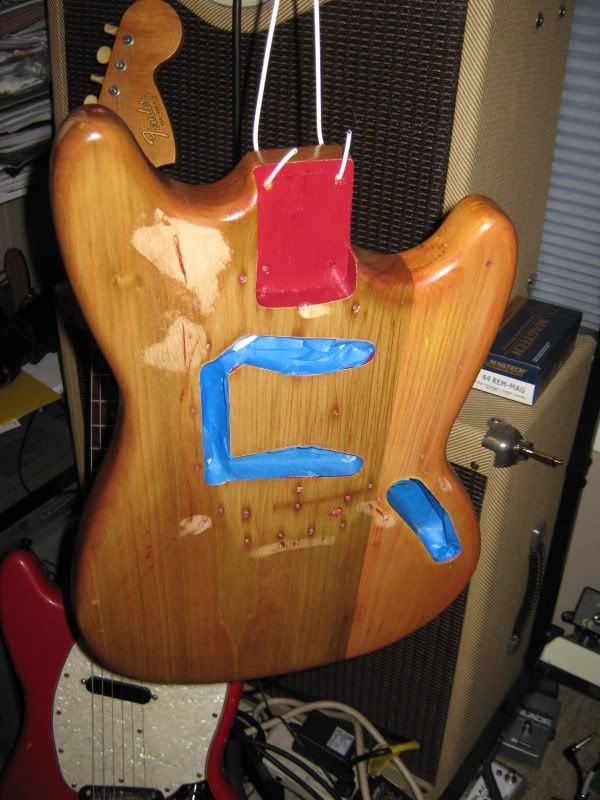
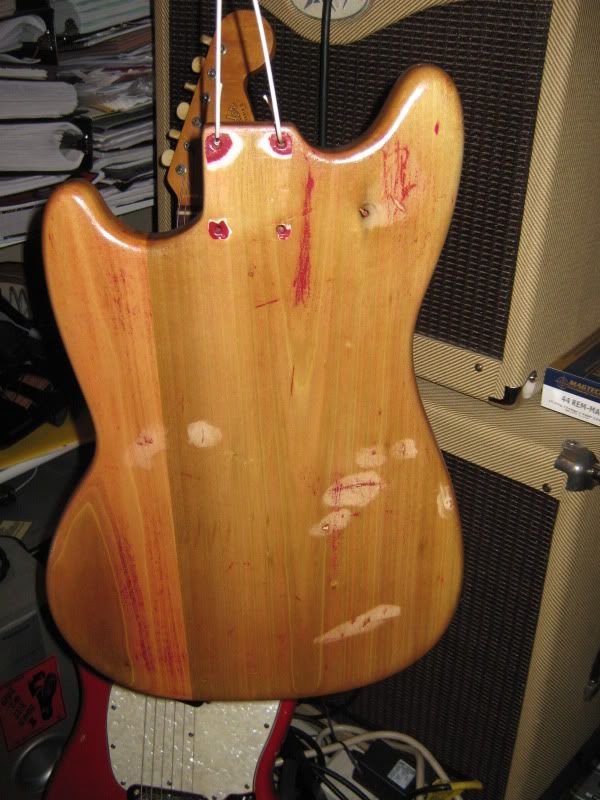
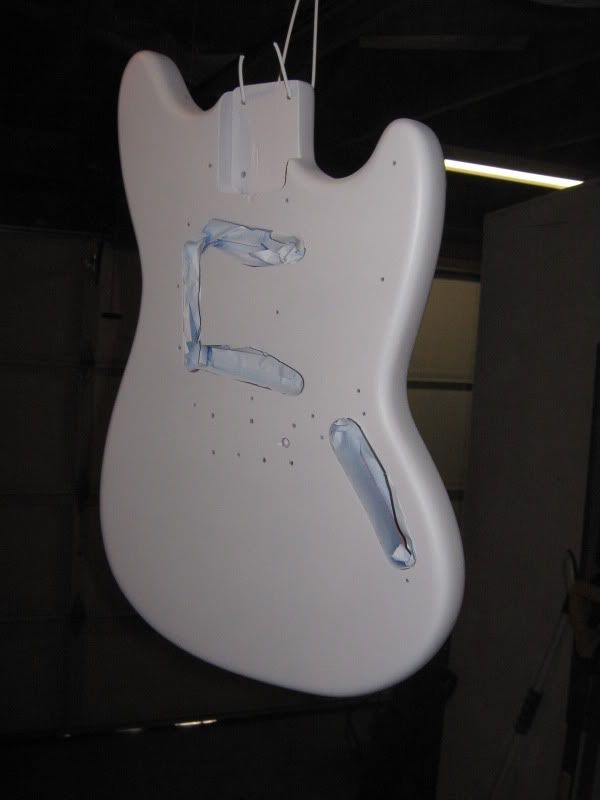
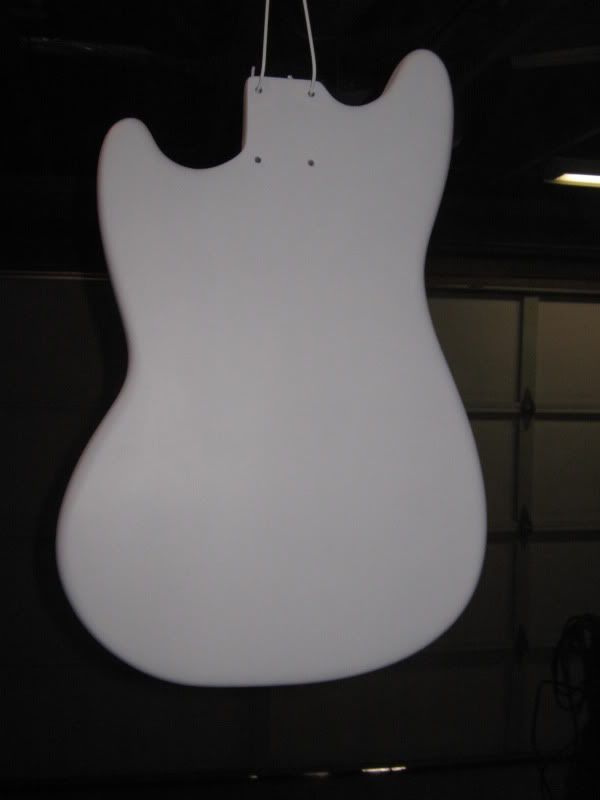
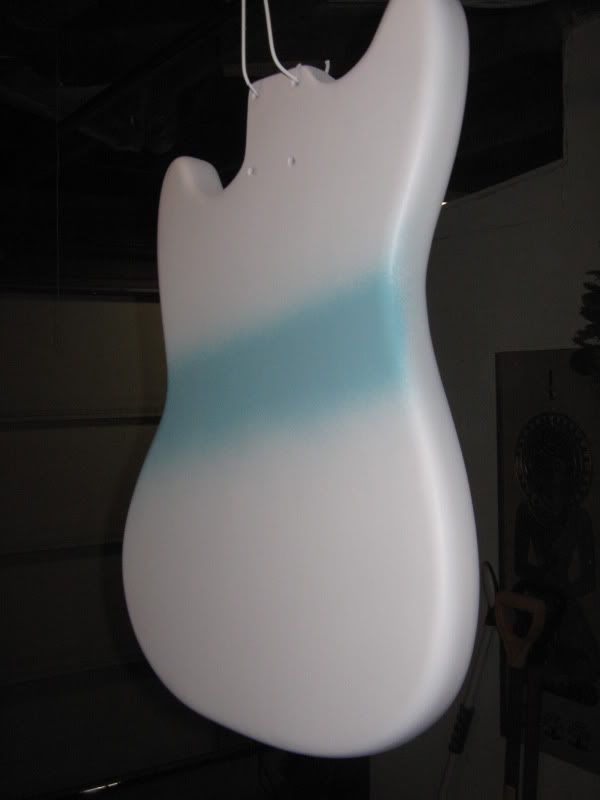
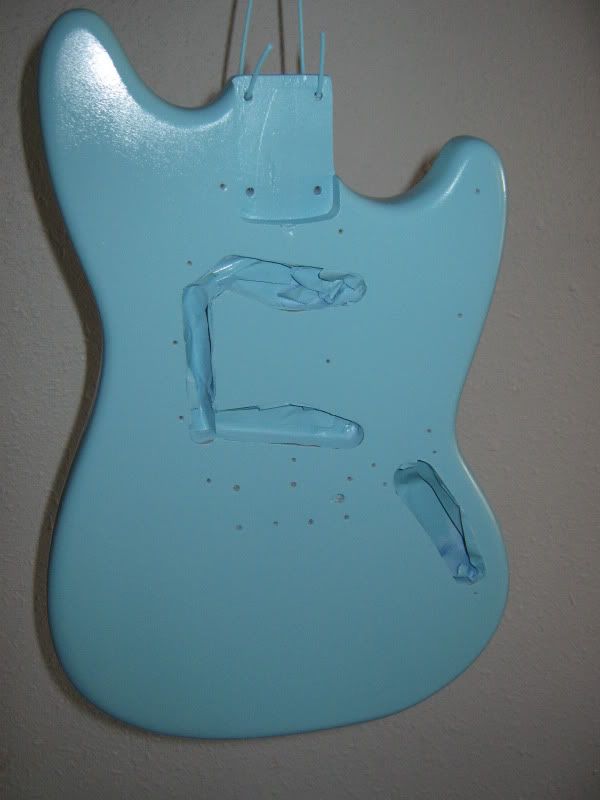
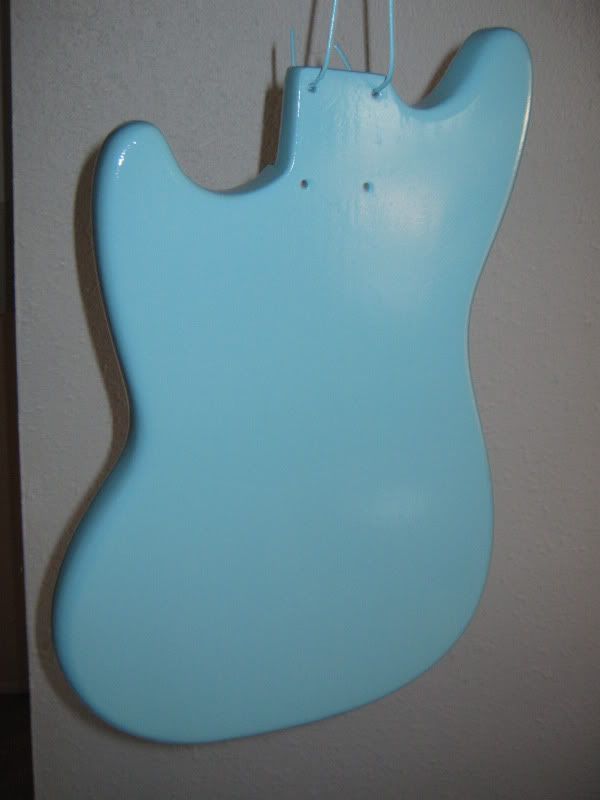
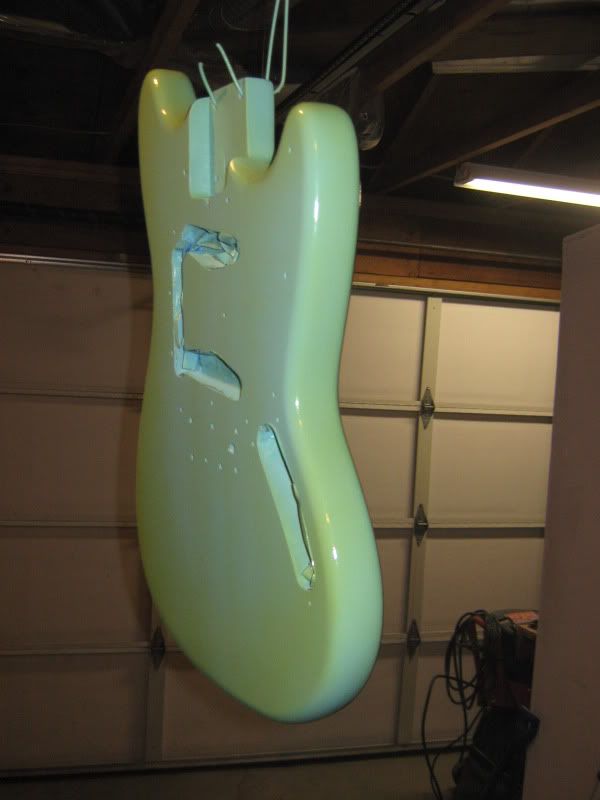
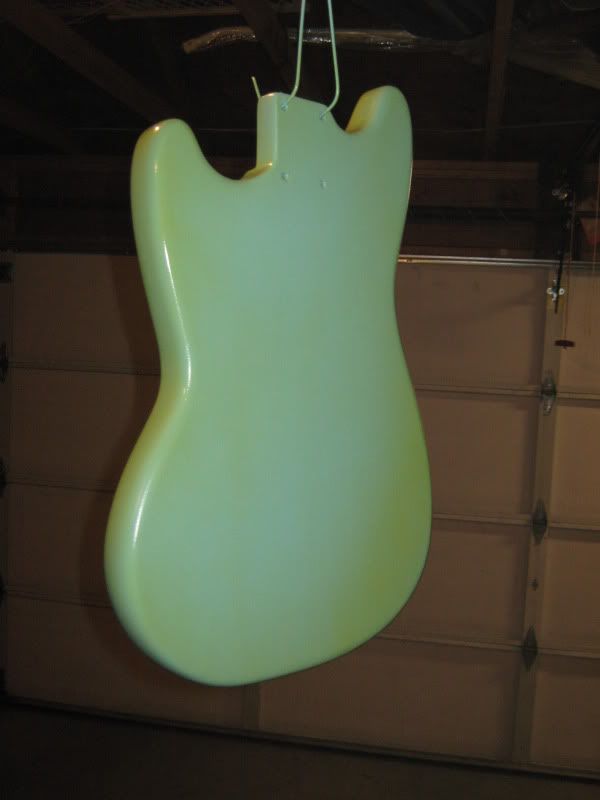
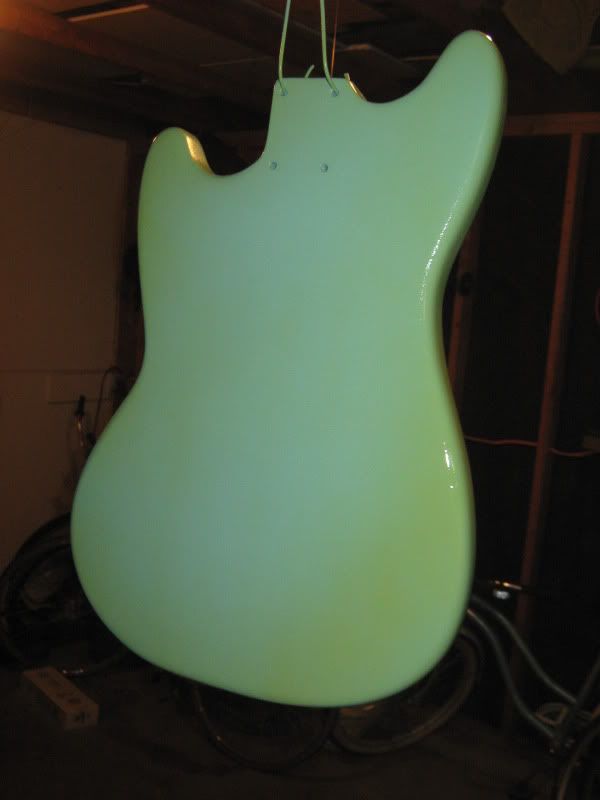
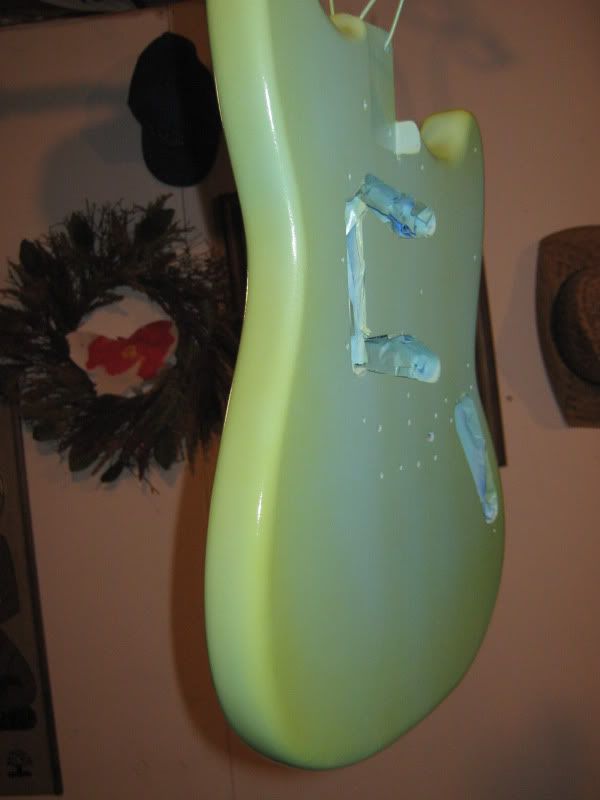
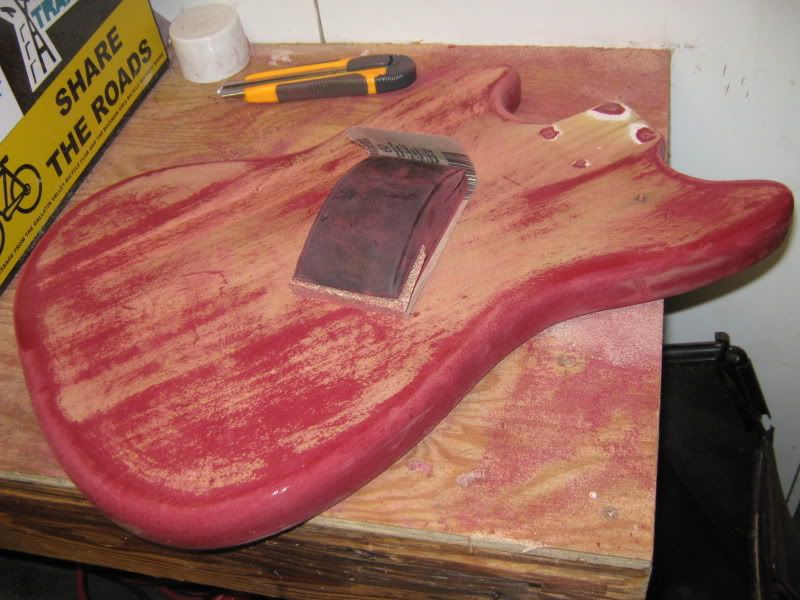
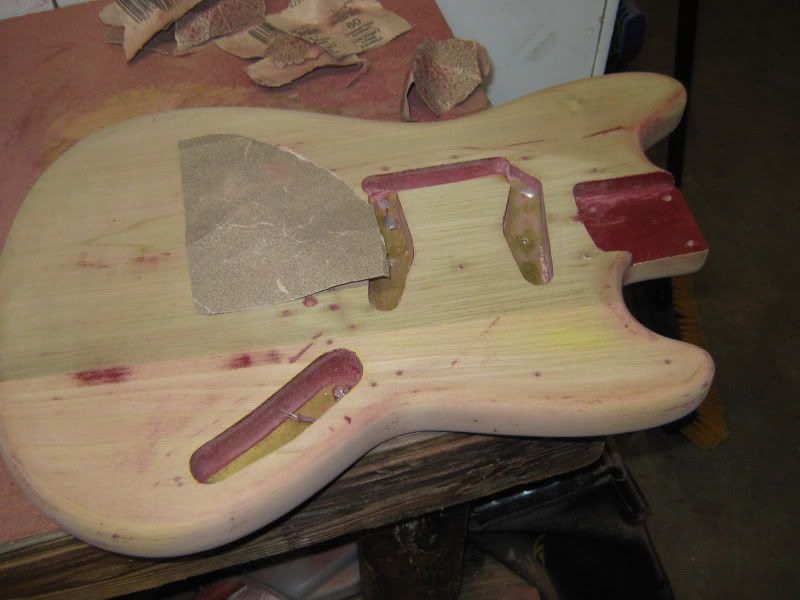
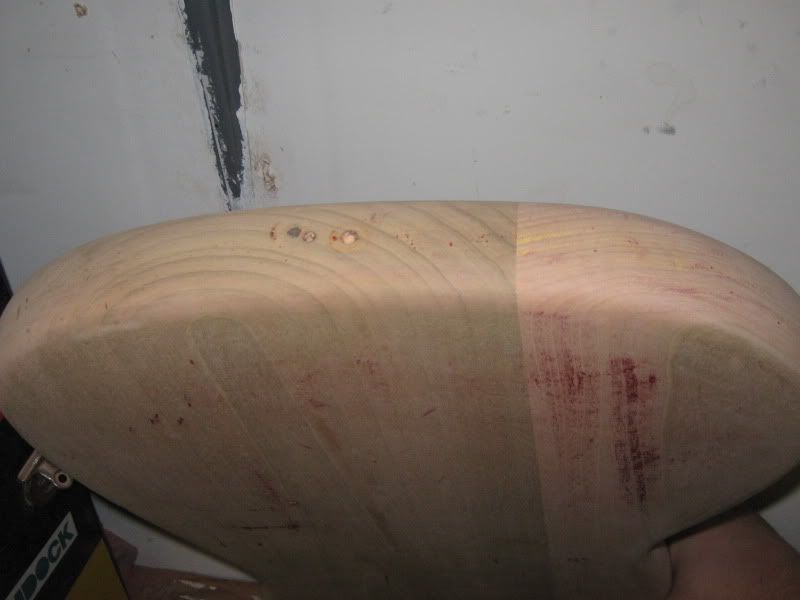
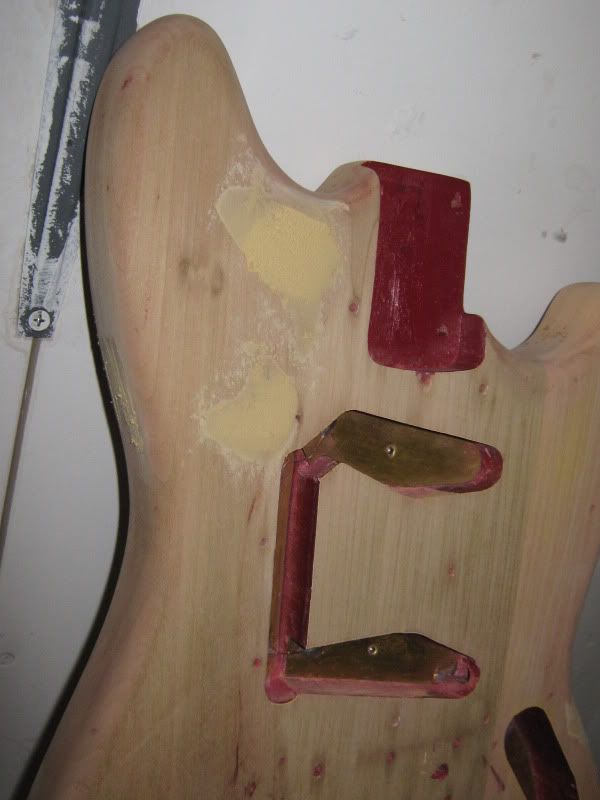
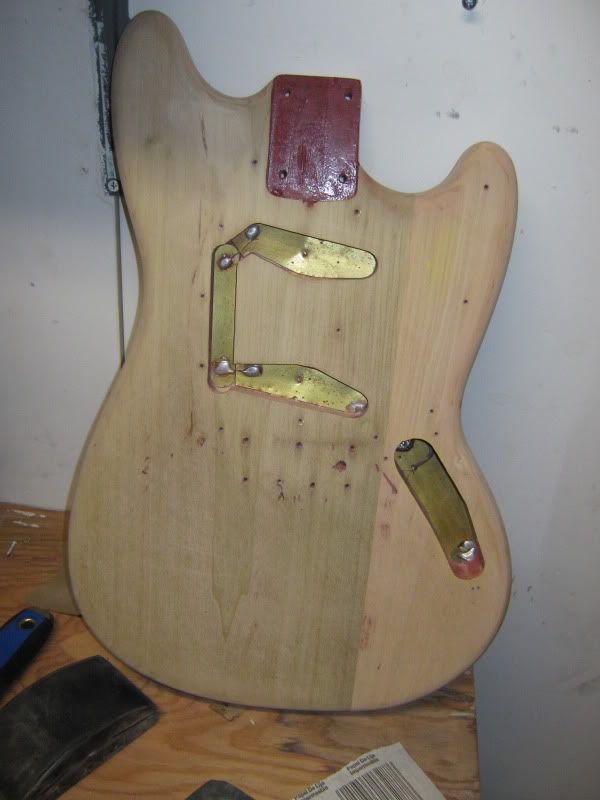
What you see below is the early stages of prep work on a '65 or so Fender DuoSonic body. The completed project will have the following components from SIX guitars! :shock:

Neck: '64 Jaguar w/ clay dots (Thanks TerminalVertigo!)
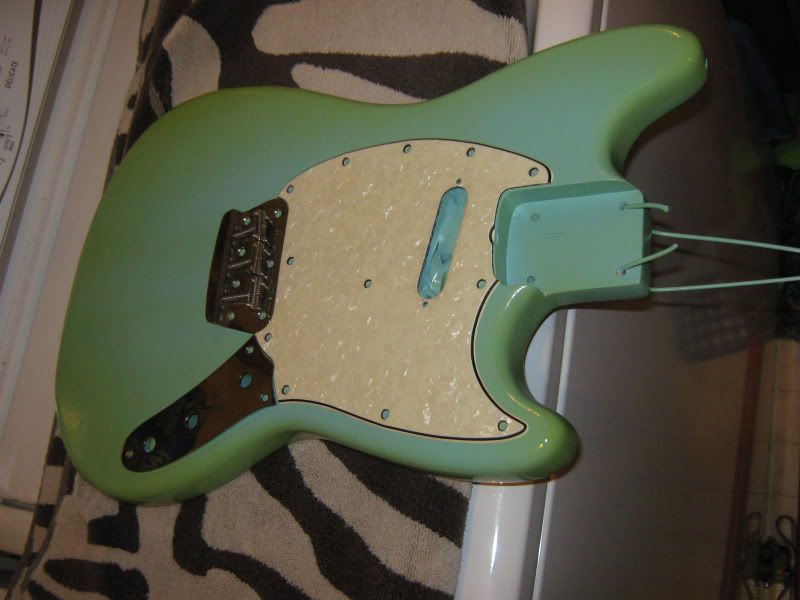
Body: '65 DuoSonic - TWO PIECE! (quite rare on a 60s student model)
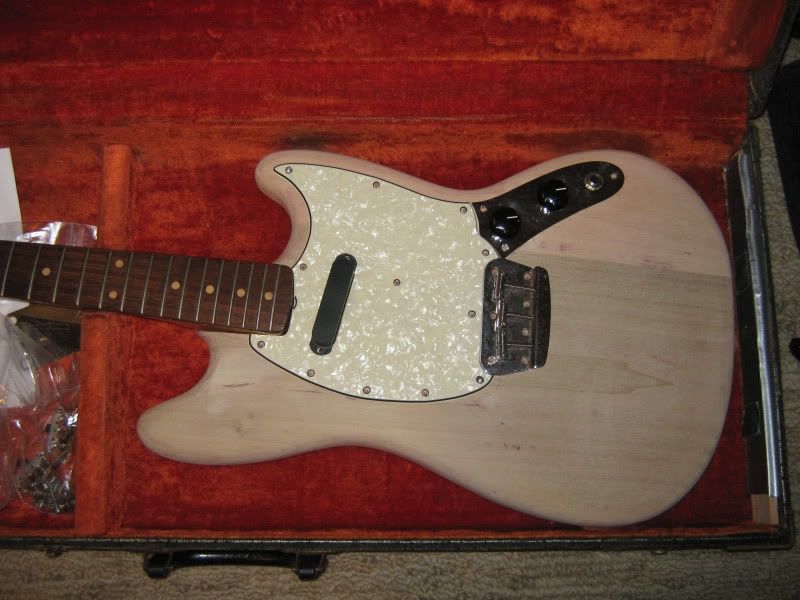
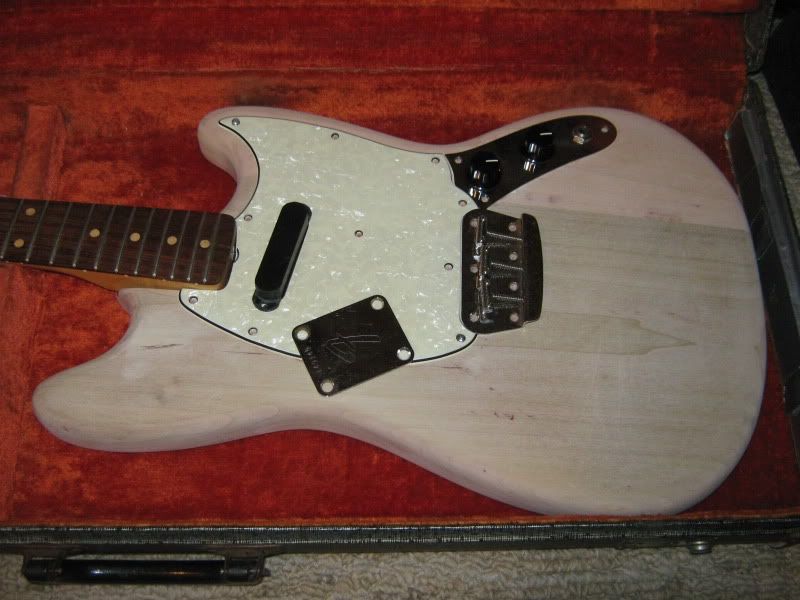
Pickguard: '65 MusicMaster
Guts: '66 DuoSonic (pup rewound by WB)
Control Plate: Late 60s Mustang
Bridge Plate: '66 DuoSonic
Tuners: '64 MusicMaster
Neck Plate: '66 DuoSonic
A few repro parts are scattered throughout.


The finish will be a heavily yellowed Daphne Blue nitrocellulose job done by ME! It'll be my first attempt, we'll see how it goes.

The neck shown is a 22.5" MusicMaster neck, which won't be going on the guitar. The Jag neck should be here in the next couple of weeks. The finish job won't kick off until the weather gets warmer, so this thread might be slow on updates for a while...

Up to this point:

Image

Image

Image

Image

Image

Image

Image

Image

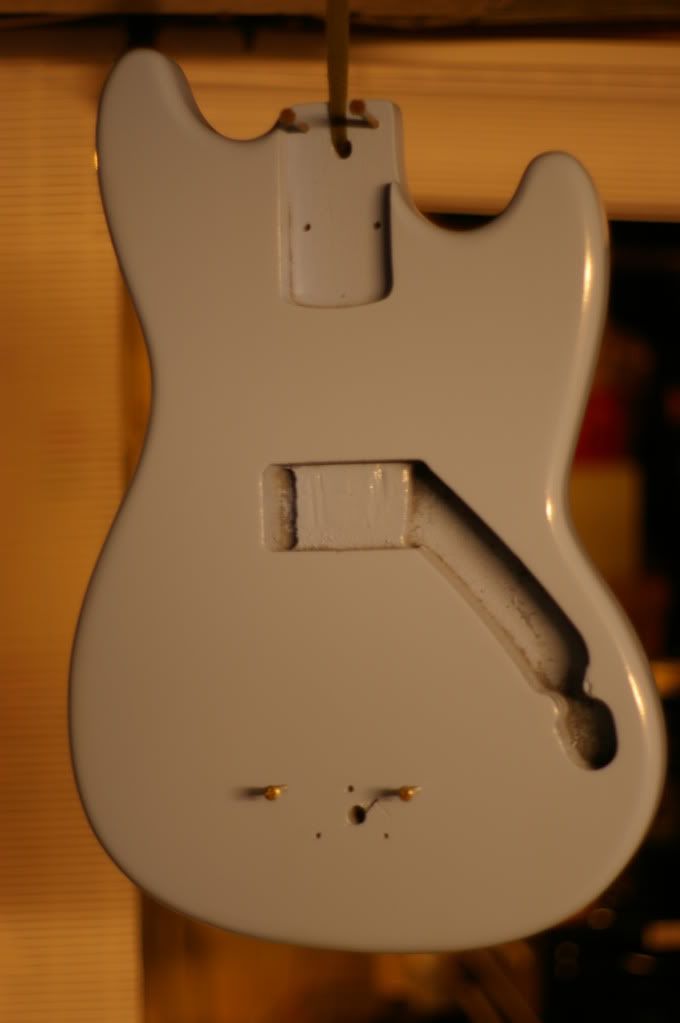
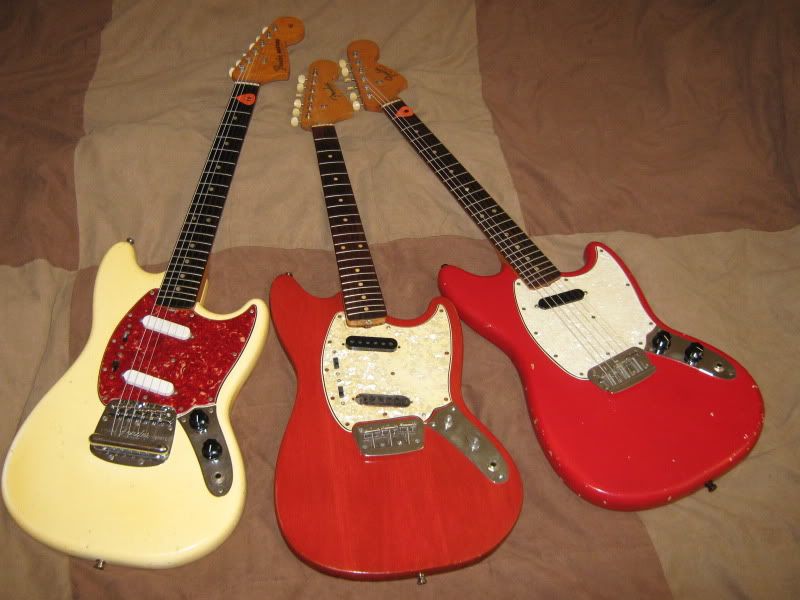
The hardware donor is here in the middle (photo below). The body and hardware are the '66 Duo-Sonic - that body is beyond salvageable (was planed down about 1/2"). The pickguard will go towards another project. The pickups had to be rewound - now they sound great. One pot is frozen. The saddles aren't original. The switches were nasty. I decided to cut my losses and just go the MusicMaster route - and found a '65 MM pickguard. The neck is from the red '64 MusicMaster on the right, which is now sporting the fantastic 24" scale neck from the Duo-Sonic. The MusicMaster tuners will be going on the Duo-Sonic neck, and the Duo-Sonic tuners on the Jag neck (I want to keep that lil' MusicMaster neck together with the rest of the guitar, as it is a bit of an oddball with the clay dots and spaghetti logo on the offset body - I want to be able to revert it back without too much confusion someday).

Image

More to come...
User avatar
cooter
.
.
Posts: 1257
Joined: Thu Nov 30, 2006 1:42 pm
Location: Blue Ridge, GA
Contact:

Re: Vintage PartsMaster Project

Post by cooter »

Dice wrote: The body and hardware are the '66 Duo-Sonic - that body is beyond salvageable (was planed down about 1/2").
Was it all planed off the front or the back? Could a 1/2" cap be put on it and it rerouted? Don't give up on it man. :lol:

Great project by the way. Looking forward to watching this one since I'm about to restore the paintjob on a 75 MM to its original Daphne Blue.
Smells like Rock n' Roll
User avatar
Dice
.
.
Posts: 278
Joined: Thu May 14, 2009 5:36 am
Location: Montana

Post by Dice »

It appears to be a good 1/8-1/4" on the front, and on the back. The pickups routes are too shallow to use. They might work with short screws. And, I have a suspicion that it isn't even an original body... Someone might have made it way back. I need to sand the finish down and see what we've got under there. The biggest giveaway for me is that the bridge screws are improperly spaced - the front and back screws angle away from each other, which is odd. Then again, the grounding plates fit perfectly and the control cavity plate has the correct soldering on the ends. I think it'd cost more to fix it than it would to just get a donor body at $200.

I'll be sure to update this thread as it comes along!
User avatar
cooter
.
.
Posts: 1257
Joined: Thu Nov 30, 2006 1:42 pm
Location: Blue Ridge, GA
Contact:

Post by cooter »

If you decide you want to unload the body one day let me know. I should be able to make a decent template from it at the very least.
Smells like Rock n' Roll
User avatar
Dice
.
.
Posts: 278
Joined: Thu May 14, 2009 5:36 am
Location: Montana

Post by Dice »

I'll keep that in mind. The outline shape is perfect. The contours are all messed up on the edges, but the somewhat strange contour at the lower horn on the back (sort of blocky) is correct. I don't know what is up with that body... I've had it strung up and it works fine. Right now all it is being used for is to hold my '66 Duo-Sonic pickguard in the correct shape so that it doesn't warp.
User avatar
cooter
.
.
Posts: 1257
Joined: Thu Nov 30, 2006 1:42 pm
Location: Blue Ridge, GA
Contact:

Post by cooter »

Cool. At least it's serving a purpose at the moment.
Smells like Rock n' Roll
User avatar
Dice
.
.
Posts: 278
Joined: Thu May 14, 2009 5:36 am
Location: Montana

Post by Dice »

I "decided" it was warm enough in the garage to do a sealer coat. Lots and lots of runs, and I put it on pretty thick... I'll level it out with a block tomorrow, and the primer coat will be coming next! I'll have to be more careful from here on out...

Those spots where I used wood filler really stand out.

I also got my new control plate today, and got my pots and jack wired up and tested. Things are coming along nicely... I'll be pulling one of the '66 rewinds from my Strat in the next day or two and getting it ready for this project.

Small update:

Image

Image
User avatar
Haze
.
.
Posts: 4924
Joined: Tue Jan 15, 2008 4:27 am
Location: Tulsa, OK
Contact:

Post by Haze »

more lighter coats next time, not terribly important for filler coats but it certainly doesn't need to be caked on. hopefully i'll be refinishing a musicmaster soon as well ;)
User avatar
Dice
.
.
Posts: 278
Joined: Thu May 14, 2009 5:36 am
Location: Montana

Post by Dice »

Thanks for the advice, Haze. Once I had a couple of runs going, I just put it on thick - figured I'll level it out, be done with the sealer, and then do it "right" from here on out. I may put a light primer coat on tomorrow. This is a real learning experience for me - hopefully it ends up alright.

I refinished a Strat body with rattle cans about 6 years ago in the Army barracks. It turned out alright. My buddy was an auto body guy before the Army, and he walked me through everything. Most of it is coming back to me - although I don't remember that cheap Krylon primer or paint being as runny as this Re-Ranch sealer.
User avatar
DGNR8
.
.
Posts: 4220
Joined: Sat Sep 30, 2006 2:51 am
Location: DC Area

Post by DGNR8 »

That's exciting. Why not get all the red out? Just wondering. Use it for base surface? I sometimes leave it for history, but in the neck cavity you don't want too much build-up and you also want a thin bare strip to look old school. It's vain, I know.

You can do it. Just be patient and go with medium coats. The worst thing you can do is spray too wet and get orange peel or drips. But even that is fixable, and not the worst thing in the world.
Yell Like Hell
User avatar
Dice
.
.
Posts: 278
Joined: Thu May 14, 2009 5:36 am
Location: Montana

Post by Dice »

Sanded off the runs - primed it up - (found a couple of small ridges/runs that I missed!) - and did a quick color test. Tomorrow I'll knock down those last couple of runs, and get started with the color!

Image

Image

Image
User avatar
Dice
.
.
Posts: 278
Joined: Thu May 14, 2009 5:36 am
Location: Montana

Post by Dice »

DGNR8 wrote:That's exciting. Why not get all the red out? Just wondering. Use it for base surface? I sometimes leave it for history, but in the neck cavity you don't want too much build-up and you also want a thin bare strip to look old school. It's vain, I know.

You can do it. Just be patient and go with medium coats. The worst thing you can do is spray too wet and get orange peel or drips. But even that is fixable, and not the worst thing in the world.
Yeah, I'm not too worried about the cavities. I'm staying light on the neck pocket - last time I did an amateur refinish, I tried sanding out some of the neck pocket... and totally messed things up! I'm just getting enough color in there to cover the red. Thanks for the tips! I'm trying not to get too wet. I had no new runs w/ the primer coat - it just allowed me to see a couple of small ones that I hadn't noticed w/ the clear sealer.
Last edited by Dice on Fri Mar 12, 2010 12:43 am, edited 1 time in total.
User avatar
Dice
.
.
Posts: 278
Joined: Thu May 14, 2009 5:36 am
Location: Montana

Post by Dice »

And... actually... that primer coat set up much faster than expected. I knocked down those runs pretty easily, and went with a color coat today as well. To hell with "the rules," I think it will still come out alright!

Tomorrow I plan on some fine sanding (got a bit of texture going there...) and another light color coat, followed by some dry time and then clear.

And then... we'll wait!

Image

Image
User avatar
hotrodperlmutter
crescent fresh
Posts: 16665
Joined: Sat Apr 04, 2009 10:29 pm
Location: Overland Park, KS, USA

Post by hotrodperlmutter »

that looks great. reminds me of my bronco/mm bass:

Image
dots wrote:fuck that guy in his bunkhole.
User avatar
Dice
.
.
Posts: 278
Joined: Thu May 14, 2009 5:36 am
Location: Montana

Post by Dice »

Nice!

I definitely need to smooth things out on mine. I think I'll hit it real quick with 220, then to 400, and 1200. Then one more coat of blue, and the amber. I figure I'll let it cure for 3 weeks or so before doing another 400/1200/buffing.
User avatar
Haze
.
.
Posts: 4924
Joined: Tue Jan 15, 2008 4:27 am
Location: Tulsa, OK
Contact:

Post by Haze »

mmmm orangy :roll:
User avatar
hotrodperlmutter
crescent fresh
Posts: 16665
Joined: Sat Apr 04, 2009 10:29 pm
Location: Overland Park, KS, USA

Post by hotrodperlmutter »

lal, he said he was going to do an moar finish sanding you dick.

i quite like orange peel. gives it that "yeah, i fucking painted this shit in my garage, asshole" look.
dots wrote:fuck that guy in his bunkhole.
User avatar
Haze
.
.
Posts: 4924
Joined: Tue Jan 15, 2008 4:27 am
Location: Tulsa, OK
Contact:

Post by Haze »

have you seen sadie? bitch must be from florida or summit
love me some orange peel. I'm sure you'll do it up proper, you seem real particular about your vintage shortscales.
User avatar
Dice
.
.
Posts: 278
Joined: Thu May 14, 2009 5:36 am
Location: Montana

Post by Dice »

Uh - yup - like I said, I needed to knock some of that down. And... I did.

Light sanding, one more coat of color, and then some purposely uneven tinted clear - a bit more extreme than but based on my '65 Mustang's aging pattern. I'll be adding some light forearm wear (not to the primer, but through the clear) - the rest will come naturally.

Again, my first attempt at a real finish - aside from a Krylon job in the Army barracks years ago.

I still have to do a final sand and buff - but the finish is quite smooth for now - and will clean right up with some light 1200 grit sanding and some buffing I'm sure.

Image

Image

Image

Image

Image


Side note - I bit the bullet and bought a set of '64 saddles. :? I figure I probably shouldn't half ass it there, when most everything else is original.
User avatar
Dice
.
.
Posts: 278
Joined: Thu May 14, 2009 5:36 am
Location: Montana

Post by Dice »

A bit of a mockup:

Image