Mustang Bass: COMPETITION ORANGE! FINISHED!
Moderated By: mods
-
plopswagon

- cutesy tag
- Posts: 18906
- Joined: Thu Jan 18, 2007 3:32 pm
- Location: 3rd Fret
- Contact:


What's the best method to apply the heat? A soldering iron, I'm guessing?plopswagon wrote:a little gentle heat is good too. some folks use thread locker on those.
I'll go look for Liquid Wrench at the automotive store. I'm guessing it comes in a spray can?TieDye wrote:Buy some Liquid Wrench and keep saturating it with it or soak it in it for a few days. That totally eats the rust loose. Usually works on the stubborn stuff. Feel free to then resoak in the other solution too. You are welcome!

I went to Canadian Tire to buy Liquid Wrench, but they recommended I get some Releasall instead, they said it works better. Sure enough, it only took about 30 minutes of soaking in the Releasall to loosen the screws. Impressive, considering I soaked the bridge saddle in PB Blaster for several days and they would not even budge. I also bought a tub of NevrDull and I'll be using it for polishing the chrome.
There was a snow storm today, so I couldn't start sanding. I'm getting impatient for the weather to improve so I can start the finishing job on the body... that's going to only happen in several months because this is Canada and our winters never end.
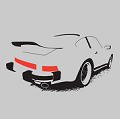
Anybody have accurate dimensions for the competition stripes?
There was a snow storm today, so I couldn't start sanding. I'm getting impatient for the weather to improve so I can start the finishing job on the body... that's going to only happen in several months because this is Canada and our winters never end.
Anybody have accurate dimensions for the competition stripes?

Can't link cos on phone but Rodvonbon has a thread linking to his YouTube video refinishing Pats mustang. It shows dimensions and method for doing comp stripes. Do an search of rods posts and you'll find it.
iCEByTes wrote:5 Most Jizz face maker Solo�s , classic Rock music i ever listened.
iCEByTes wrote:Blunt a joint , Take the Touch , Listen this.
Here's the latest update on this project.
I've managed to prime the body with BIN primer during the spring days with nice weather. Today I wet sanded the primer coat to get it smooth. I've started using the graffiti spray paint that I bought. It dries incredibly fast, within a few minutes. So I've managed to already do a few coats today. It doesn't drip or run, which is nice. I think the coats are drying very thin, though. I hope that isn't a problem when I start wet sanding.
I also ordered an aged pearl pickguard on Ebay, it hasn't arrived yet. If the weather stays nice I might get this project done in the next few weeks.
Here's a progress pic, right after spraying:

Yeah, the picture came out accurate in regards to the colour.James wrote:That colour looks good. Does it seem close viewed in person?
Looking forward to more pics.
I'm going to wait a couple of days before sanding for maximum paint hardness. I'm not sure that's necessary since the paint was dry to the touch in about 5 minutes, but I'd rather play it safe until I see how well the paint reacts to wet sanding.
The pickguard arrived today! It's "antique pearl", looks good. I was worried it would look like the atrocious modern Japanese pearl pickguards, but this looks close to the real thing. Has a slightly yellow tint to make it look aged.

I wet sanded today. The paint is quite durable, I only had 3 tiny sand throughs. I touched those up and since the paint dries in minutes, I was able to sand the spots down and prepare for some competition stripe action.
I watched Rodvonbon's video where he shows how he does comp stripes and I used his method. Masking tape on a pane of glass, I measured out stripes using his measurements and cut them with a hobby knife and a straight edge to keep the lines straight. Tape applied to body, I masked the rest off with a union newsletter and started sprayin'!

I let it sit for an hour in the sun just to be absolutely sure that the paint was dry and wouldn't smear everywhere while I pulled the tape off. I'm quite happy with the results. There's one tiny little area of red paint that bleed underneath the masking tape, near the rear strap peg. It's not visible in the pic below. Tomorrow I'll gently scrape it off with a razor blade. Next step, clear coat!

I watched Rodvonbon's video where he shows how he does comp stripes and I used his method. Masking tape on a pane of glass, I measured out stripes using his measurements and cut them with a hobby knife and a straight edge to keep the lines straight. Tape applied to body, I masked the rest off with a union newsletter and started sprayin'!
I let it sit for an hour in the sun just to be absolutely sure that the paint was dry and wouldn't smear everywhere while I pulled the tape off. I'm quite happy with the results. There's one tiny little area of red paint that bleed underneath the masking tape, near the rear strap peg. It's not visible in the pic below. Tomorrow I'll gently scrape it off with a razor blade. Next step, clear coat!

-
hotrodperlmutter
- crescent fresh
- Posts: 16665
- Joined: Sat Apr 04, 2009 10:29 pm
- Location: Overland Park, KS, USA
So, I've started the clear coat. Unfortunately my balcony is just above a busy street, and all those cars are always kicking up a shitstorm of dust. That's annoying enough when doing the colour coats, but for a clear coat it's just not doable, I'd have to sand off practically everything I've sprayed in clear just to get the dust out.
So I'm clear coating in my dining room, with fans strategically placed at the windows to vent out my apartment. So far so good. No toxic fume buildup, no nasty chemical smells in my apartment. The body is propped up on a plastic bowl. I'm using Dupli-Color clear. For some reason the pic makes it look like there is red overspray near the stripes and the horns, but it's just some kind of weird illusion as this doesn't exist in real life.
By the way, anybody know what's wrong with Flickr? Their site is totally fucked up and semi functional.

-
hotrodperlmutter
- crescent fresh
- Posts: 16665
- Joined: Sat Apr 04, 2009 10:29 pm
- Location: Overland Park, KS, USA