Page 2 of 6
Posted: Sat Aug 09, 2008 11:11 pm
by aen
red is cool and all, but i would have done gunpowder.
JK, serious and dangerously stiff boners.
Posted: Sat Aug 09, 2008 11:26 pm
by fullerplast
It would have almost matched my countertops!

And by the way... my wife LOVES our matching speckled FR ceiling fan.

Posted: Sat Aug 09, 2008 11:36 pm
by Fran
fullerplast wrote:HAHA! Yeah... and routed it out with a srewdriver and hammer for some hambackers....

Lol, talk about it. I bought a '76 Musicmaster that had been erm.. routed by a dog, or so it seemed. Splinters everywhere just for a 'bucker.
Love the finish, but still creamin' over the shell pink Jag.

Posted: Sat Aug 16, 2008 2:21 pm
by fullerplast
Posted: Sat Aug 16, 2008 2:59 pm
by Neil
fullerplast wrote:

HAWT!
Posted: Sat Aug 16, 2008 3:07 pm
by Aeon
Looking superb.
What is the exact process that you use to shoot your paint? Do you just shake the bottle up and give it a few coats? Any special techniques?
Posted: Sat Aug 16, 2008 3:27 pm
by fullerplast
Aeon wrote:Looking superb.
What is the exact process that you use to shoot your paint? Do you just shake the bottle up and give it a few coats? Any special techniques?
Thanks!
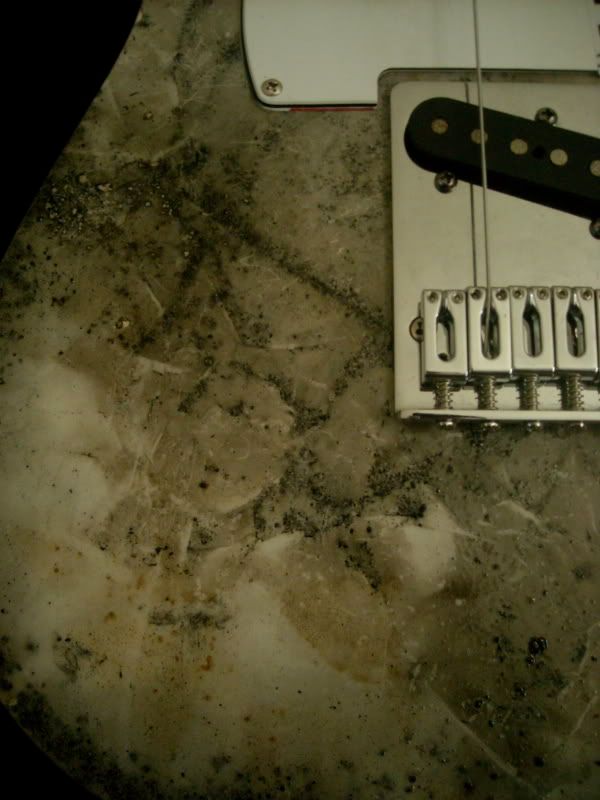
Well, even though I do have a compressor and spray gun, I use reranch products on guitars. The only technique I've learned is that with nitro, you have to hold the can back and just mist the surface first, let it sit 5-10 minutes (or a cigarette) and then mist it again and wait. The third pass can go on closer and wet, but being careful not to run. The reason you can't go wet on the first pass is that it will fisheye. I usually wait at least a day before I do another coat. Nitro goes on much better over nitro (than any other surface) because it melts into the previous coat.
But any painter will tell you that prep is the most important thing. It has to be smooth and clean. One thing I learned from this project is not to skip the grain filler... even on alder. Some people will tell you that you only need it on ash or mahogany. But any type of wood is going to have imperfections and raised grain. Alot of blems show on this body at the right angle to the light. But I'm trying to make this look 40 something years old, so I'm not overly concerned. Still, I do wish I had filled it.
I'm far from an expert on this... I just learn as I go. There's FAR more talented folks than me on this board.
Posted: Sat Aug 16, 2008 5:09 pm
by More Cowbell
Looks coral to my eyes, not close to fiesta red at all. Good job though!
Posted: Sat Aug 16, 2008 5:13 pm
by tribi9
fullerplast wrote:Aeon wrote:Looking superb.
What is the exact process that you use to shoot your paint? Do you just shake the bottle up and give it a few coats? Any special techniques?
Thanks!
But any painter will tell you that prep is the most important thing. It has to be smooth and clean. One thing I learned from this project is not to skip the grain filler... even on alder. Some people will tell you that you only need it on ash or mahogany. But any type of wood is going to have imperfections and raised grain. Alot of blems show on this body at the right angle to the light. But I'm trying to make this look 40 something years old, so I'm not overly concerned. Still, I do wish I had filled it.
Fuller, would you know how thin you need to dilute the grain filler?
Like pancake mix thin? Thinner?
Posted: Sat Aug 16, 2008 5:20 pm
by fullerplast
Looks coral to my eyes, not close to fiesta red at all. Good job though!
It isn't red enough to be fiesta, or pink enough to be coral! My goal was faded fiesta red... but this just looks orange to me. I experimented with shooting some of it on a piece of white baseboard and then spraying yellow-tinted clear over it, but it didnt change the color much at all.
As for the grain filler, I use Bartley's right out of the can.
Posted: Sat Aug 16, 2008 5:43 pm
by tribi9
fullerplast wrote:Looks coral to my eyes, not close to fiesta red at all. Good job though!
As for the grain filler, I use Bartley's right out of the can.
i got some grain filler but its a really thick paste. I think you can dilute it a bit, to make it easier to lay down. How thick is the stuff you're using? Pix?

Posted: Sat Aug 16, 2008 5:47 pm
by fullerplast
Its about like toothpaste, I guess.
It goes on easy and sands easy. The key is to apply it, wait 10 minutes, then scrape it off (crossways) with a plastic scraper... leaving it only in the grain.
Posted: Sat Aug 16, 2008 8:10 pm
by iCEByTes
amazing replica dude
Posted: Sat Aug 16, 2008 10:03 pm
by fullerplast
Thanks!
Now it's bolted together and I'll try to resist the urge to mess with it before Thursday morning, when I leave for the Philippines for 2.5 weeks! It should be ready for polishing and maybe some nitro cracking by the time I get back. I also want to tint the neck some more... I wish I had stained it amber.


Posted: Sat Aug 16, 2008 10:19 pm
by BobArsecake
Looks ace :D I'm going to have a proper go this week a that Vista Musicmaster I bought from James last summer.
Posted: Sat Aug 16, 2008 10:36 pm
by fullerplast
BobArsecake wrote:Looks ace

I'm going to have a proper go this week a that Vista Musicmaster I bought from James last summer.
Those are great... I bought a black one off eBay for $125 a few years after they came out.
I was amazed how resonant it was!
Posted: Sat Aug 16, 2008 10:49 pm
by BobArsecake
fullerplast wrote:BobArsecake wrote:Looks ace :D I'm going to have a proper go this week a that Vista Musicmaster I bought from James last summer.
Those are great... I bought a black one off eBay for $125 a few years after they came out.
I was amazed how resonant it was!
I bought it bits and it lacks a scratchplate, pickup and electronics so I've not had chance to play it, though I played RobRoe's and it did sound great. It's also painted yellow and has a few dings that need ironing out (or in I suppose), so I'm going to get on sanding it either tomorrow or next week, think I'm going to go for either surf green or daphne blue, and ideally in nitro, but I'll have to see what the supply is like UK side for that business.
Posted: Sun Aug 17, 2008 12:08 am
by fullerplast
I lied... I couldn't leave it alone.
I was bored so I went ahead and fitted the nut. This is the first time I fitted a nut to a bound board and was surprised at how little there is between the ends and the e-slots. It's a TUSQ pre-slotted nut. First, I held it vertically and made passes over #220 until it appeared to fit between the binding with an even amount on each side, then I turned it sideways and evenly rubbed it back and forth over the sandpaper until it fit into the slot. Then I rounded the edges by dragging it over the paper and turning it as I went. Finally, I attempted to dye it with the yellow dye I used on the body, but all I dyed was my fingers. Giving up on that... I glued it in with two-part epoxy. It's a really tight fit in the slot, and just a few drops of epoxy was enough.
It still needs some additional shaping with a jewler's file. Any excess glue and that paint line where it meets the rosewood will be cleaned up when I do the wetsanding.
I am unsure exactly how rounded it should be where it meets the binding...


Posted: Sun Aug 17, 2008 12:22 am
by fullerplast
Posted: Sun Aug 17, 2008 1:02 am
by fullerplast


