30" scale Telecaster/ Esquire bass build (pics)

Painting? Routing? Set-up tips? Or just straight-up making a guitar from scratch? Post here, and post pics!

Moderated By: mods

Rotor
.
.
Posts: 13
Joined: Mon Oct 25, 2010 1:46 am
Location: IL

Post by Rotor »

Because of the shorter scale and slightly more narrow string spacing the 51 P bass pickup will have to be at a greater cant than on a 51 P bass.
.
Image
.
.
Image
.


I used a curved chisel and then a dremel sanding drum to open up the pickup route to accept the 51 P bass pick up.
.
Image
.

I need help thinking through this next part.

I will have to jack the pickup up on something as this rout is way deeper than I need. I suppose a block trimmed to fit under the PU is one way but would be nasty to shield over.

I was trying to think of other ways to uniform the bottom and raise it as a single plane. A puddle of epoxy came to mind.

Any other ideas I should consider?

JR
User avatar
drBenway
.
.
Posts: 199
Joined: Wed Oct 20, 2010 9:13 am
Location: Sweden

Post by drBenway »

Looking really good.

I'm not sure that the poles have to be 100% in line with the strings.

Too late now I guess. Were they way off or just slightly?
Rotor
.
.
Posts: 13
Joined: Mon Oct 25, 2010 1:46 am
Location: IL

Post by Rotor »

They were way off and looked odd not being under the strings. Asthetics mostly also, I bend quite a bit and I want them in the center most spot to cover me.

JR
User avatar
aen
Turdscreamer
Posts: 7698
Joined: Sat Apr 22, 2006 5:07 am
Location: ELECTRIC WARRIOR
Contact:

Post by aen »

EXPLODING BONER TOWN
High quality, low popularity Ecstatic Fury
User avatar
Thom
lamp
Posts: 6999
Joined: Thu Apr 20, 2006 8:23 am
Location: Exeter, UK

Post by Thom »

Rotor wrote:I will have to jack the pickup up on something as this rout is way deeper than I need. I suppose a block trimmed to fit under the PU is one way but would be nasty to shield over.

I was trying to think of other ways to uniform the bottom and raise it as a single plane. A puddle of epoxy came to mind.

Any other ideas I should consider?

JR
Not a solid base, but what about foam like under Jag pickups? Easy to cut to shape and thickness you need, and still screw into the body at the current depth if you get longer screws?
User avatar
honeyiscool
.
.
Posts: 2072
Joined: Tue Feb 01, 2011 11:36 pm
Location: San Diego, California

Post by honeyiscool »

Neck dive shouldn't be a problem with lightweight tuners and the fact that these are guitar dimension necks, not big bass necks.
Rotor wrote:They were way off and looked odd not being under the strings. Asthetics mostly also, I bend quite a bit and I want them in the center most spot to cover me.

JR
But you bend inward. Anyway, is that a humbucking pickup? It looks split somehow.

The way I would do is to rig up a mounting guard out of pickguard material, kind of like this but bigger:

Image

Make it out of aluminum and it would look cool, too.
Kicking and squealing Gucci little piggy.
User avatar
Mages
súper crujiente
Posts: 7454
Joined: Wed Mar 26, 2008 8:34 pm
Location: MD
Contact:

Post by Mages »

stewart wrote:nice work so far. interested to see how it balances without a proper top horn though.
it probably balances about the same as a normal telecaster. it has a guitar body and the neck is set in the body in a way that it sticks out about the same as a guitar neck.
cogito ergo sum...thing or other...
finboy
.
.
Posts: 3564
Joined: Fri Feb 08, 2008 3:56 am
Location: Calgary, Alberta, Canada

Post by finboy »

hmm, that *could* look great with an ashtray cover rigged to work as a pick up cover, and a p-bass bridge cover for the bridge

Image
User avatar
hotrodperlmutter
crescent fresh
Posts: 16665
Joined: Sat Apr 04, 2009 10:29 pm
Location: Overland Park, KS, USA

Post by hotrodperlmutter »

crepes on le cross this looks awesome! BAJABASS

and if you want to let go of those short ferrules, holla atcher boi.
dots wrote:fuck that guy in his bunkhole.
User avatar
DanHeron
.
.
Posts: 3501
Joined: Sat May 24, 2008 7:48 pm
Location: Manchester, UK
Contact:

Post by DanHeron »

This is an awesome project.

I've seen a few similar ones:
Image
Image
Image
User avatar
BillClay
.
.
Posts: 1421
Joined: Mon Jun 28, 2010 6:05 pm

Post by BillClay »

No offense to the above basses, but what you've got going is hella more badass. This will be the coolest tele bass.
Rotor
.
.
Posts: 13
Joined: Mon Oct 25, 2010 1:46 am
Location: IL

Post by Rotor »

@ thom; I mocked it up with some foam but it was so tall that the stability was bad and the screws were only barely penetrating the wood. I think will put a ½ inch puddle of epoxy in the bottom and build foam up from there.

@honeyiscool; It is a humbucker. Fralin split coil 51
A trim plate would be just the thing but the angle is greater than any of the conversion plates I have seen. I would have to fab one up and I’m not much with that. I don’t mind it open the way it is now.

@ finboy; I have thought about ashtrays but that Musicmaster bridge flares out too much.

@ Dan; I like all those other ones. The Billy Orange Thinline was by Rhomco and I got the idea from looking at his.
Rotor
.
.
Posts: 13
Joined: Mon Oct 25, 2010 1:46 am
Location: IL

Post by Rotor »

So I got this imported “ Alder� body from Rondo for $40.00 because it had not been drilled for guitar bridge holes. I thought it was a bargain but I am reminded that you always pay in the end.

There was a most tenacious sealer in this wood. ( disclaimer; If I had been painting this, I would have been all set. Because I was committed to and oil finish the sealer had to come off) No chemical warfare would touch it. (Kleen, Citri strip) I had to sand it off and it was nasty. 60 grit felt like it was bouncing off at first. I caved after a few attempts and bought a sander with a replaceable wedge/ prong doohickey at the front to get inside the horn.

It came out the other side as a flat top. I considered leaving it that way but then knocked the radius down a little.


Image
.
Image
.
Image
.
.

Image

In retrospect using alder for a dye job with an oil finish was not the best idea. I am comfortable with the techniques from working on lots of surplus M1 stocks. I had not read up on alder and now understand it’s properties don’t make a great candidate for a dyed natural finish on account of it grain pattern can look splotchy under dye. None the less I am committed
And will give it a thinned conditioning coat before the dye goes on.

JR
Rotor
.
.
Posts: 13
Joined: Mon Oct 25, 2010 1:46 am
Location: IL

Post by Rotor »

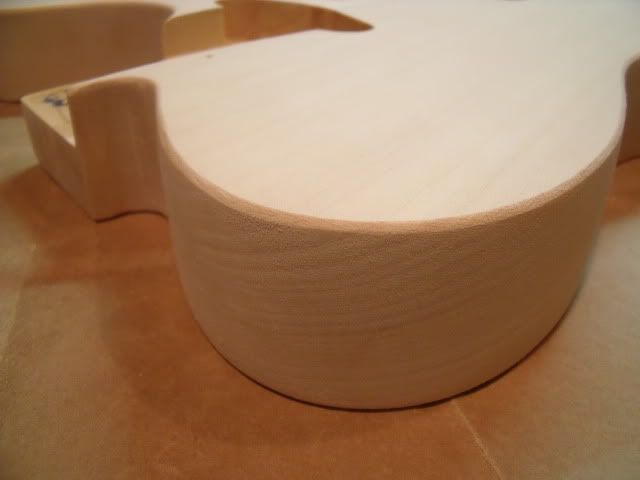
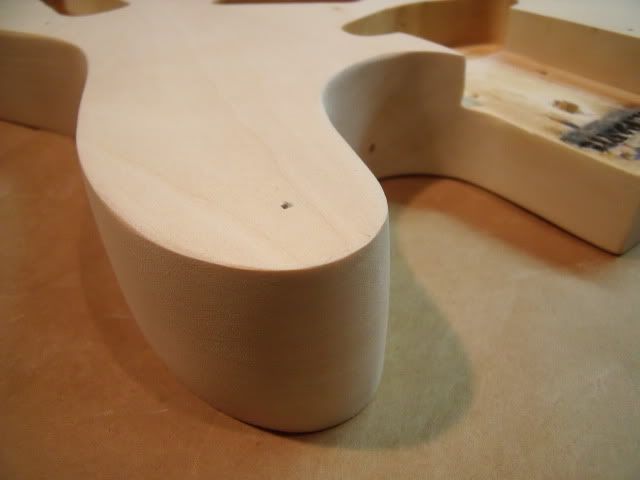
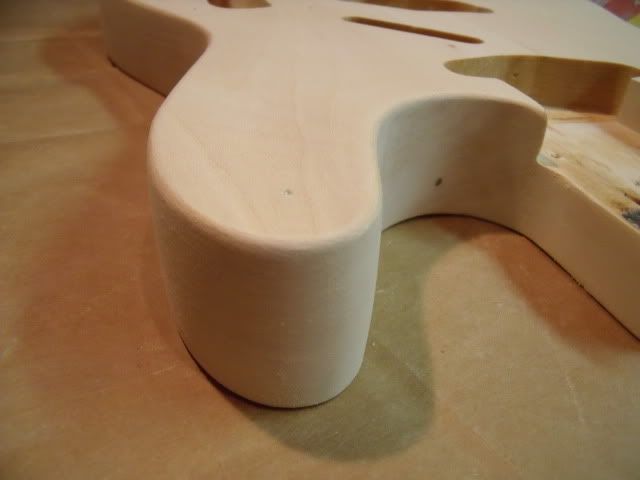
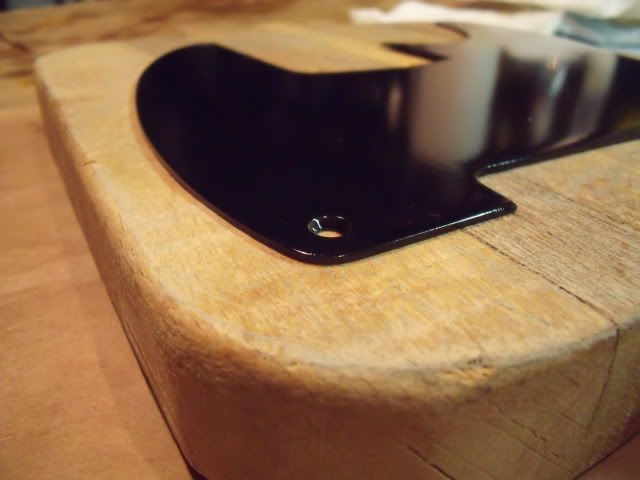
As mentioned above, even though this is alder it this is going to have an oil finish.

It has been recommended to me, that to dye Alder, a conditioning coat should be used to better to control the speed and depth of color absorption. The reason is because using dye on woods like alder and birch can cause the final job to appear splotchy.
.
.
Image
.

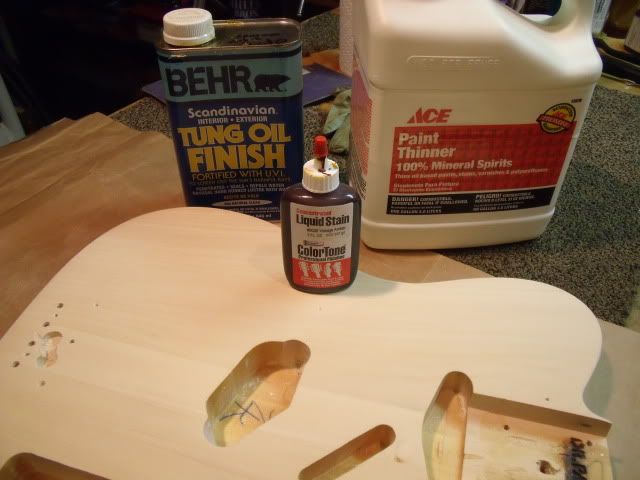
For my purposes a conditioning coat is just my final finish thinned 50/50 with mineral spirits. I have worked on mostly gun stocks for the past 8 years and found some products I really like. Behr’s Scandinavian Tung Oil Finish (TOF) is one of them. It is an easy to work with, flat drying oil with some driers in it. No varnish in it to my knowledge and I have asked around. I have always stayed away from Birch-Casey Tru-Oil on rifle stocks. Not just because of the “metal� spelling but on the advice of cabinet makers and gunsmiths I respect. I did break down and try it on the Bronco neck on this project. I’m happy to say that while I think it will protect the neck nicely I don’t think it is an actual oil finish. Working with it felt like working with polyurethane. It may have “polymerizing oils� in it. I’ll bet that’s code for polyurethane. It just did not have the work time that oil does, Tung or Boiled Linseed (BLO ).

Anyway back to the bass.

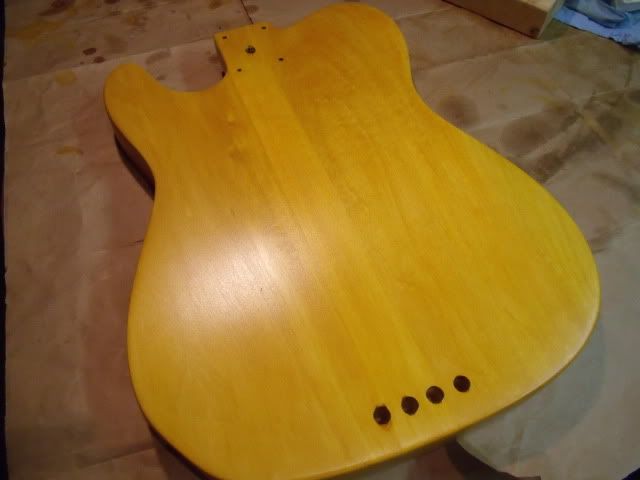
In goes the 50/50 conditioning.
.
Image
.

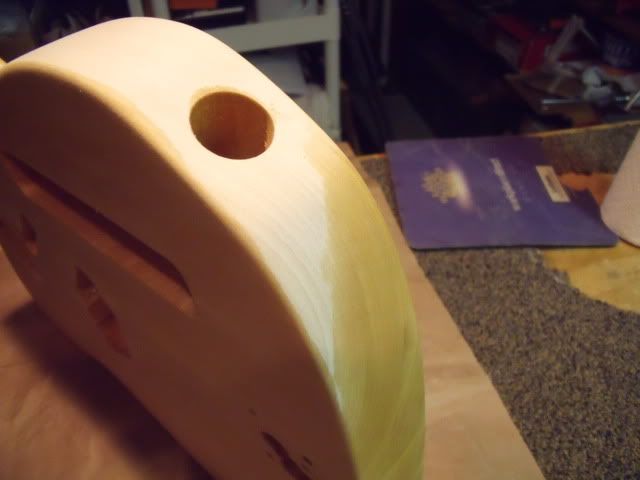
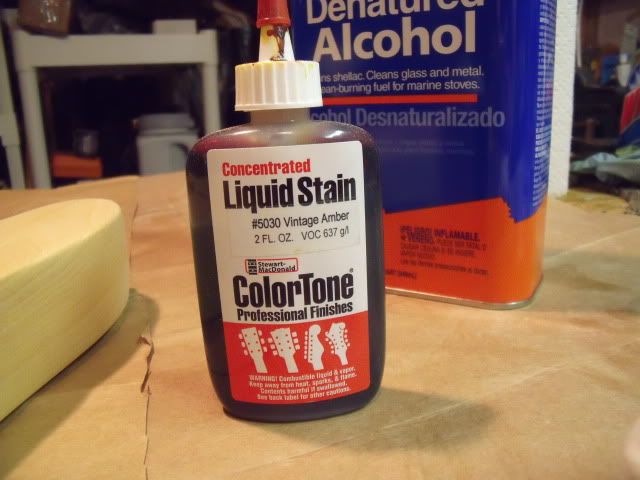
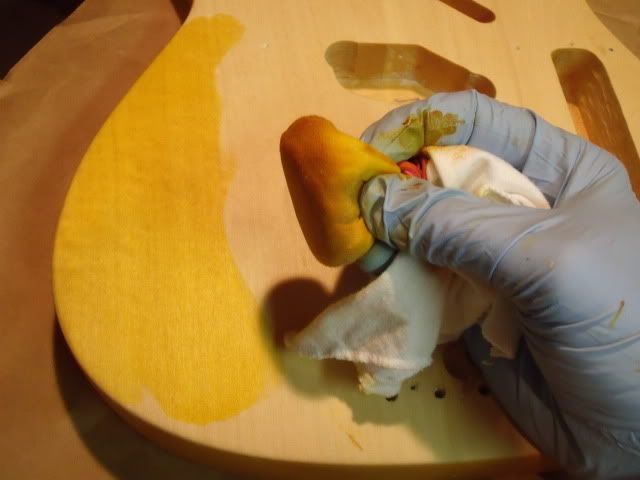
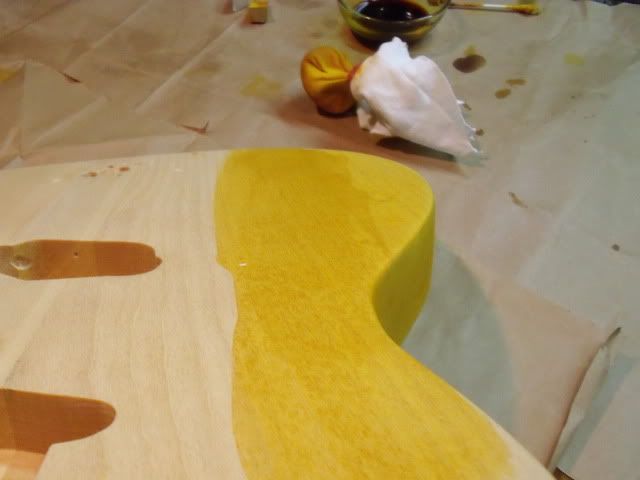
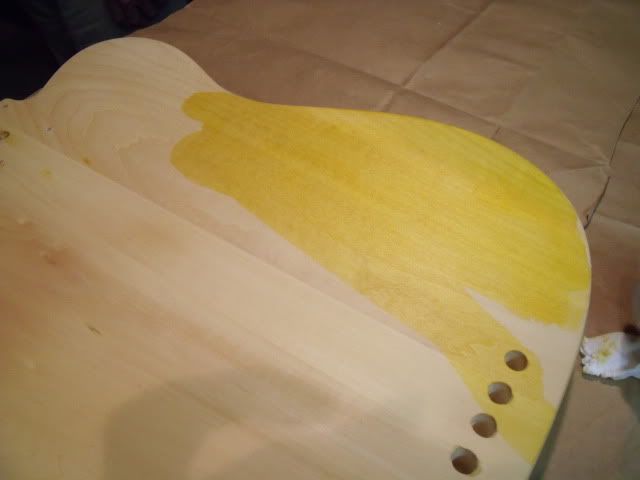
Let it dry for a couple of days and in goes the dye ( Trans-tint vintage amber thinned in denatured alcohol)
.
Image
.
Image

.

Image
.

Image
.


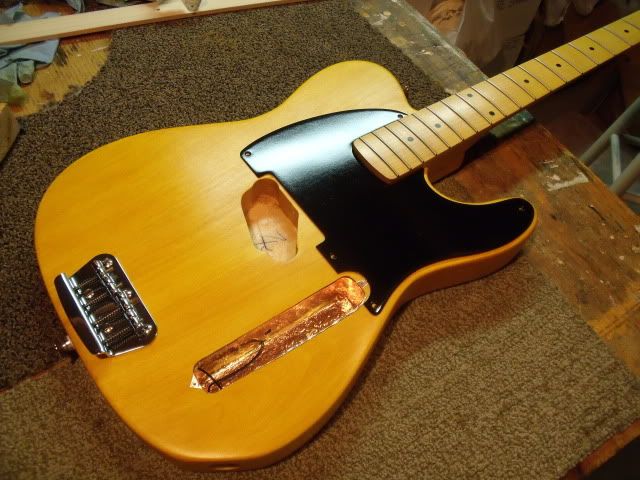
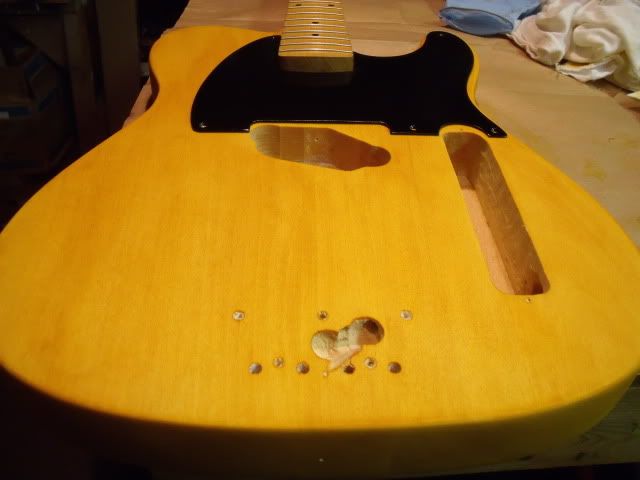
It does look a little splotchy but I think after I build and oil finish it will mellow out a lot.

It will never pass for butterscotch but I think I am going to like this look.
.
Image


JR
User avatar
Gabriel
.
.
Posts: 3178
Joined: Sun Apr 11, 2010 8:46 pm
Location: NYC

Post by Gabriel »

This is going to look super awesome.
User avatar
Ankhanu
.
.
Posts: 2995
Joined: Tue Nov 10, 2009 4:51 pm
Location: Nova Scotia
Contact:

Post by Ankhanu »

Sexy!
ekwatts wrote:That's American cinema, that is. Fucking sparkles.
Donate to Ankhanu Press
Rotor
.
.
Posts: 13
Joined: Mon Oct 25, 2010 1:46 am
Location: IL

Post by Rotor »

The Bakelite pickguard is getting lacquer and needs to be sanded first to give the edges a little “melt�. I’m not sure if I will wet sand it after lacquering or not.

New
Image

Sanded
Image

After the first three coats
Image


Time lapse for application of Behr’s Scandinavian Tung Oil Finish (TOF).

Applied with poly dauber. Let soak for 25 or so mins. Wipe off with soft cloth. Let cure for at least 24 hours. Repeat as necessary to build finish to taste. In this case 7 or 8 times. Top it off with Johnsons paste wax.

Image

Time to get the bridge on to mount the Fralin split 51 so the ground wire and control cavity shielding happen now. I have never done this before but thanks to lots of good threads I think I get the basics.

For what I hope is a foolproof ground I am going to tie in to the right front bridge mounting screw like this.

Image

Between the thread engagement and the copper foil this should be bombproof.

It is really looking like something now. I just have to get the pickup installed and wire it up.

Image


JR
User avatar
Gabriel
.
.
Posts: 3178
Joined: Sun Apr 11, 2010 8:46 pm
Location: NYC

Post by Gabriel »

Holy crap this is going to look good.
User avatar
stewart
Cunning Linguist
Posts: 17644
Joined: Mon Jul 14, 2008 7:33 pm
Location: Edinburgh, Scotland
Contact:

Post by stewart »

it looks AMAZING.
Image
User avatar
damienblair17
.
.
Posts: 1069
Joined: Fri Oct 24, 2008 6:31 pm
Location: San Francisco
Contact:

Post by damienblair17 »

Oh man, every time I see this thing it looks even better! Great work Dude!
Doog wrote:The perfect marriage of Teh Kurdtz and Teh Durstz.
RUN AMOK!

KESSEL RUN!