Page 2 of 3
Posted: Sun Jul 24, 2011 1:14 pm
by cooter
Man, that sucks.
Every new layer of nitro melts into the old layers and it can take months for it to fully cure.
I really hate that the tape tore the paint off. I use blue painters tape and it works well
but I still try to remove the tape as soon as possible. I know none of this helps now.
Anyway, on the brighter side, you've got a clean slate so to speak for whatever color you choose.
Still sucks.
Posted: Sun Jul 24, 2011 1:52 pm
by Addam
The blue was actually really growing on me. It has a pretty cool '60s vibe to it with the pearl PG.
Dunno, maybe it was never meant to be?
I've been looking at these colours;

Ice Blue

Burgundy Mist

Pelham Blue

Gold
Leaning more toward Burgundy Mist or Gold.
Posted: Sun Jul 24, 2011 5:06 pm
by cooter
I've always wanted to try Burgundy Mist.
Posted: Sun Jul 24, 2011 5:19 pm
by Addam
I used burgundy mist on an abandonded scratch build, it looked pretty damn sexy.
Posted: Sun Jul 24, 2011 5:36 pm
by JohnnyTheBoy
Nice T'other project Adam! bloodybuggeringshitbag about the paintpeeldisaster...like coot says, clean slate an all...
Liking the cobbled whammy...and id plump for the firemist as well...with a comp stripe....although i do fancy Lake Placid Blue...

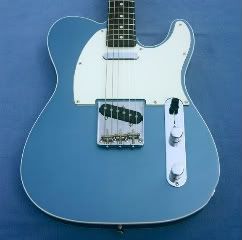
This Tele gives me the twitch everytime i see it!
But i guess the previous colour is possibly too similar...
Posted: Sun Jul 24, 2011 5:46 pm
by Addam
Speaking of the abandoned project; I dug it out and placed the Bronco bridge and guard on.
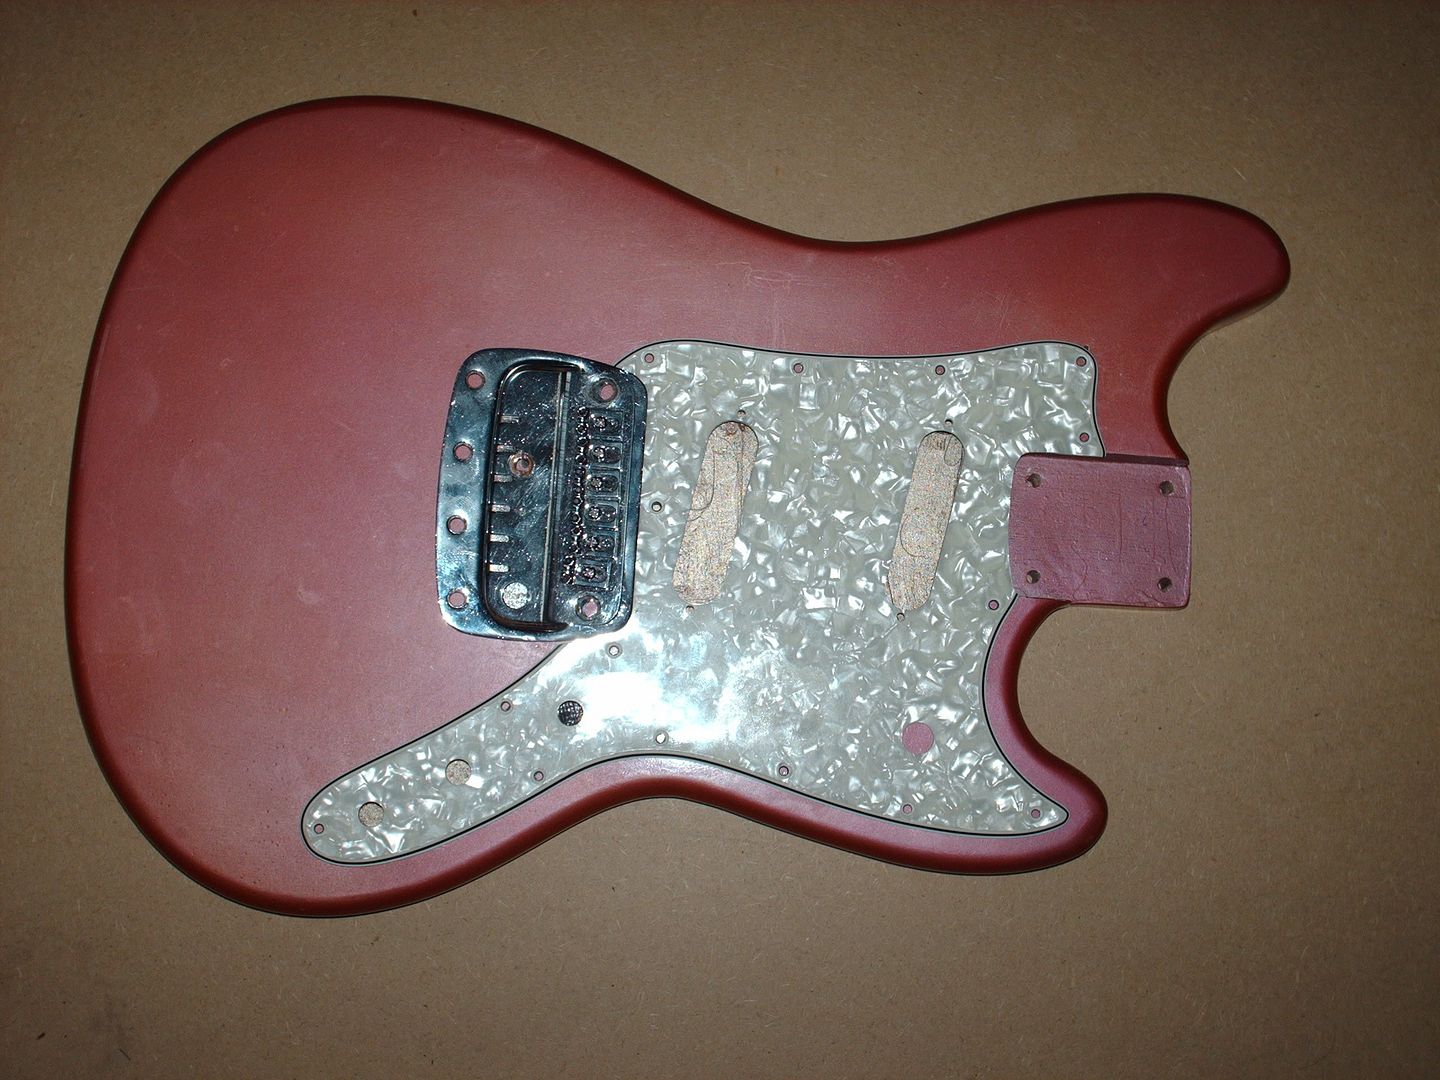
I reckon it looks good, might sway my judgement.
Posted: Sun Jul 24, 2011 5:48 pm
by BillClay
AddamInsane wrote:
FREE RElic and MOJO BRah.
I like the gold sparkles, that's something you don't see everyday.
Posted: Mon Jul 25, 2011 8:16 pm
by Addam
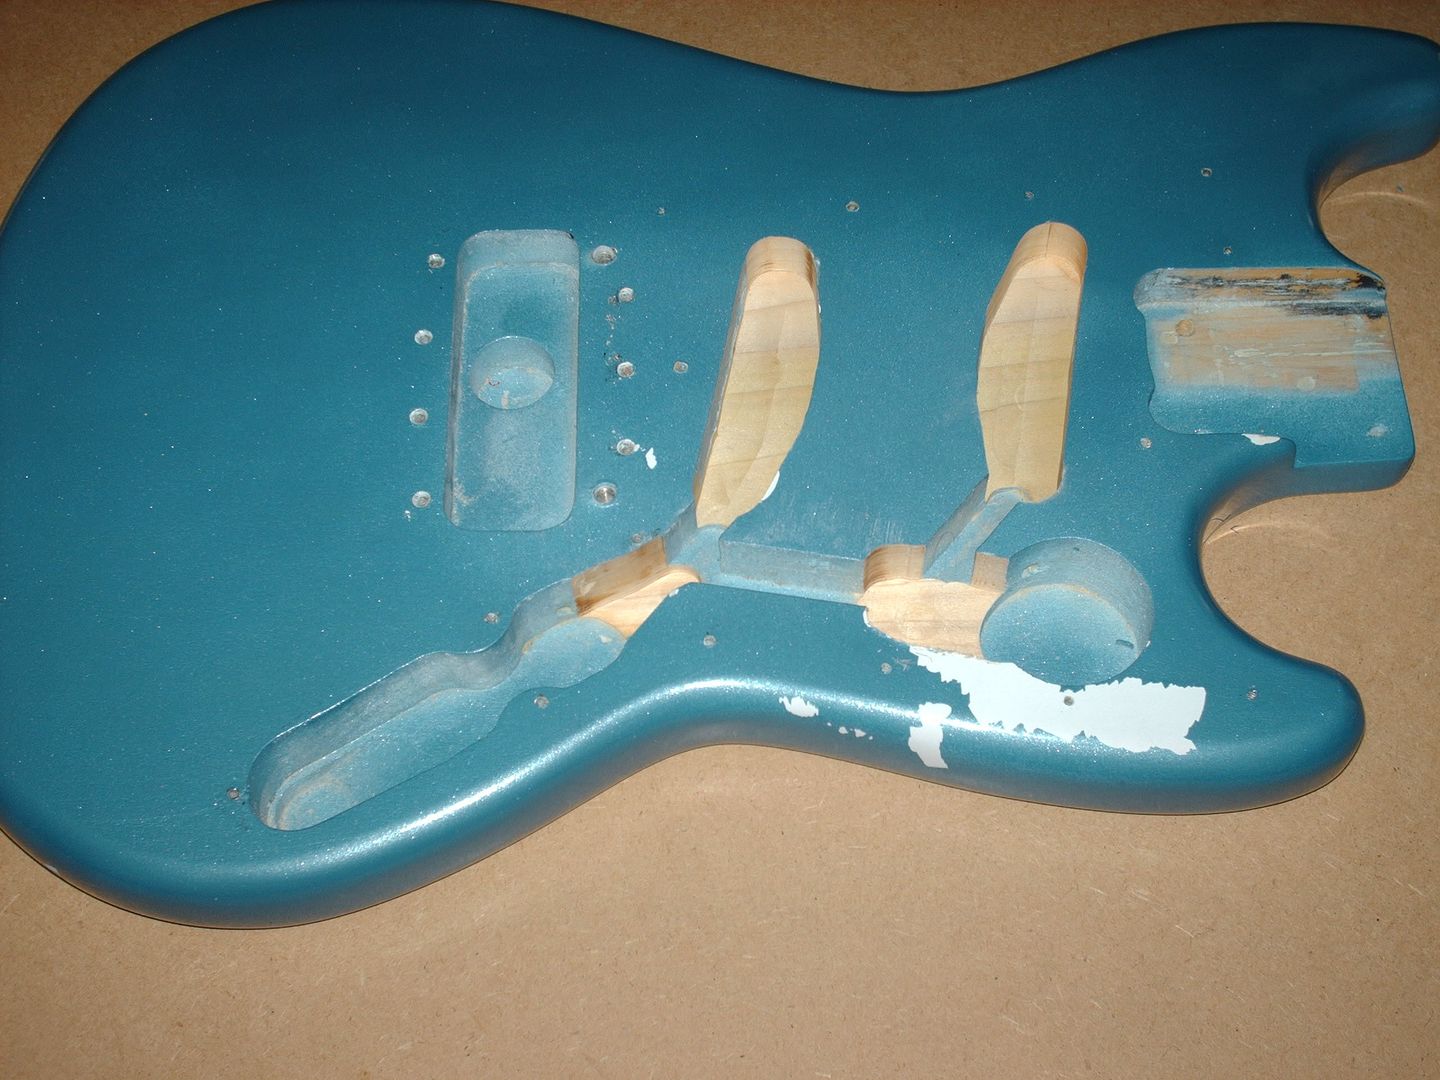
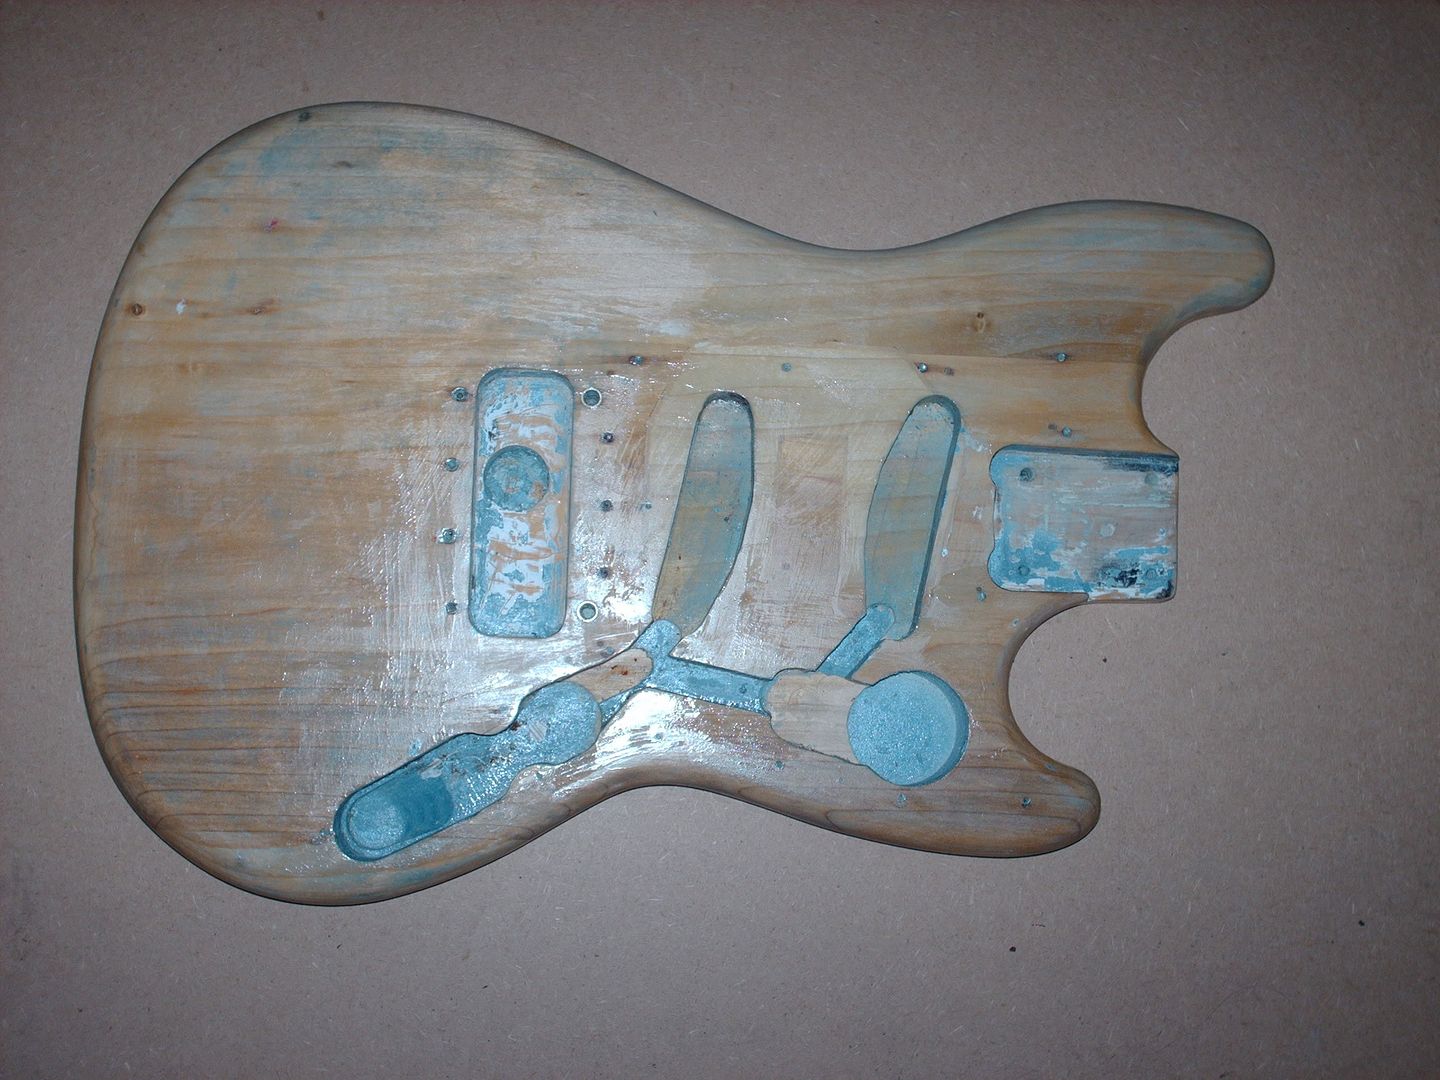
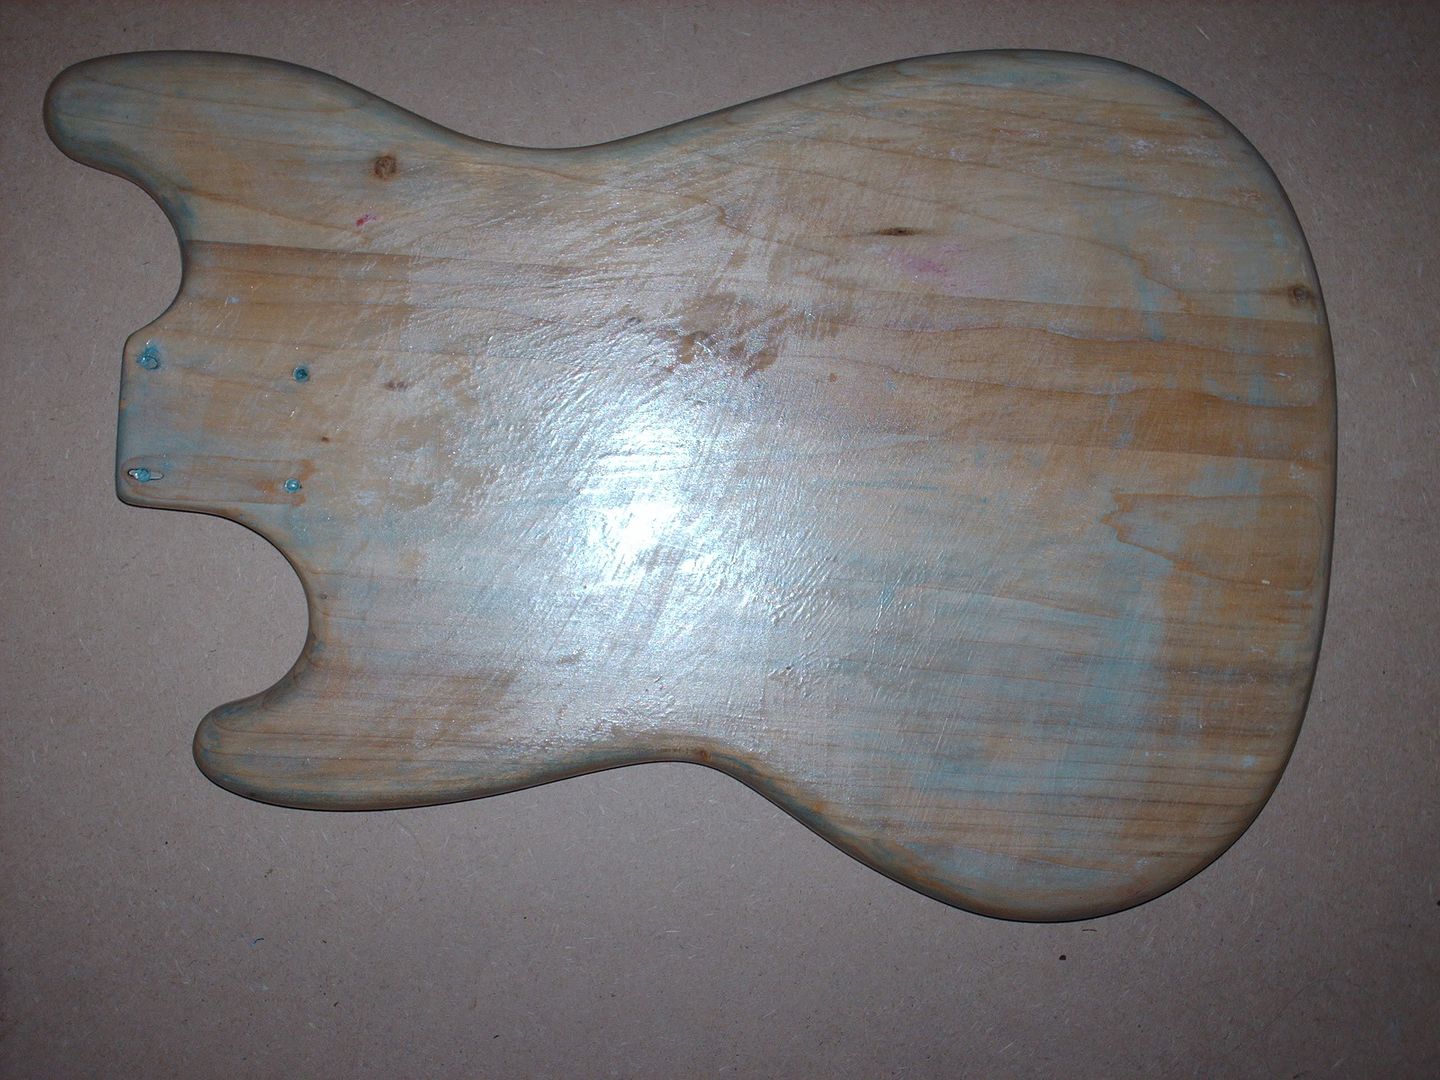
Well, I needed to get something done, so I stripped the fuck out of the paint, sanded that little baby down and slapped some sanding sealer on it.
Posted: Sun Jul 31, 2011 7:28 pm
by Addam
For mainly financial reasons, I didn't get any nitrocellulose colour, but I found some nitro primer.
So with a combination of sanding sealer, the primer and some acrylic 'Vauxhall bright copper' I got this;

And with parts to help visualise the end project;
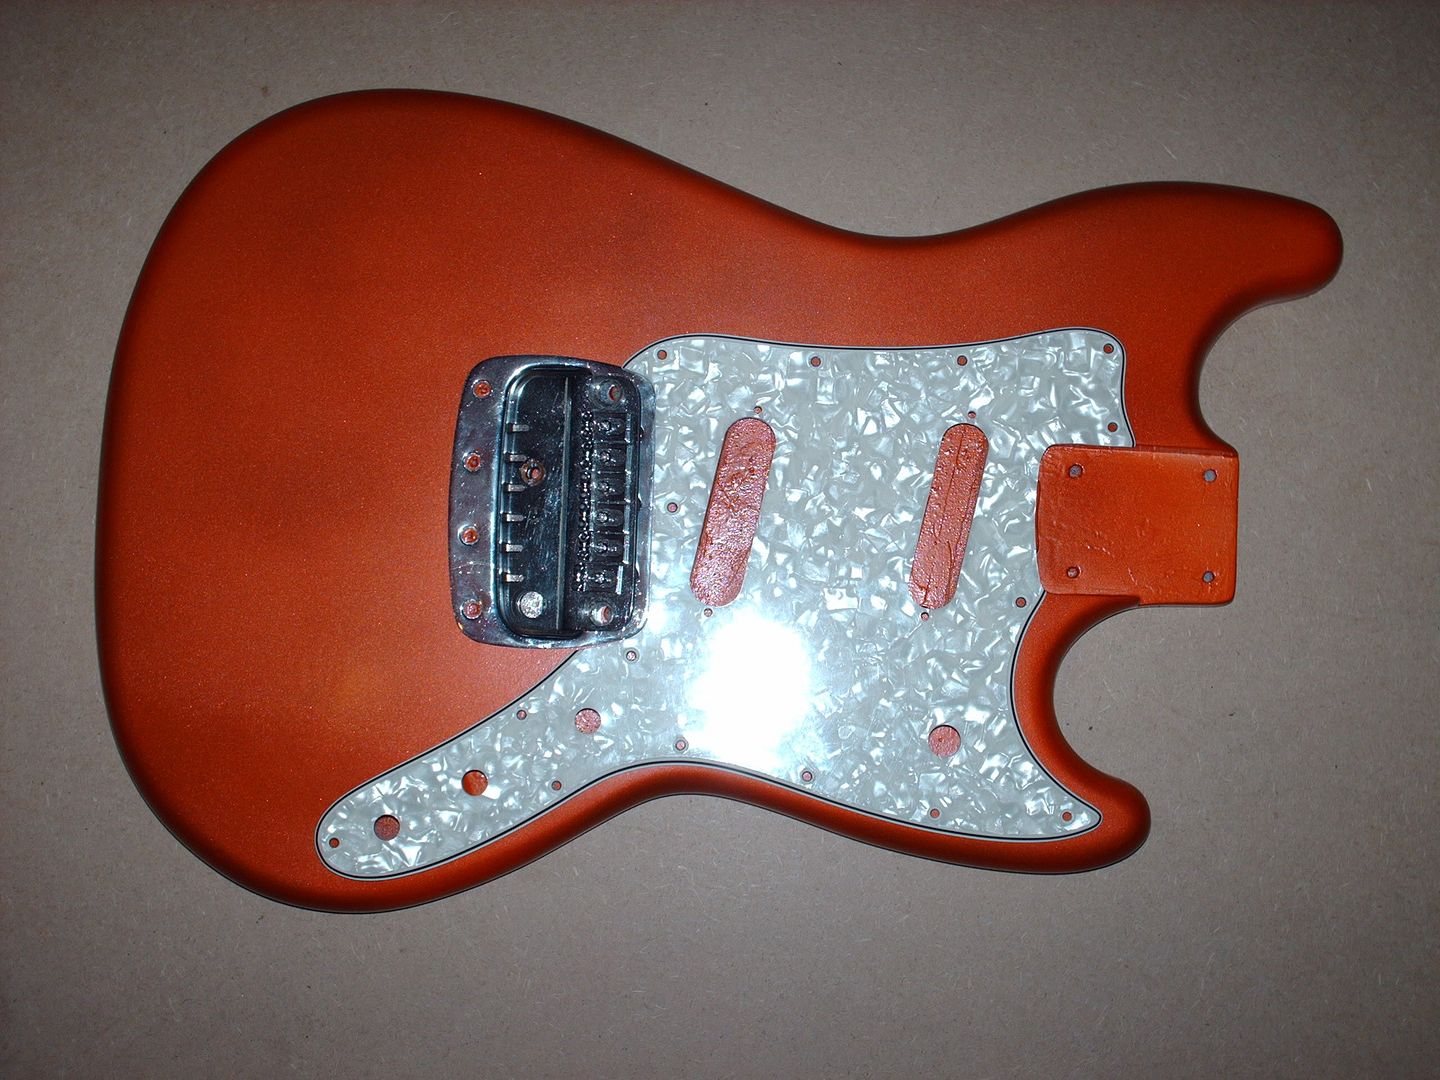
I think it's looking pretty damn sexy. Maybe not as sexy as burgundy mist, but I like it.
Needs a fuck load of clear gloss on it, then it'll be good to go.
Posted: Sun Jul 31, 2011 9:12 pm
by cooter
I like it. I have a Dano style project that needs that color.
Posted: Tue Aug 09, 2011 4:17 pm
by jamba72
BillClay wrote:AddamInsane wrote:
FREE RElic and MOJO BRah.
I like the gold sparkles, that's something you don't see everyday.
obviously the blue color didnt stick well to the primer after you shot another layer of nitro on it, it peeled of with your tape..
sorry about that..
Perhaps it wasnt exactly necessary to sand it completely down after..
nice body..
Posted: Fri Sep 30, 2011 10:56 am
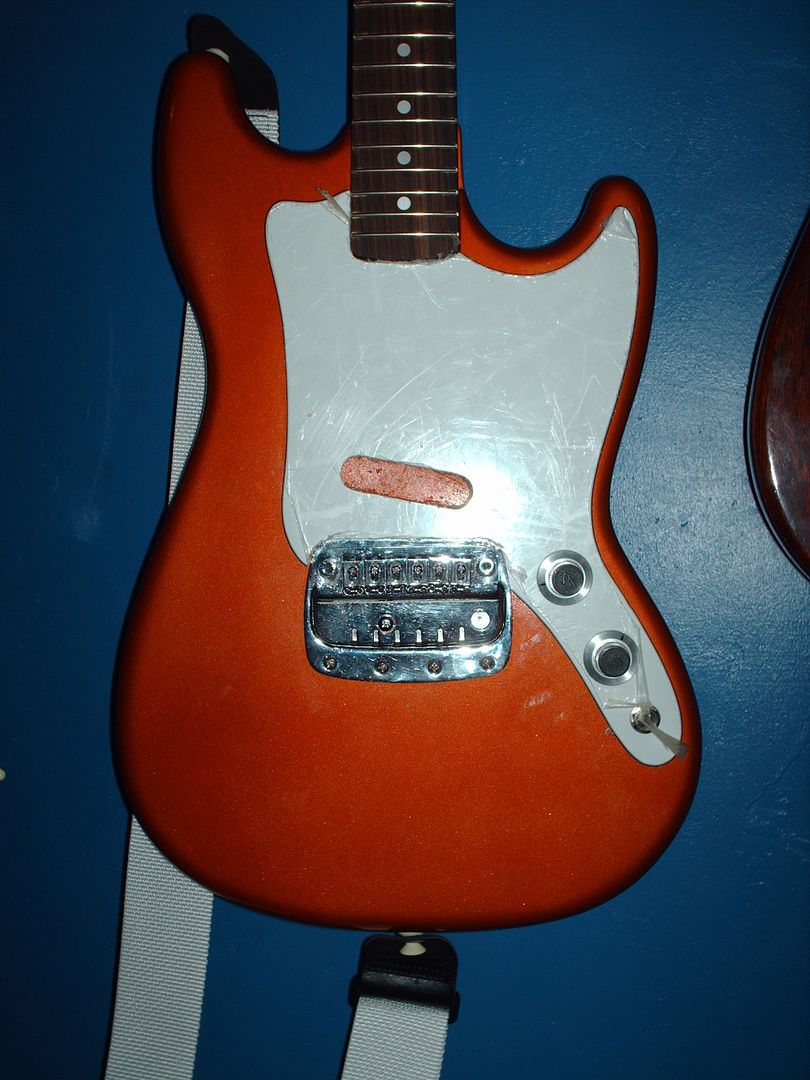
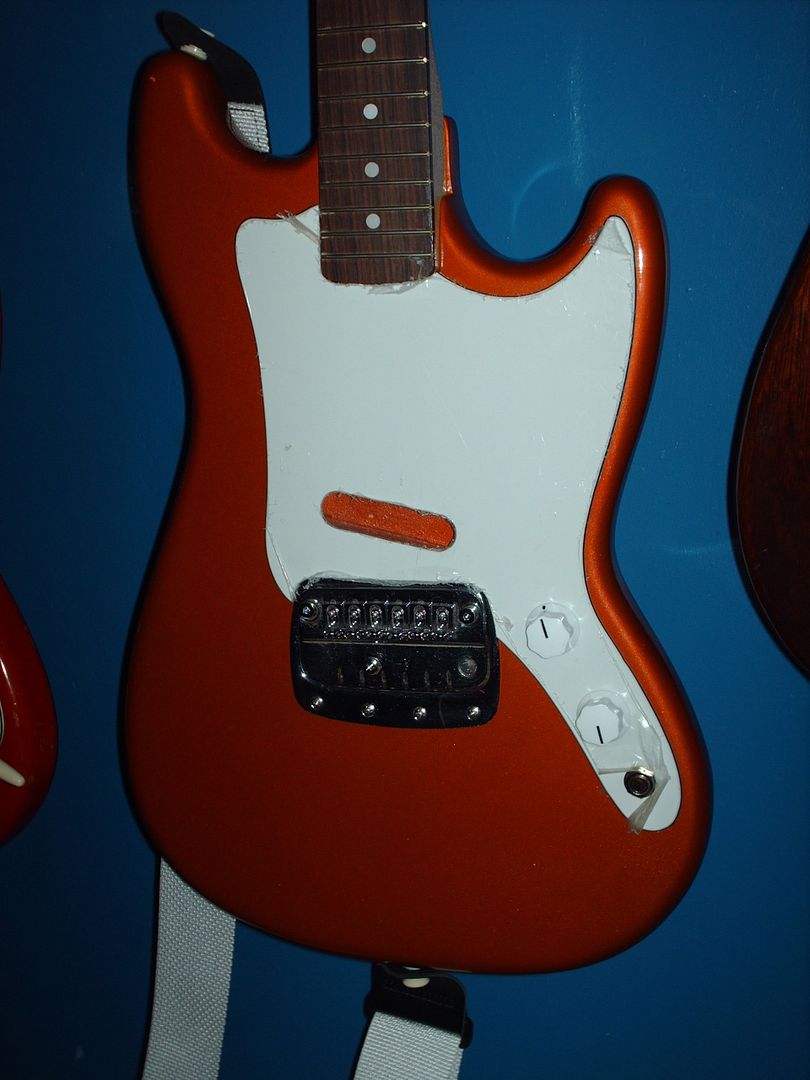
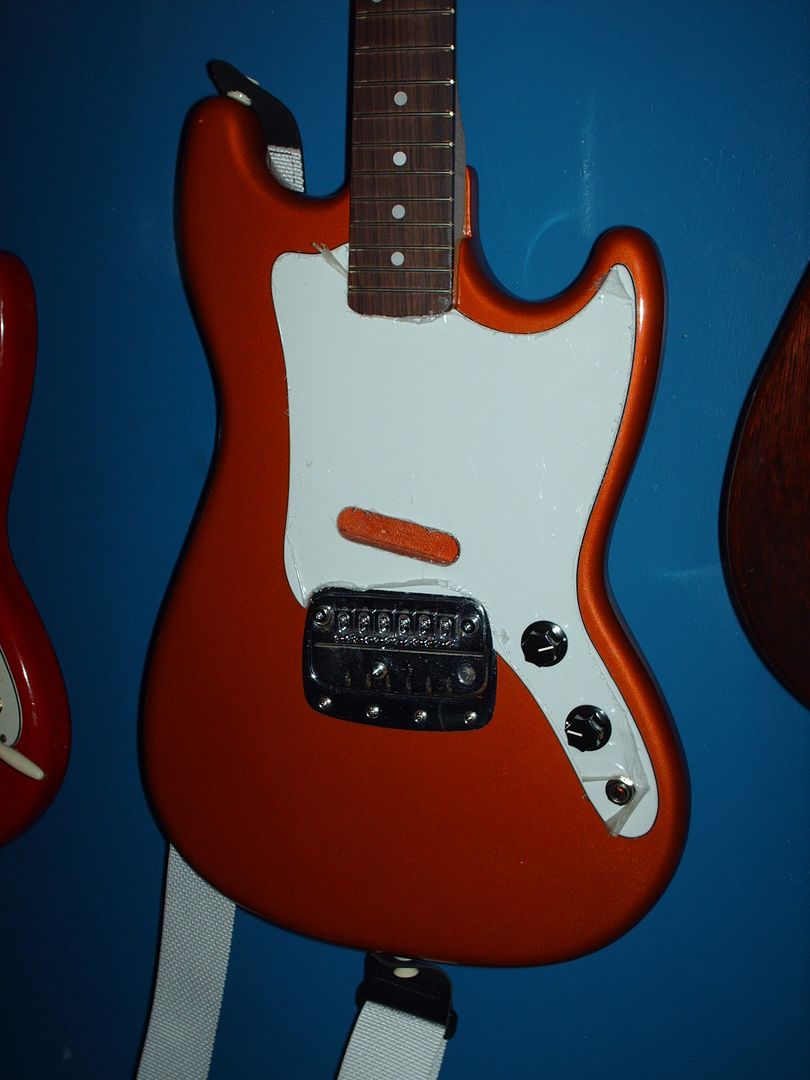
by Addam
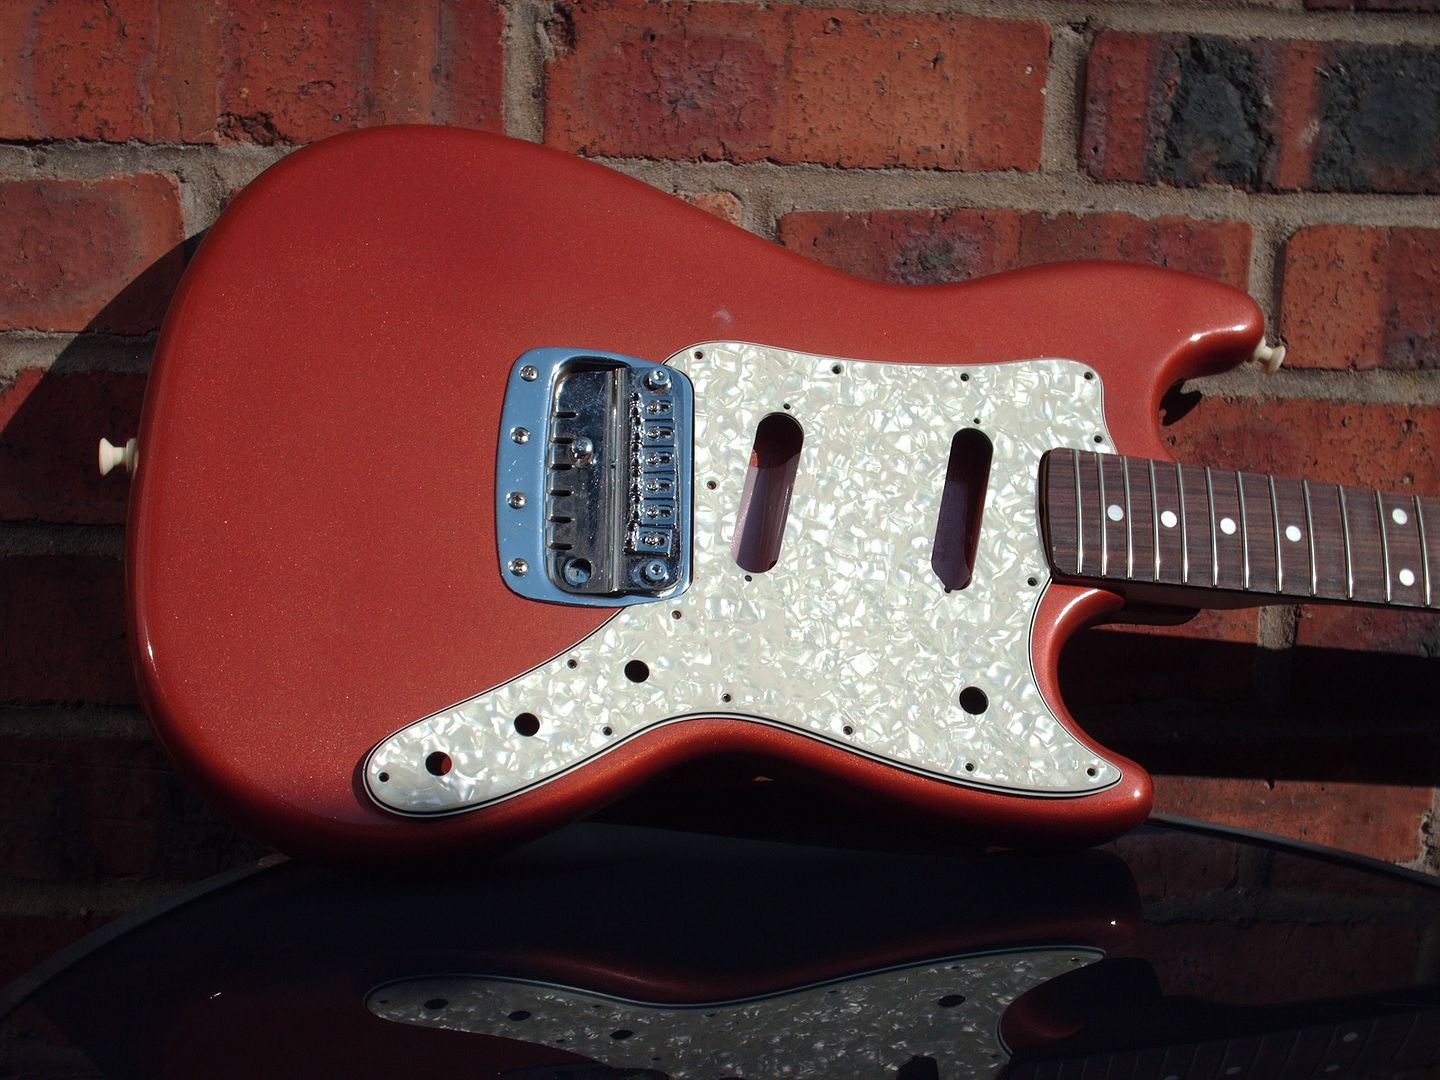
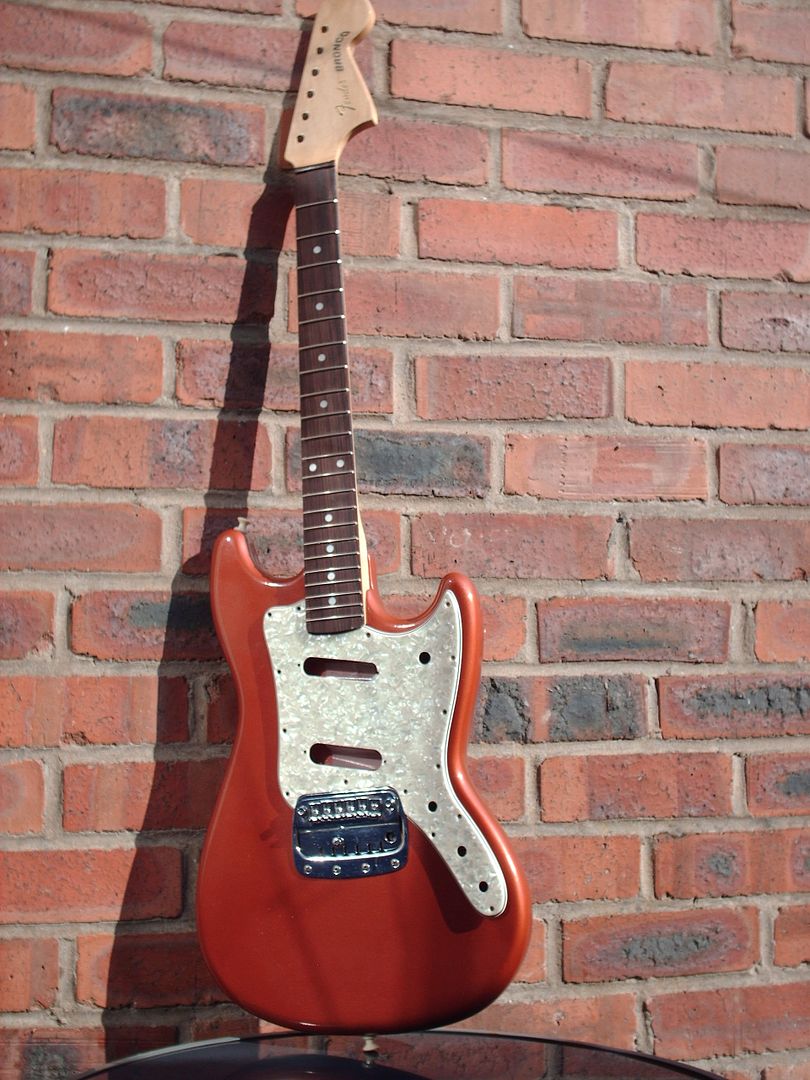
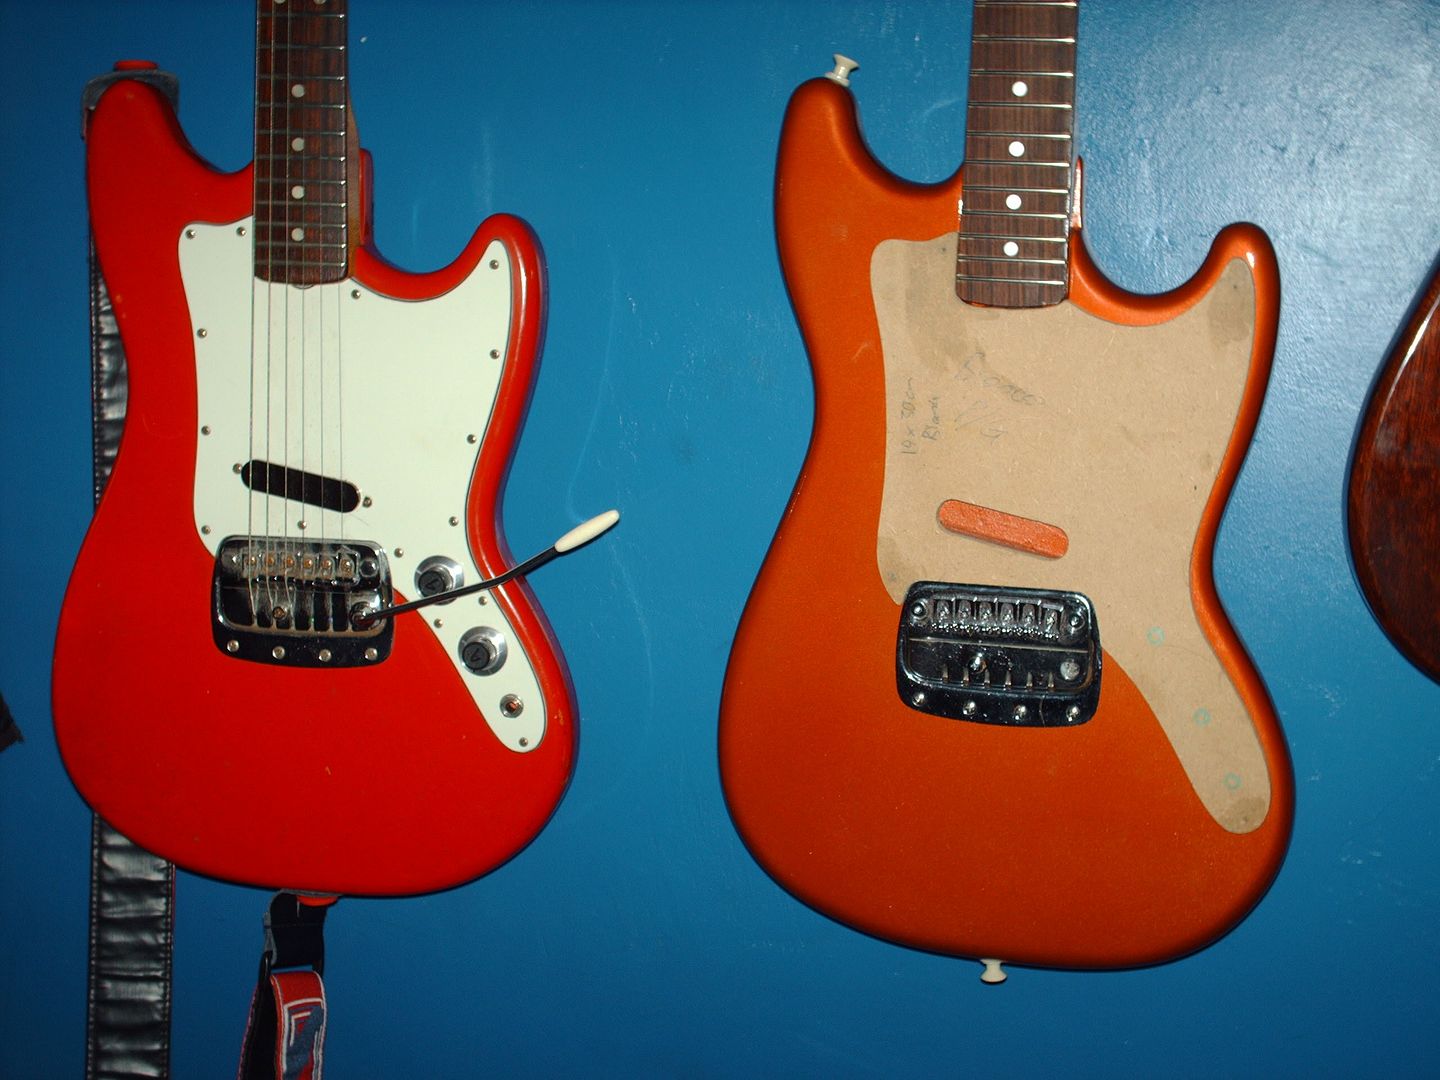
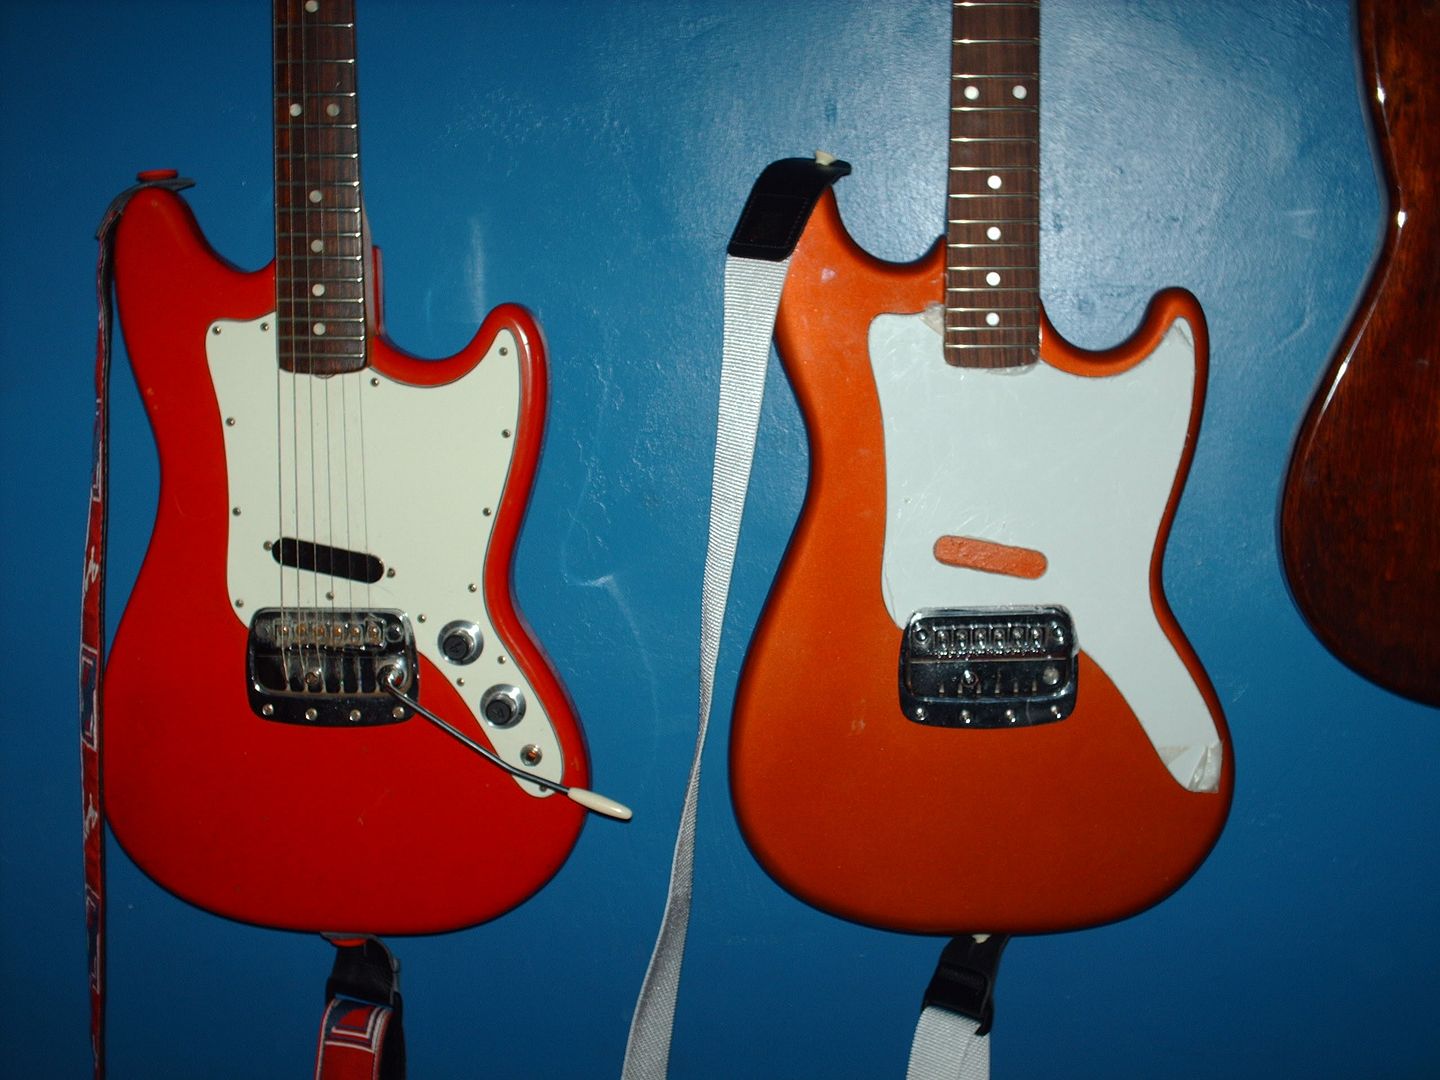
It's been forever since I updated.
It's been painted; not
perfect but acceptable.
The eagle-eyed among you will have noticed I have fucked the pickguard. I needed to slightly enlarge the hole for the neck pickup and the carpet tape failed!

I'll probably be making a new 3 ply white pickguard, with just 1 single coil pickup.
Posted: Fri Sep 30, 2011 5:48 pm
by JohnnyTheBoy
Looking good Adam! and dont worry about fucking up...just do it again and make another!
Anyway youre not alone there pal!...ive been beavering away at my conversion necks, and fucked up the mop inlays!
My prob was the radius is quite hefty on the ones im making, so when i used the radius block i made i went a bit apeshit with it, and managed to sand the f'in corners off the mops!...was not a happy bunny...but ive routed the buggers out again and put chopped up ikea chopping board in instead...fingers crossed this time!...
Im almost at the sanding stage with the stang body too!....time...money...etc etc!!
Posted: Fri Sep 30, 2011 6:42 pm
by ploppy
What did you use to cut out the pickups? I want to put a second one in my bronco too.
Posted: Fri Sep 30, 2011 6:55 pm
by Pens
That color turned out really nice.
Posted: Fri Sep 30, 2011 7:42 pm
by Addam
ploppy wrote:What did you use to cut out the pickups? I want to put a second one in my bronco too.
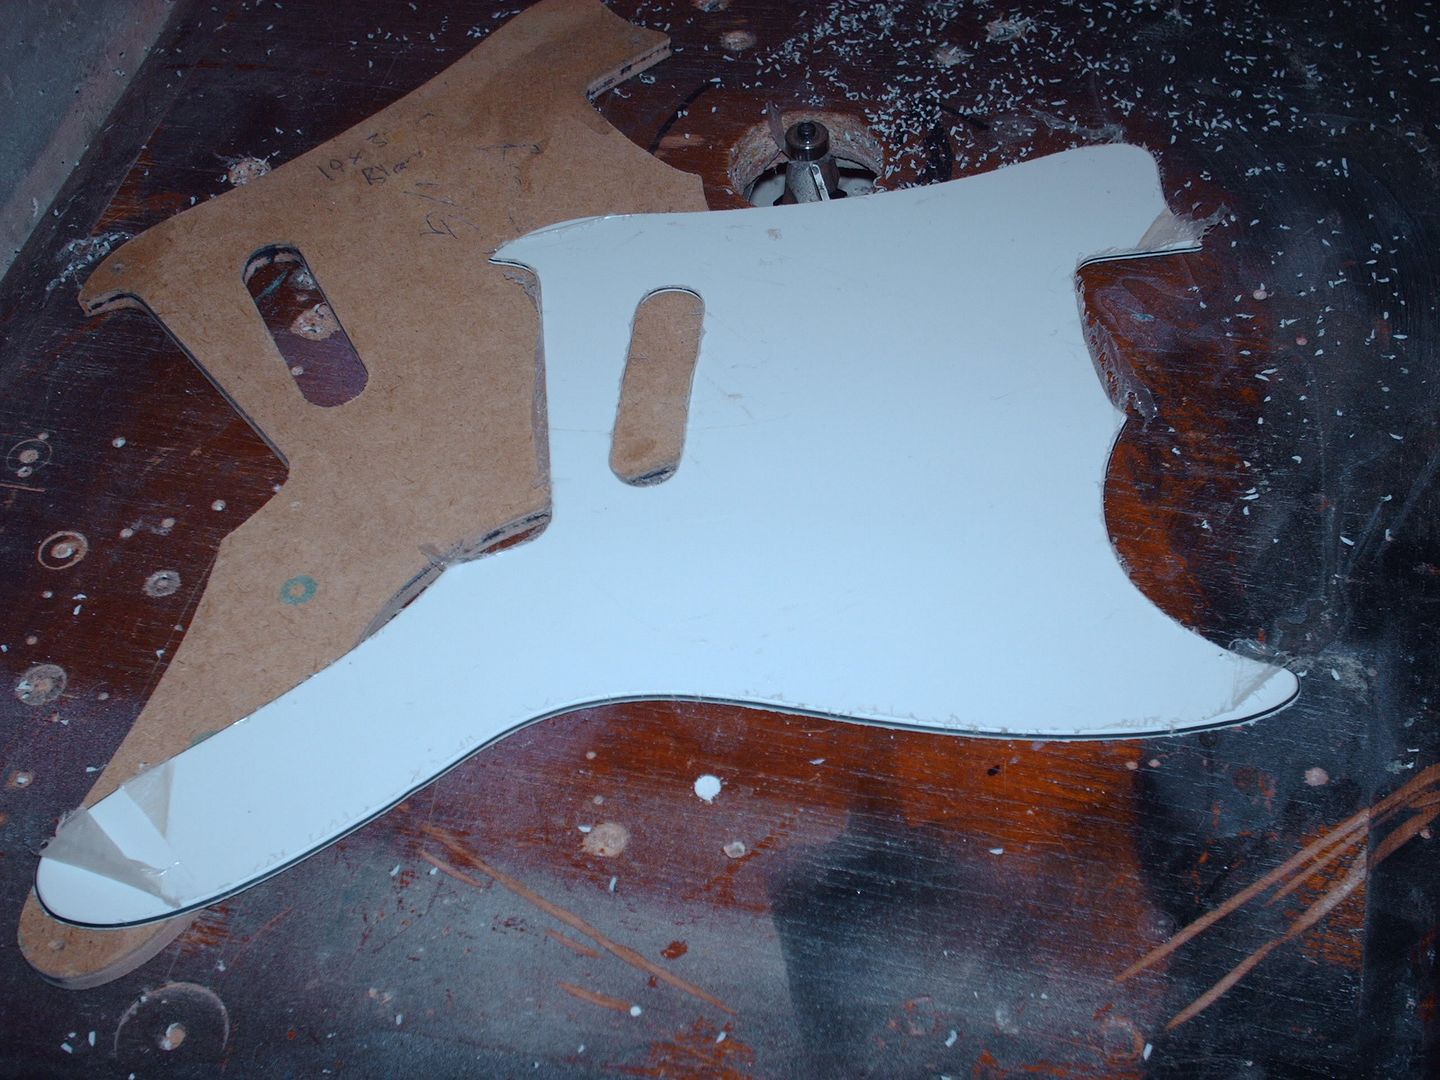
I have a template that I made from the original pickguard from my red Bronco. Which I will use to make a new white pickguard for this.
I have a table router that I use to make pickguards, really easy and quick to do.
That pearl pickguard came with the body when I got it from Cooterfinger. It's a 'chandler' item for a 70's Musicmaster that he cut a hole for the bridge pickup. That I think has shrunk slightly, I'll use it on something, just not this guitar.
Posted: Fri Sep 30, 2011 8:21 pm
by Addam
I made the template from the original pickguard from the red Bronco that had a neck humbucker.
Then I cut the pickguard with a straight cutter and beveled by hand with a file. Though, I have since cut a few pickguards and beveled them with a router.
Way faster and smoother, but needs careful setting of the router height.
I'll probably cut a new guard for the red one when I do one for copper bronco. I bought a big enough blank.
Posted: Fri Sep 30, 2011 10:06 pm
by lorez
shit this is looking brilliiant and inspiring. love it
Posted: Mon Oct 24, 2011 7:40 pm
by Addam
I pulled my pinger out and made the pickguard, obviously I'm just a lazy bastard as I see the damn thing every day.
Anyway...
Routered with my shiny new router

and re-routerered with a chamfer
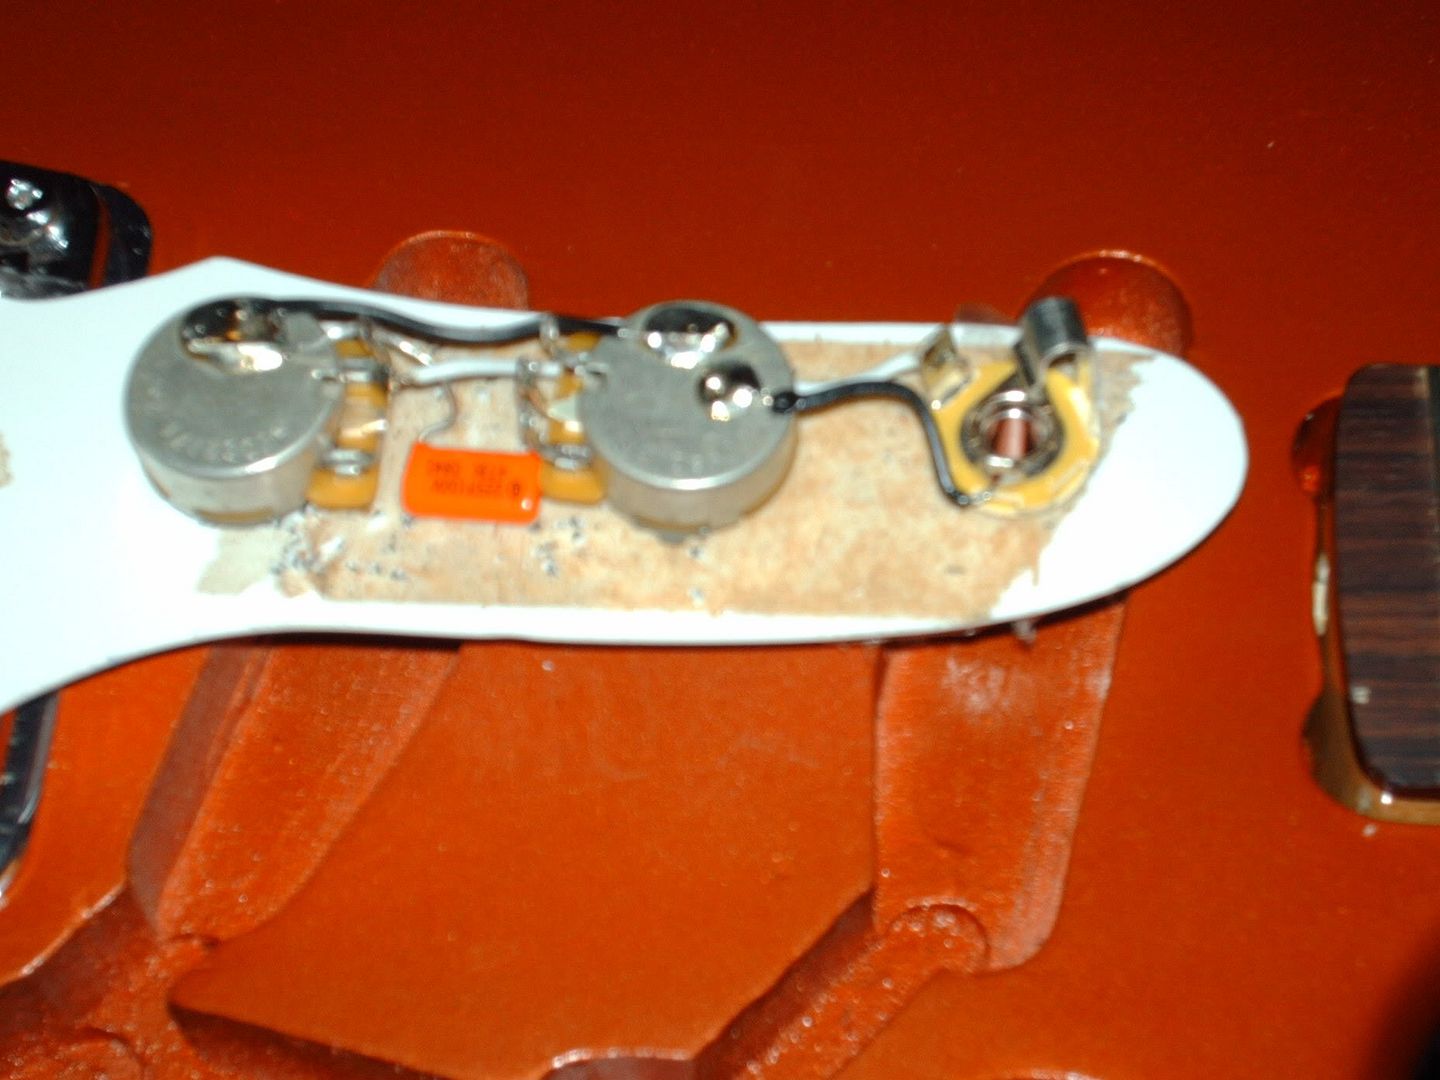
I drilled some holes and did a bit of soldering, and the full size pots fit perfectly in the routes done by Cooterfinger.
I test fitted some more knobs for visuals, I quite like the white 'stang-style knobs. I'll be using white strap buttons, white-button tuners and a white strap.
Posted: Mon Oct 24, 2011 10:13 pm
by DGNR8
Nice work. I wish I could dew routing. It's too advanced.
+1 on blue tape. I even use a mix of widths, from pin stripe, half inch, to 2 inch. Pin stripe is more expensive, but you don't use much.