DGNR8 wrote:I have a scuzzy 70s Fender neck without frets. Should I sand it clean before installing new frets, or leave it gross and fucked up? It's smooth enough. It just looks dirty, which I am fine with.
I haven't done enough fret work to answer from experience. But, if it were me, I'd at least knock the grim off the top of the fret slots and clean them out good before I started a refret. If you didn't want to change the look of the neck wear you could mask off the fretboard and just leave the top of the fret slots exposed. You might be able to clean the exposed areas with a little napatha on a cloth instead of using sandpaper. I don't think I would use any sandpaper unless it was on a radius block.
I've only done a handful of refrets but I've used a little titebond in the fret slot before I tap in a new fret, then I wipe away the excess glue. I saw SGLou do that on one of his builds and it works like a charm. I don't know if the glue is a Gibson thing or if Fender does it as well but there was glue in the slots on this Marauder when I pulled the old frets. I have an old Bronco neck that needs a refret and the frets have to be pulled from the side instead of straight out. I've been doing a lot of reading on that. I may give that a shot this summer.
i had a 69 warped/broken truss rod 12 string villager neck that i did some fret fret trial and error and stuff. i ended up using a precision driver(flat head) and softly hammered the frets out. if i remember correctly it seemed to work better to go from the bass side to the treble side.
i tried to pull them from the top as gingerly as possible. that was a horrible fucking idea. it ripped the fretboard all to shit!
i have also found that cleaning the fretboard and doing a bit of slot cleaning is a def the way to go. and gel super glue, hammer in, and then put the fret press on for about 20 mins each. usually i will do about 5 frets. then when the 6th fret is drying and the clamp is on i will start to clip and clean the first five frets.
it saves a bit of time in the long run i suppose.
robert(original) wrote:i had a 69 warped/broken truss rod 12 string villager neck that i did some fret fret trial and error and stuff. i ended up using a precision driver(flat head) and softly hammered the frets out. if i remember correctly it seemed to work better to go from the bass side to the treble side.
i tried to pull them from the top as gingerly as possible. that was a horrible fucking idea. it ripped the fretboard all to shit!
i have also found that cleaning the fretboard and doing a bit of slot cleaning is a def the way to go. and gel super glue, hammer in, and then put the fret press on for about 20 mins each. usually i will do about 5 frets. then when the 6th fret is drying and the clamp is on i will start to clip and clean the first five frets.
it saves a bit of time in the long run i suppose.
I read that you could take a dremel and make a little notch in the fret on the bass side so the screwdiver or punch would have something to catch on when you tap them out. They also suggested tapping them from the bass side out through the treble side so that's definitely the route I'm going to take.
Did you heat the frets with a soldering iron before you tapped them out? Were the original frets glued in?
i know i put an iron to them, but i didn't notice a difference. i don't think they were glued in tho, i think the side slot method kinda kills the need to glue.
i saw a pic of how they did it back in the day. it was a series of really thin saw blades, and the neck is on a rod that just swipes by the blades so that the slots are radius perfectly. i want to say they used that system for over 30 years or so. but then when cbs started having thier darker days and exporting stuff out they started getting sloppy.
robert(original) wrote:i know i put an iron to them, but i didn't notice a difference. i don't think they were glued in tho, i think the side slot method kinda kills the need to glue.
i saw a pic of how they did it back in the day. it was a series of really thin saw blades, and the neck is on a rod that just swipes by the blades so that the slots are radius perfectly. i want to say they used that system for over 30 years or so. but then when cbs started having thier darker days and exporting stuff out they started getting sloppy.
you brought up the dremel dibbit thing. with the prescion driver(flat head) it was rather easily to notch right under the fret head and above the tang. right on top of the fretboard. for many obvious reasons, your precision driver will be ruined after doing this.
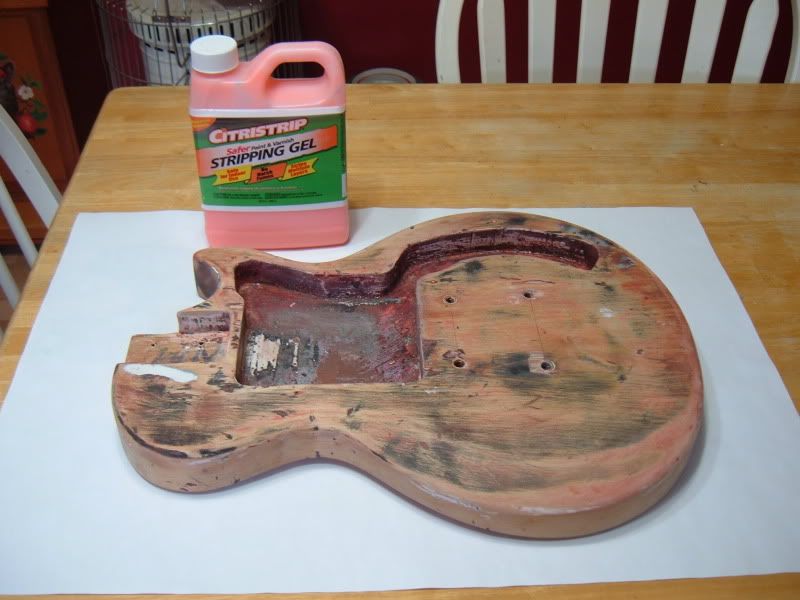
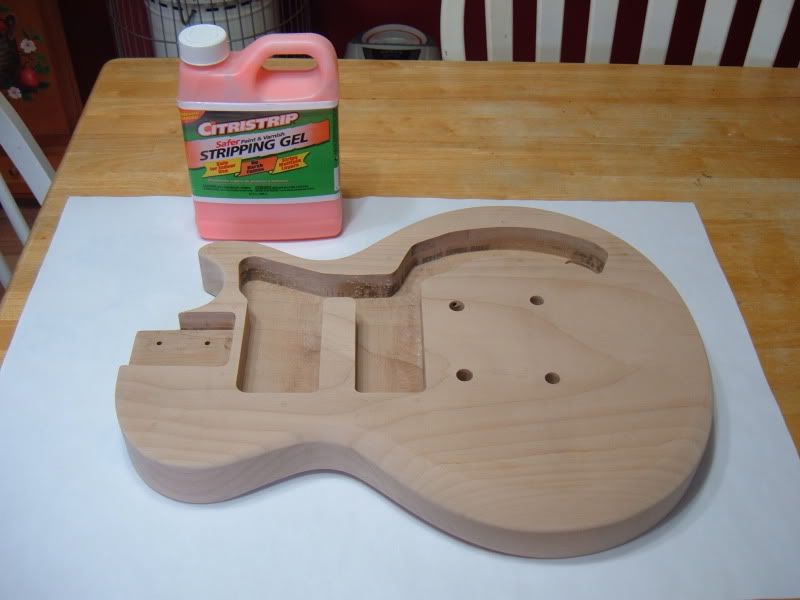
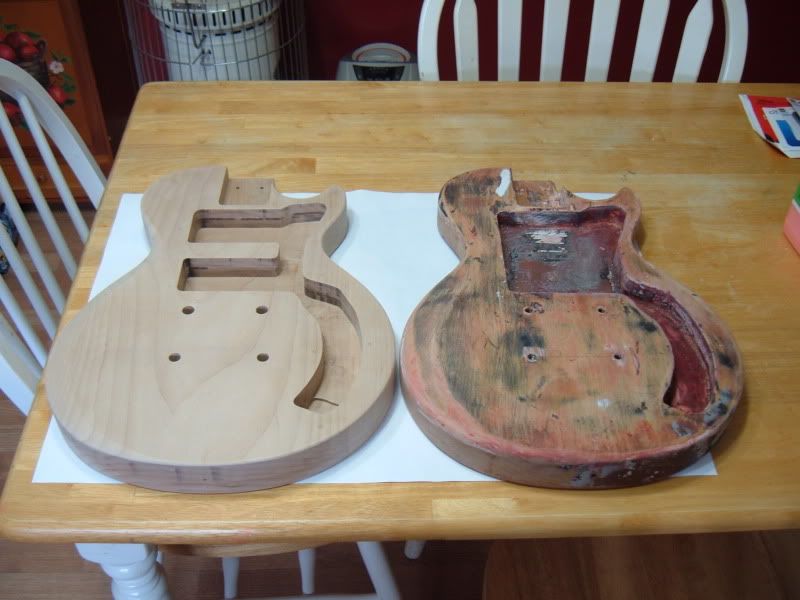
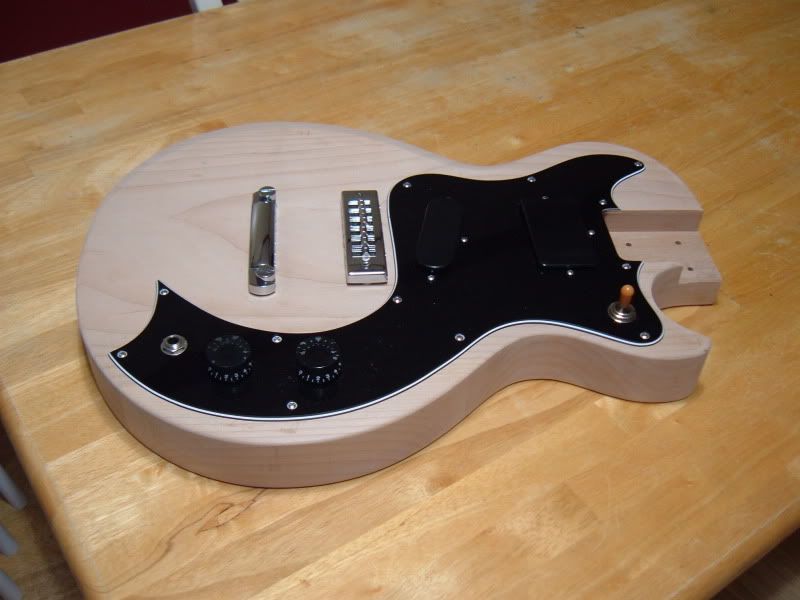
at first i was holy shit, he cleaned that thing up really nicely and he even added a bit of wood inbetween the pups. and it matches the grain!
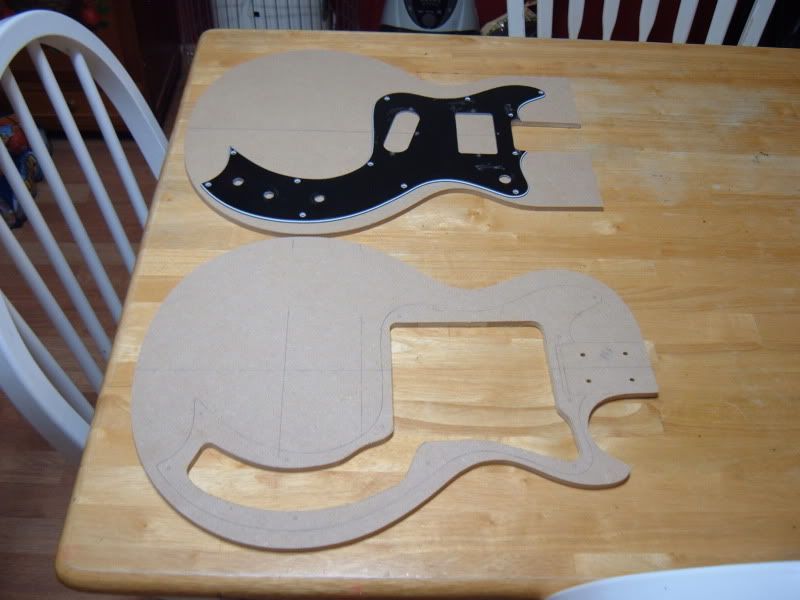
and then i, just like everyone else saw the spoiler, and kudos on the templates.
i made templates of every guitar i came across for about 2 years straight, then i ended up with about 3 full shelves of nothing but body templates. everything from like 6 different teles to a flying v bass and even some mando templates.
btw, keep them away from moisture! i had a few ruined from getting wet and warping beyond repair. boohoo.
robert(original) wrote:at first i was holy shit, he cleaned that thing up really nicely and he even added a bit of wood inbetween the pups. and it matches the grain!
and then i, just like everyone else saw the spoiler, and kudos on the templates.
i made templates of every guitar i came across for about 2 years straight, then i ended up with about 3 full shelves of nothing but body templates. everything from like 6 different teles to a flying v bass and even some mando templates.
btw, keep them away from moisture! i had a few ruined from getting wet and warping beyond repair. boohoo.
I think Gibson did the swimming pool route on these because they used the same body for the S1 that came with 3 single coils. I wanted a little more support under the pickguard on mine.
I'm getting there with all the template. They already take up a third of my workbench.
You should post a pic of all your templates
Congratulations! Your Punkacc9 evolved into Awstin.
Punkacc9 wrote:I always thought that switch tip looked sweet. Lol. You should use them gold knobs I sent you!
I think I'll switch it out with a black tip for this build since the pickups and pickguard are black.
I'll save the amber switch tip and gold knobs for another build. It just looks like a wad of earwax floating on a sea fo black on this one.