Page 3 of 4
Re: Teardrop progress.
Posted: Thu Aug 25, 2011 11:40 pm
by Narco Martenot
ekwatts wrote:
Now I'm not sure what grade of sandpaper to use to get the top edge of binding to look shiny. Scraping it makes it smooth enough and flush but not sparkly. I wonder if the clearcoat at a later stage will give it the sheen it needs? We'll see. I'm just waiting for the wood dye to get here now.
This is a cool project.
If you still need to smooth the plastic out, I would use fine automotive grade sandpaper. Maybe start with 600, and move up to 1500-2000. Then, use some rubbing compound. I use rubbing compound by Meguiars, but there are special compounds for plastic.
Posted: Tue Aug 30, 2011 4:49 pm
by ekwatts
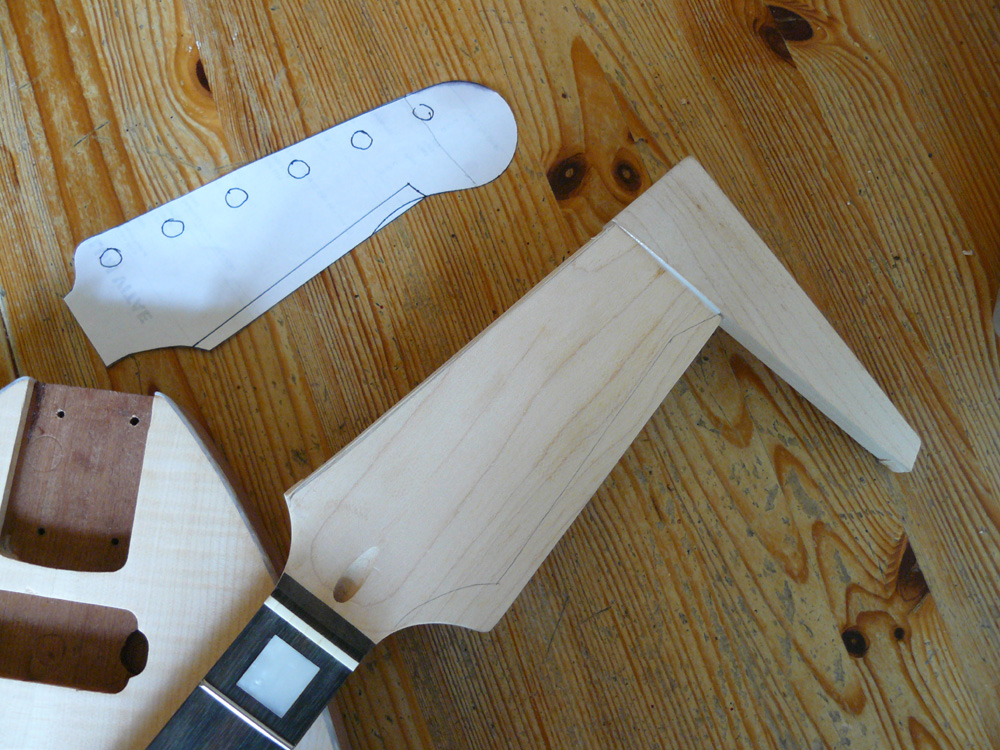
Headstock template.
I based it off the Batwing head, so it's rather long. Instead of the batwing design I've just straightened it out, sort of like the old Guyatone LG headstock which I love. Ignore the other pen lines, the outline of the paper is the headstock shape.
The high E tuning peg will be right where the extra bit of wood joins the rest of the headstock so I'm going to dowel it to make sure the end of the headstock doesn't just snap off in the middle of the Supernaut solo.

Posted: Tue Aug 30, 2011 6:22 pm
by Viljami
Oooh, Guyatone LG headstock equals class in my book. Nice to know I'm not the only one.
Posted: Sun Sep 04, 2011 11:32 pm
by ekwatts
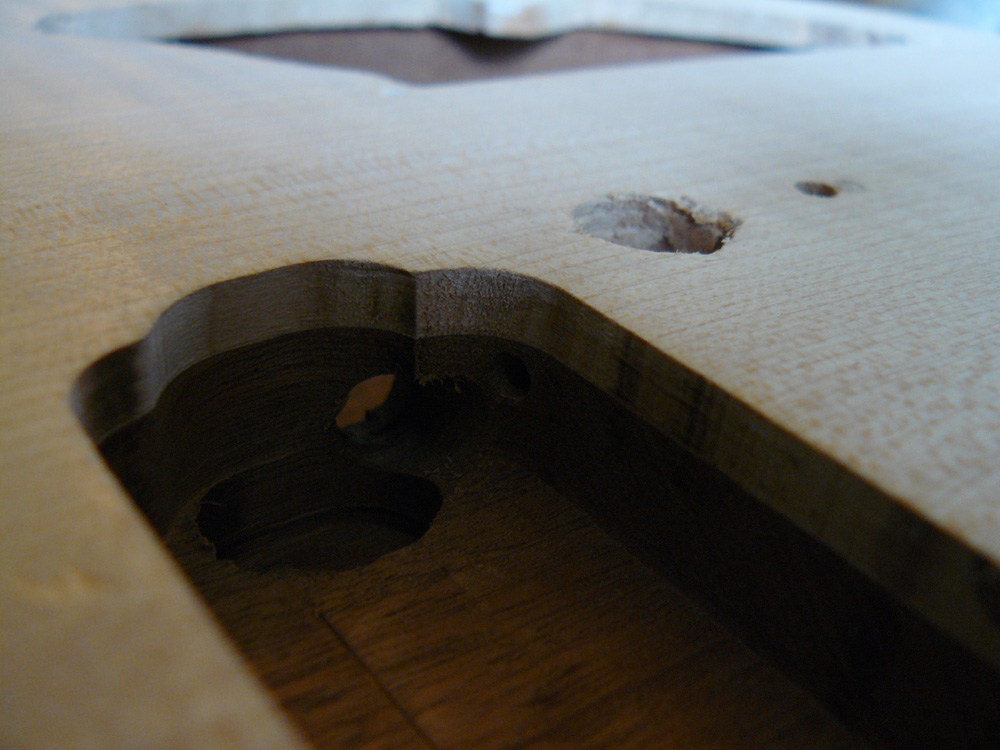
Just thought of something; how am I going to earth it?
I doubt I'll be able to drill a hole from one of the bridge cup holes into the control cavity. I'll give it a go, but I'm not confident. How else might I go about earthing it without the convenience of a large scratchplate to hide the workings under?
Posted: Mon Sep 05, 2011 11:05 pm
by paul_
ekwatts wrote:Just thought of something; how am I going to earth it?
I doubt I'll be able to drill a hole from one of the bridge cup holes into the control cavity. I'll give it a go, but I'm not confident. How else might I go about earthing it without the convenience of a large scratchplate to hide the workings under?
a) relocate your input jack to the side of the guitar like a Les Paul or Tele (if not already the plan), drill into side of guitar through jack socket--->control cav---> bridge post hole: a straight line
OR
b) run wire from bridge post hole across top of guitar into the lower right corner of the bridge pickup cavity (and install pickup on top), have it go through the pickup lead channels to the control area. This will show, but not a lot because of the guitar strings/the shadow they cast and you'd pretty much have to be told it's there to go "aw yeah, I see".
Posted: Tue Sep 06, 2011 4:14 pm
by ekwatts
I think I might have solved the ground problem. I just drilled it from the pickup cavity. It's probably too high and the wire might rub the pickup a bit and make it stiff (oo-er) but I won't find that out until I buy the pickups for it, which is actually going to be the final stage (thinking ahead lolz).
I also dowelled the headstock. Pain in the dick. It's fairly straight but because of a TINY miscalculation and what I can only assume is a variable thickness in the original headstock wood, it feels completely off. It's actually not. But it looks and feels it. This is going to be a motherfucker of a pain to sand into the final shape but I knew that. S'all cool.
Posted: Tue Sep 06, 2011 4:24 pm
by BillClay
ekwatts wrote:
Leave it like it is. If you don't, Im'a steal that headstock design. Much love,
Bill Clay
Posted: Tue Sep 06, 2011 4:47 pm
by ekwatts
My brothers both said that, too. It'd be a pretty extreme heavy metal headstock; THE PICKAXE.
On top of a teardrop shaped body.
Maybe on the next project..
Posted: Tue Sep 06, 2011 7:36 pm
by lorez
ekwatts wrote:My brothers both said that, too. It'd be a pretty extreme heavy metal headstock; THE PICKAXE.
On top of a teardrop shaped body.
Maybe on the next project..
smash your head in to make you cry!
still looking good ek, loving it
Posted: Tue Sep 06, 2011 10:22 pm
by othomas2
None of your images are showing Ekwatts ? Even your avatar / signature are '?' in a box... huh.
I really want to see the developments...
Posted: Wed Sep 07, 2011 7:45 am
by Viljami
I can see them just fine. I just want moar pictars.
Posted: Thu Sep 08, 2011 2:05 am
by bassintom
Great job Eric. Making me jealous.
Posted: Sun Oct 16, 2011 4:12 pm
by ekwatts
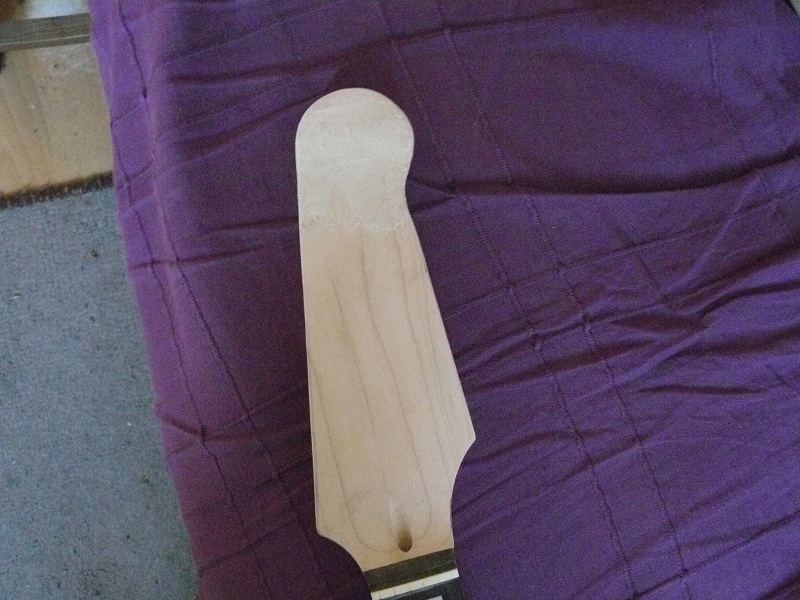
It's been a while since I updated because I've been so terrified of putting tools to the headstock. But I finally did it (good old Sunday boredom) and it looks....
Alright, actually. All I used was a hacksaw and a little sander head for my electric drill. A mountain of sawdust later and a liberal application of more wood filler and it doesn't look like complete shit, at least, and the shape is pretty much there.
Posted: Sun Oct 16, 2011 4:22 pm
by deaner33
Looking good.

Posted: Mon Oct 17, 2011 9:47 pm
by ekwatts
Well, this is kinda cool. I just stumbled on this guitar on eBay and it's obviously right up my street, but have a look at the headstock! I'd never actually seen this guitar or the headstock before, I was basing mine off a combination of the Guyatone LG and my Batwing headstock. Quite chuffed about it, obviously.

Comparing the two I'd say the dip is slightly sharper, making it a little shorter than mine and the width is thinner as well, being a little more pinched at the thinnest point between the treble and bass sides before the rounded section. Otherwise it's pretty much exactly the same design. Which is awesome.
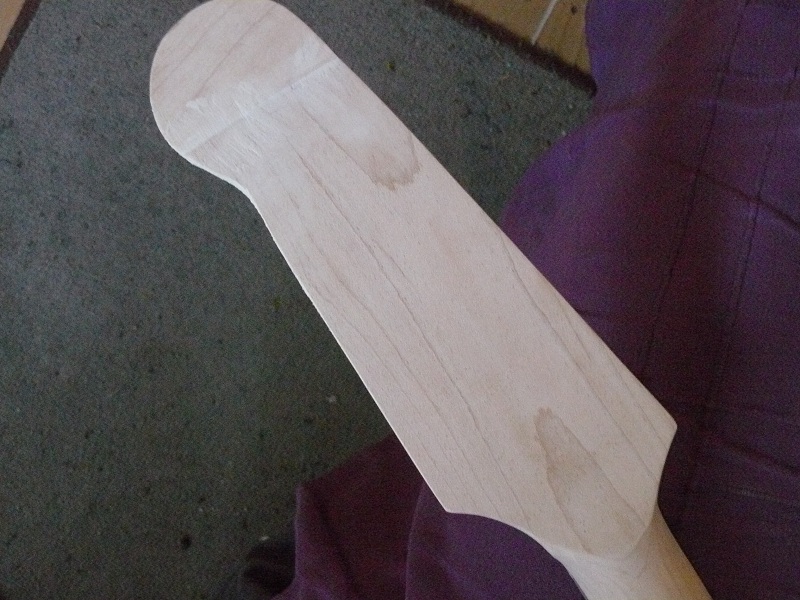
Anyway, done some more sanding on it today although it still needs a bit more to sort it out properly, and I'm going to buy the sprays tomorrow for starting on the finishing soon. By "soon" I mean as soon as I get over my fear of starting on the second-scariest step. I dunno why; I can always just sand it down if it goes tits up. But still. It's kinda scary.
Posted: Mon Nov 28, 2011 4:40 pm
by ekwatts
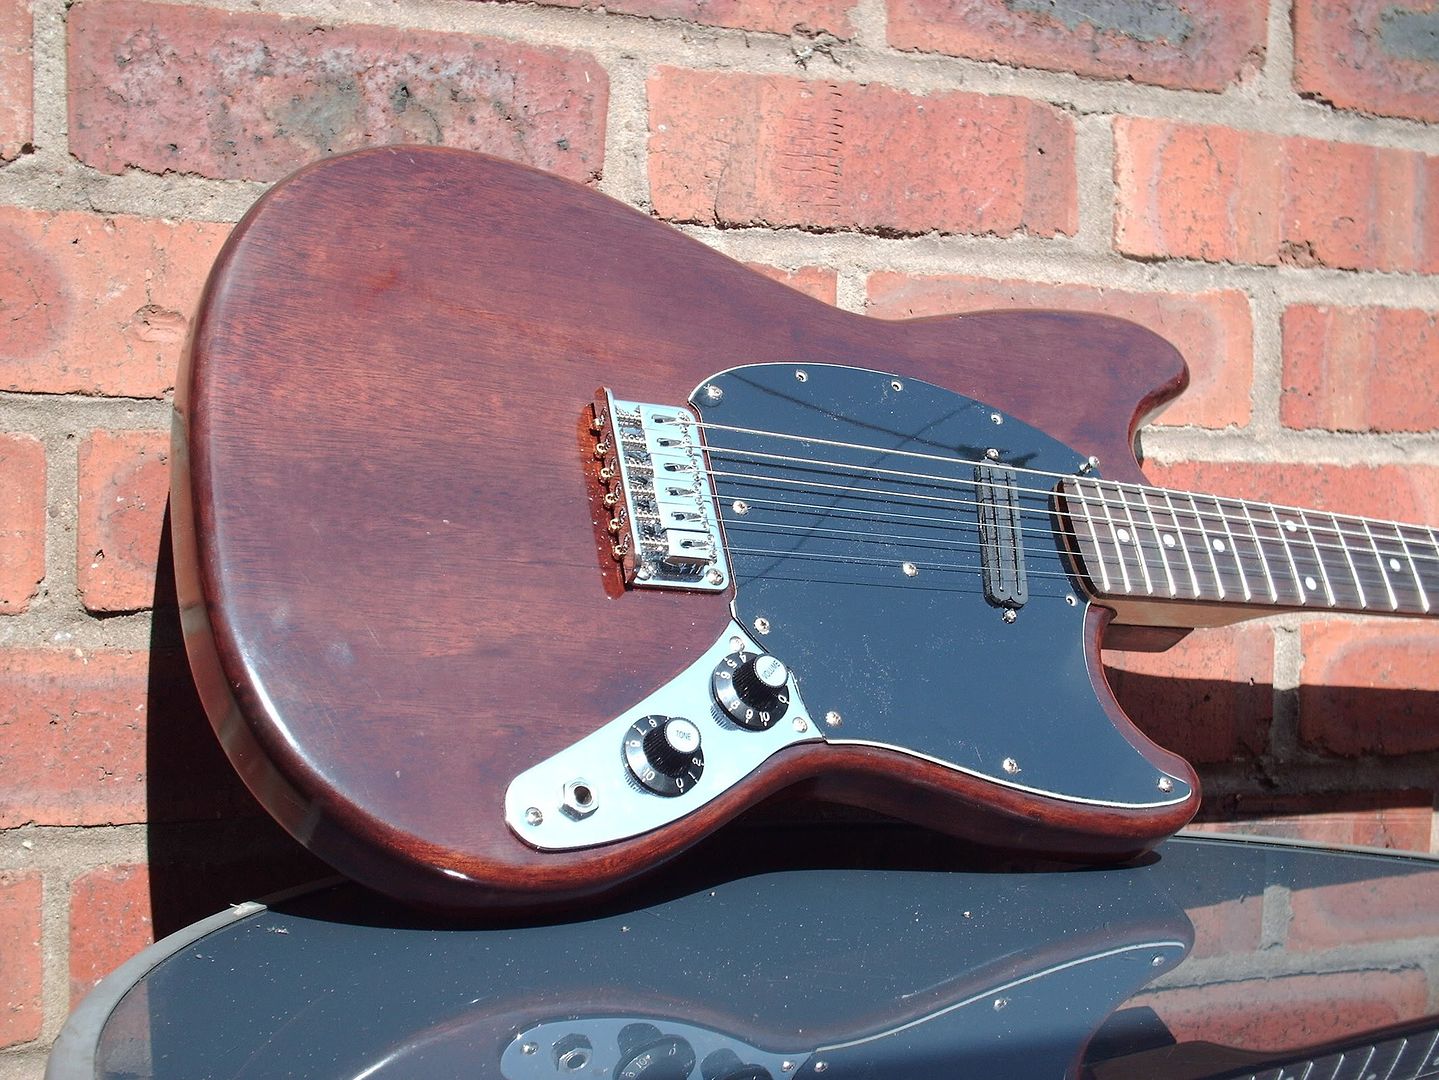
Welp, I'm just not happy about how the front was turning out. I've spent the last couple of weeks sorting the headstock out, applying filler, sanding it, dolloping more filler on, sanding it, sticking in some more filler, etc. So I went back to the body with a fresh pair of eyes and just said "No."
The bigsby won't sit correctly with the bridge having moved it forwards to cover the holes where the screw snapped off; the strings rub against the edges of the roller tunomatic. So I'm having to move it further back, revealing all the shitty marks and fuckups I made trying to fix it up. It only shows up really when you have your face within a good foot of the body, but it's still there and I know about it so I've decided I'll be painting the front black. As such, I decided to darken down the mahogany too with a nice stain:
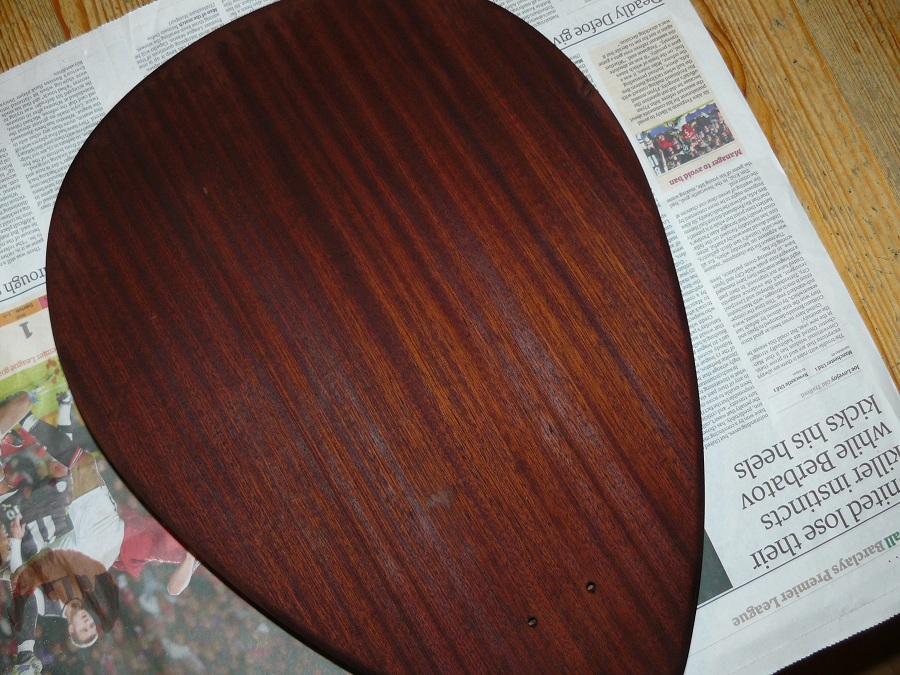
Ooooh! Seductive. It looks immediately better. Next step is the sanding sealer, then the black, then the gloss. I'm fucking bricking it. Never done a guitar finish before. This is where it could ALL GO WRONG. Also, I'll probably be spraying the neck black, too, apart from the front of the headstock, which will remain the planned pearloid.
Posted: Mon Nov 28, 2011 6:00 pm
by Pens
Eh, can you detail how bad the front is? I didn't notice anything wrong in the pictures that couldn't be covered up with that dark stain.
Posted: Mon Nov 28, 2011 6:59 pm
by ekwatts
I've tried taking pictures but none of it really seems to come out very well. It's mostly the filler I used around the soundhole binding as well as the filled screw holes from the previous bigsby placement that are the main culprits. I'd already stained it and it brought them out even worse, and it seems to be the kind of thing that comes out even worse when under proper lighting, which usually means the gloss nitro will make it look ghastly, I expect. So I'm going the route of a black Gretsch a friend bought recently which had a lovely dark mahogany back to complement the dark finish on the front. Black was always my backup plan anyway. It's going to look like a tuxedo.
Posted: Mon Nov 28, 2011 10:14 pm
by Addam
Tell me about the processes you did on the back of that body. That grain had a nice streaky look to it.
What shade of stain did you use?
What kind, if any grain filler?
On this I used Colron wood filler and Colron 'Indian Rosewood' wood dye.


Unlike oil based grain fillers that repel the stain, this stuff drinks it, making the pores darker and I reckon more natural looking.
Wood is weird, looks smooth as anything until you start spraying anything on it.

Posted: Mon Nov 28, 2011 10:46 pm
by Pens
Okay, well I honestly think black would look pretty nice as well.
One question, where did you get that neck? I didn't see you mention that in the thread.