Page 5 of 6
Posted: Mon Jan 23, 2012 3:01 am
by wantsasupersonic
wantsasupersonic wrote:mkt3000 wrote:Out of curiosity, how much of your build is based off of a stock unmodified supersonic (for replacement part purposes for my own SS)?
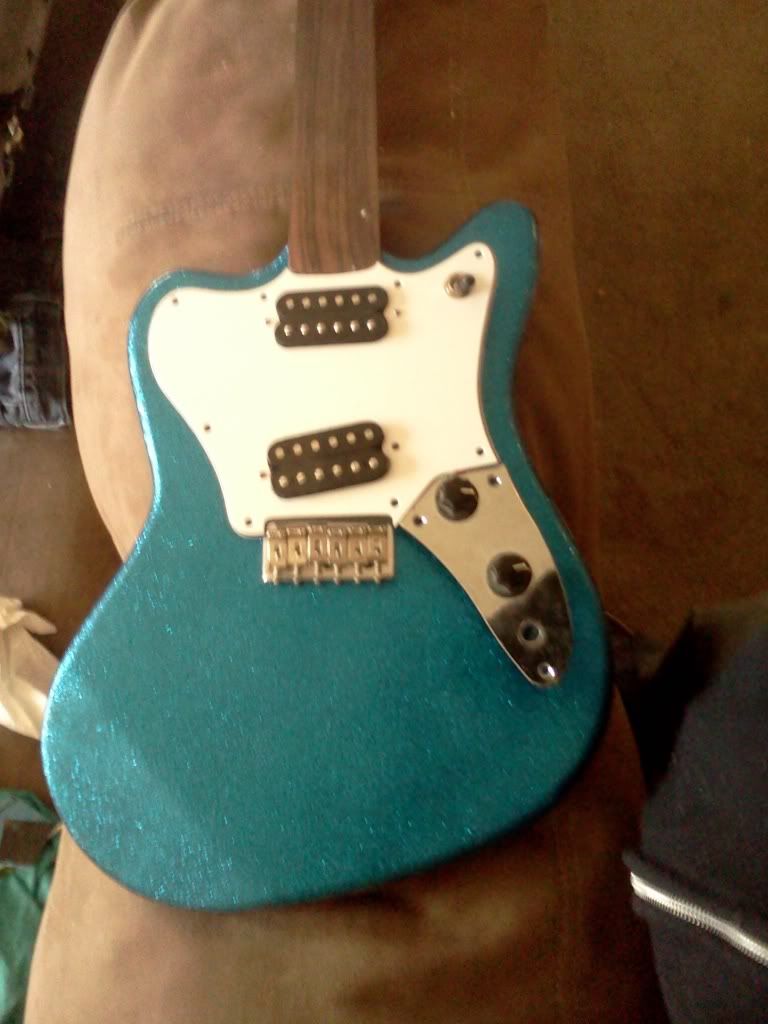
Not sure what you mean exactly. I got the jackplate from wadeaminute (hope I spelled it right ). But from now on I will machine my own. I have a couple connections for plating. The pg was not original, just a flat black replacement I got from e bay. I have no super sonic nor have I even seen one I person. I used pics from Google and 3 or 4 programs to make templates.
Basically if you needed a pg, Jack plate, I could make them and they'd fit a stock SS. Or maybe talk to wade. As for a neck mine is the right scale and may or may not fit a stock SS. With an original neck I could clone it.
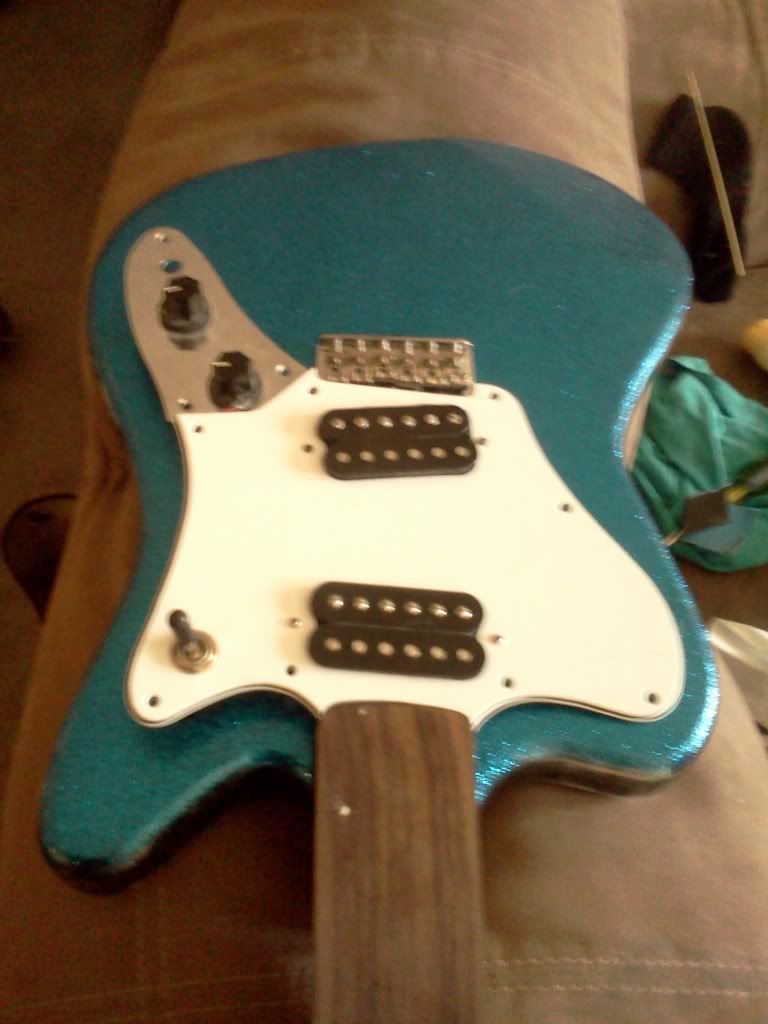
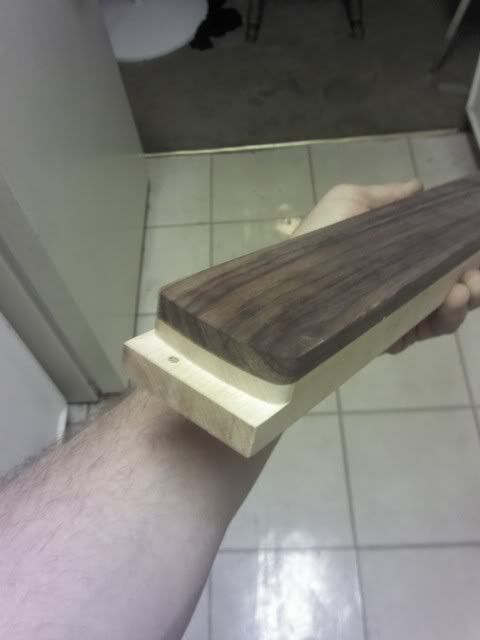
BTW here's my heel. I don't think I've posted these yet.
Anything else is off the shelf items, I'm lucky enough to live very close to about six guitar shops and have made friends with them and they trust me to the point that I can dig thru there parts bins and either make a fair offer or they charge me at there cost so I don't usually have to wait on shipping for most stuff.
Posted: Mon Jan 23, 2012 3:07 am
by wantsasupersonic
My heel is routed deeper than a stock SS. I did this for a reason, which ill reveal later.

Posted: Mon Jan 23, 2012 7:32 am
by wadeaminute
wantsasupersonic wrote:My heel is routed deeper than a stock SS. I did this for a reason, which ill reveal later.
Tease!
I hope to make one myself one day. I'm jealous of this project.
I sent a pickguard to somebody...
Posted: Sun Jan 29, 2012 4:44 am
by wantsasupersonic
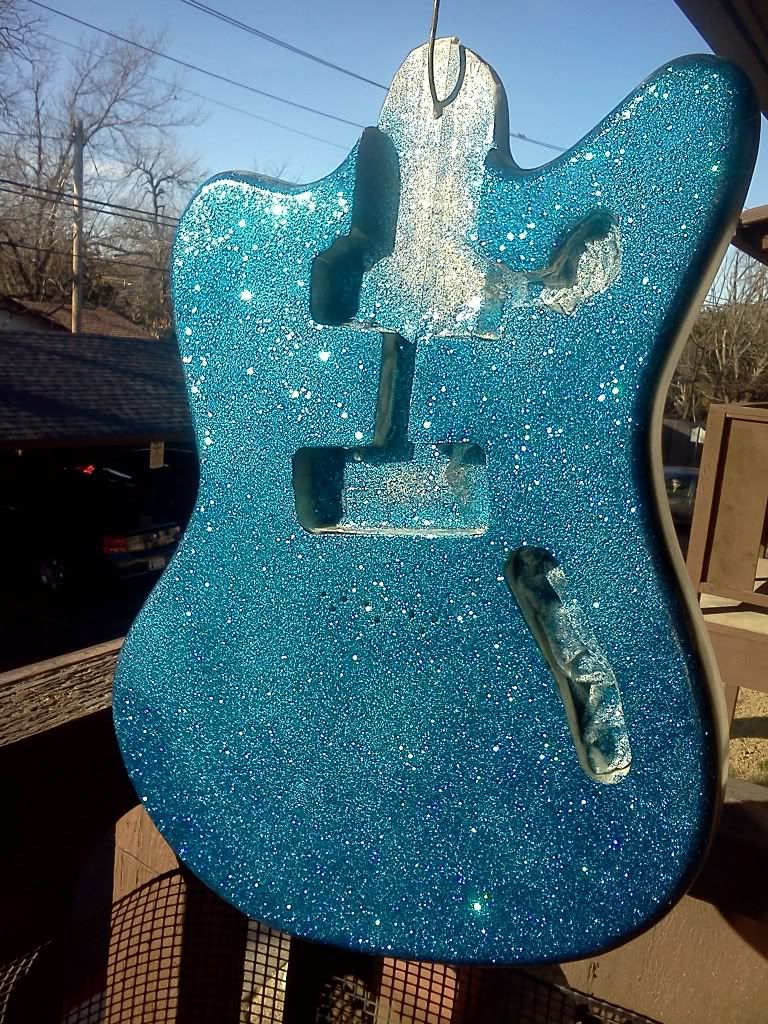
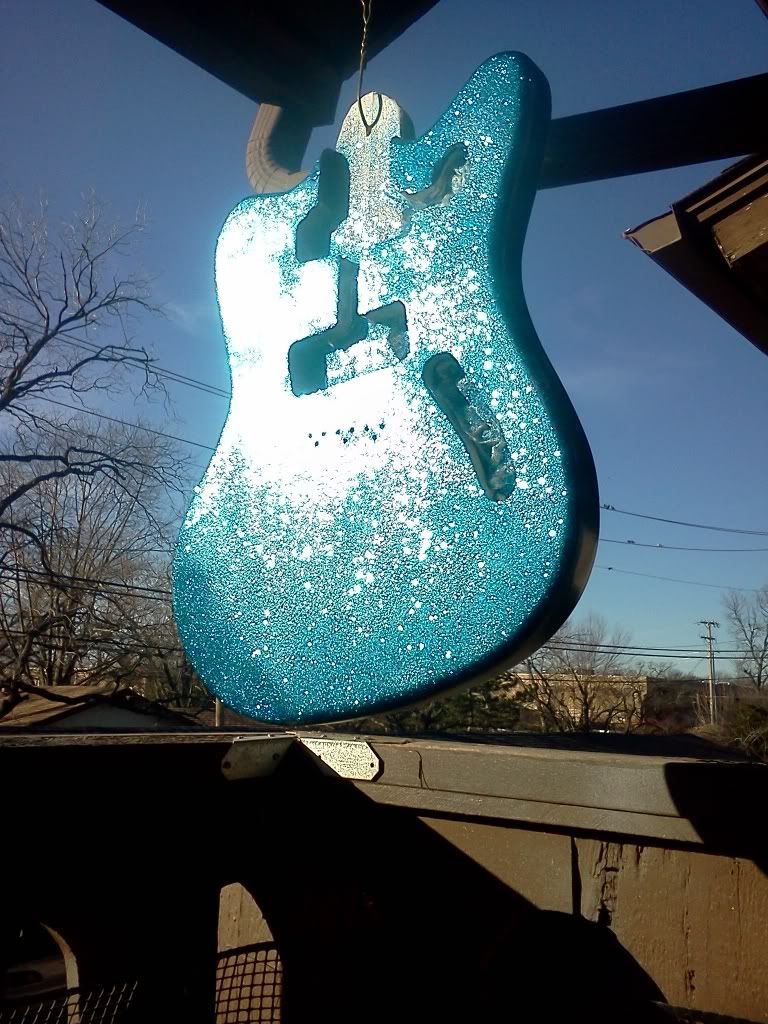
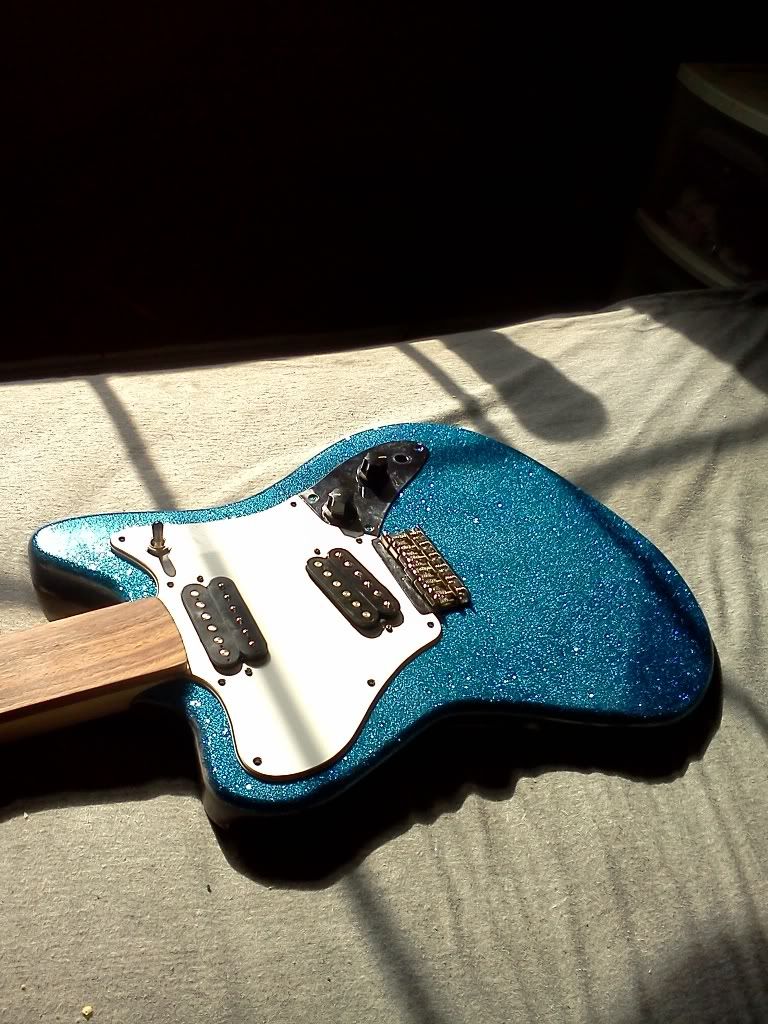
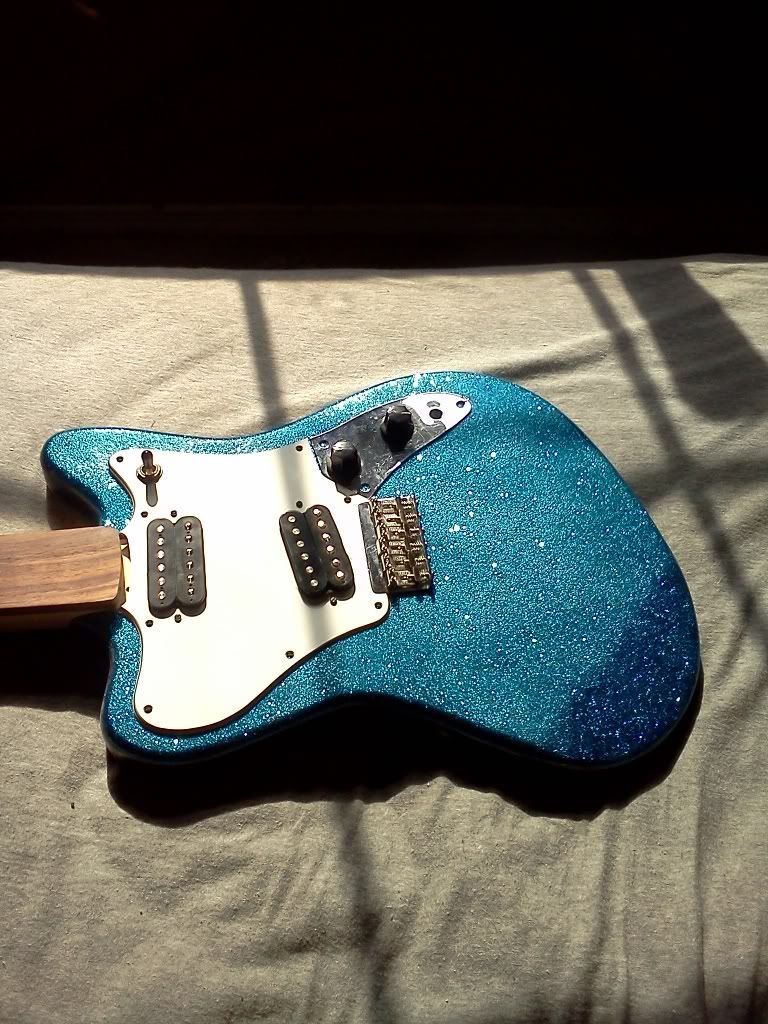
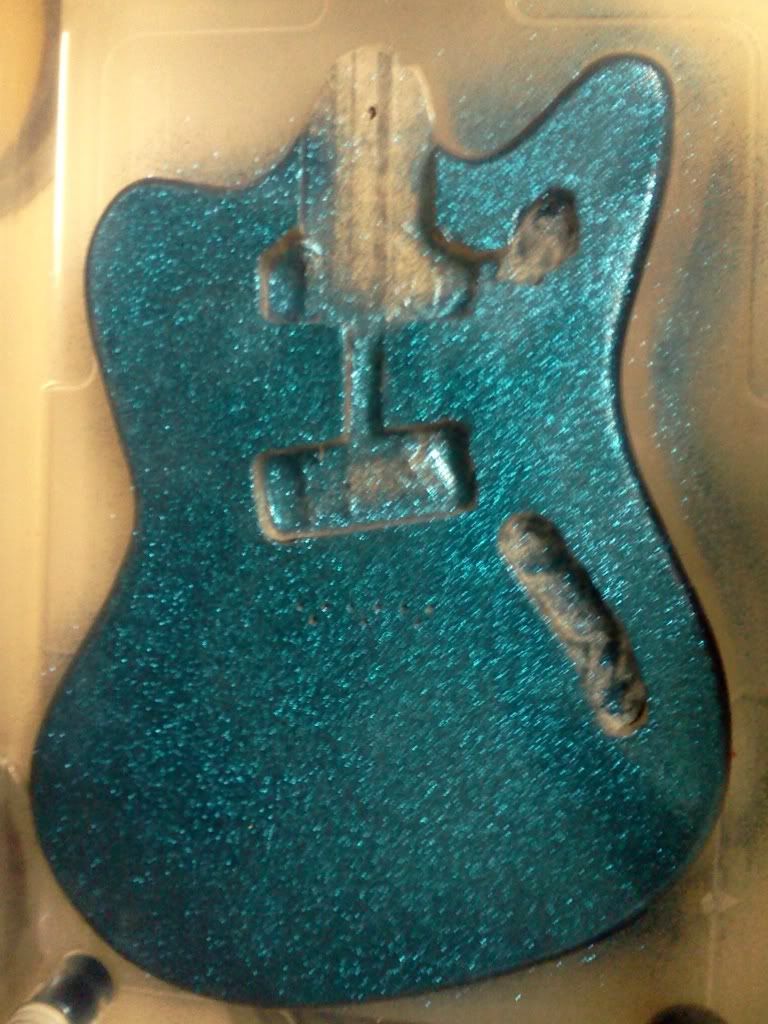
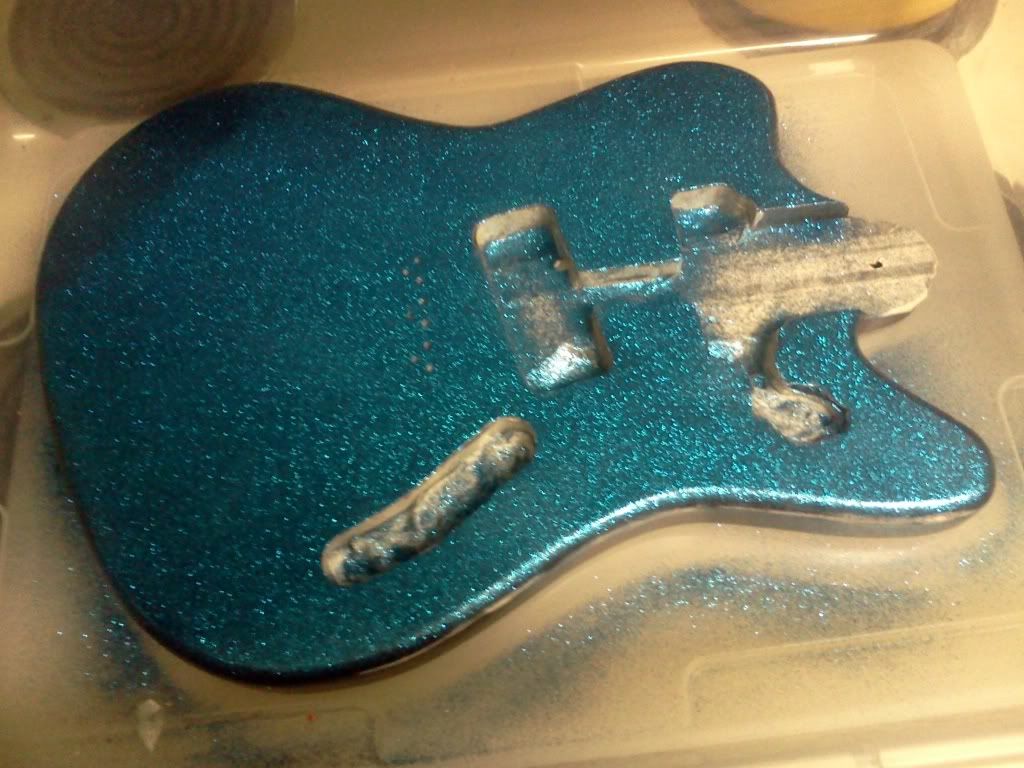
Super shitty cell pic. Shot one side of the guitar today. After experimenting I found to keep the runs at bay I needed to shoot onto a level surface. I'm sure if I could fine tune all the variables this wouldn't be necessary. Flow rate, pressure, ratios all factor in. I keep wanting to spray to keep the flake even, but then I get runs, also I have to shoot thinner than usual thane witch makes for even more runs. Glad I practiced before going for it.
I promise quality pics of the finished project
Posted: Sun Jan 29, 2012 4:46 am
by wantsasupersonic
The color is way off in this pic BTW.
Posted: Sun Jan 29, 2012 5:47 am
by wadeaminute
Cool.
Posted: Sun Jan 29, 2012 6:18 am
by wantsasupersonic
Gravity also helps lying the flake down mostly flat. Another shot an hour later. Don't know if you guys can tell from these pics but the flake lies down giving it a more smooth look. Let it set over night in the oven @ 140f it should be more than ready to handle and move to the back, then on to the sides. Then it will be time to see how many coats of thane it will take to seal in the flake and still have a margin for error. Don't want to wet sand down to the flake. It will take the blue off and ill end up with silver spots in the blue.
Posted: Sun Jan 29, 2012 6:21 am
by wantsasupersonic
wadeaminute wrote:Cool.
thanks man. Couldn't have done it without you.
Posted: Sun Jan 29, 2012 7:29 am
by taylornutt
wantsasupersonic wrote:Super shitty cell pic. Shot one side of the guitar today. After experimenting I found to keep the runs at bay I needed to shoot onto a level surface. I'm sure if I could fine tune all the variables this wouldn't be necessary. Flow rate, pressure, ratios all factor in. I keep wanting to spray to keep the flake even, but then I get runs, also I have to shoot thinner than usual thane witch makes for even more runs. Glad I practiced before going for it.
I promise quality pics of the finished project
What flake spray are you using?
Posted: Sun Jan 29, 2012 8:10 am
by Zack
This is looking great man, nice sprakels
Posted: Sun Jan 29, 2012 1:55 pm
by wantsasupersonic
taylornutt wrote:wantsasupersonic wrote:Super shitty cell pic. Shot one side of the guitar today. After experimenting I found to keep the runs at bay I needed to shoot onto a level surface. I'm sure if I could fine tune all the variables this wouldn't be necessary. Flow rate, pressure, ratios all factor in. I keep wanting to spray to keep the flake even, but then I get runs, also I have to shoot thinner than usual thane witch makes for even more runs. Glad I practiced before going for it.
I promise quality pics of the finished project
What flake spray are you using?
I use nason (Dupont) select clear, and activator mixed at a 2 to 1 ratio and 2 parts kustom shop. 008 hex flake and use my Frankensteined togeather spray rig and a cheapo gun with a oversized nozzle. I pieced together my whole rig for under $75. It can be done. Its more economical than rattle cans if you plan on doing more than 5 guitars. Nothing wrong with rattle cans, still use them occasionally. This guitar is polyurethane due to the thickness of the clear I need. Nitro would take years to build up to the thickness. Would also yellow and change the final color of the guitar. Not to mention the margin for error with nitro. I can wet sand poly the next day, as to nitro at least 30 days.
Posted: Sun Jan 29, 2012 1:58 pm
by wantsasupersonic
Goots. wrote:This is looking great man, nice sprakels
thank you. It will look a lot better once its done.
Posted: Sun Jan 29, 2012 2:05 pm
by wantsasupersonic
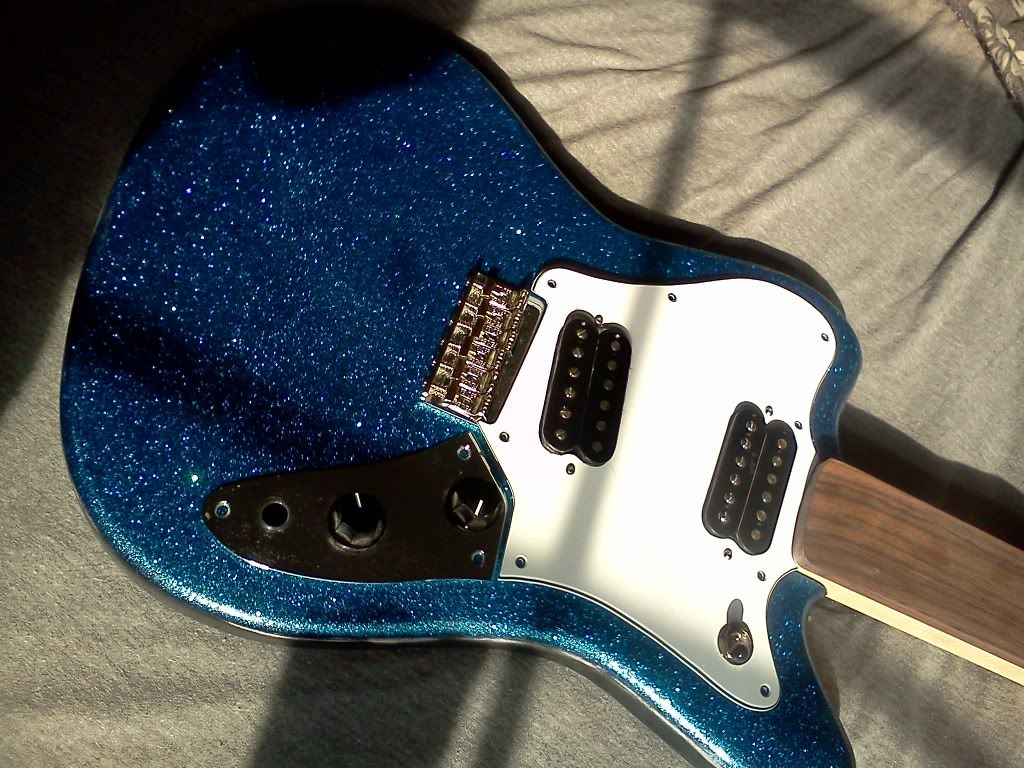
You guys with ss's, what's your opinions on strap button locations? Factory in the neck plate, or move it to the upper bout?
Posted: Sun Jan 29, 2012 3:46 pm
by wantsasupersonic
Posted: Sun Jan 29, 2012 4:05 pm
by BillClay
that thing is getting to look hot as fuck
Posted: Sun Jan 29, 2012 5:14 pm
by wadeaminute
wantsasupersonic wrote:You guys with ss's, what's your opinions on strap button locations? Factory in the neck plate, or move it to the upper bout?
I switched my strap button location on my first one when I got it in 1998 to the upper bout. Bad move. Guitar did not balance well. Big neck dive. Now I keep the strap buttons on the neck plate. I think many people must try the move, as a few others that I have bought also have holes there, but when I got them the strap buttons were back on the neck plate. My white one actually has holes on the top and bottom bouts.
I would try the neck plate first. That way, no hole in the nice paint. Plus, it looks more upside-down that way.
Posted: Sun Jan 29, 2012 5:39 pm
by wantsasupersonic
wadeaminute wrote:wantsasupersonic wrote:You guys with ss's, what's your opinions on strap button locations? Factory in the neck plate, or move it to the upper bout?
I switched my strap button location on my first one when I got it in 1998 to the upper bout. Bad move. Guitar did not balance well. Big neck dive. Now I keep the strap buttons on the neck plate. I think many people must try the move, as a few others that I have bought also have holes there, but when I got them the strap buttons were back on the neck plate. My white one actually has holes on the top and bottom bouts.
I would try the neck plate first. That way, no hole in the nice paint. Plus, it looks more upside-down that way.
In the neck plate it is. Thanks for the info.
Posted: Sun Jan 29, 2012 6:45 pm
by wantsasupersonic
Posted: Sun Jan 29, 2012 7:51 pm
by jamba72
great build..great color..
how will you do the neck radius?
Posted: Sun Jan 29, 2012 10:32 pm
by wantsasupersonic
jamba72 wrote:great build..great color..
how will you do the neck radius?
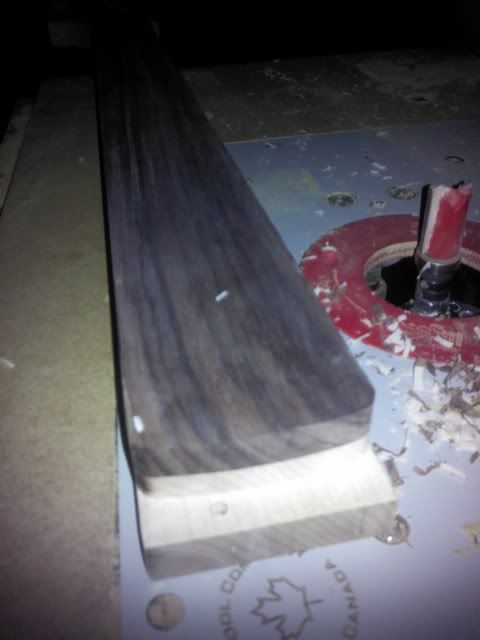
I have radius blocks. I'm a 12'' radius Guy. I'm working out a all in one jig for truss routing, radius, fret slotting, planing, because this is my first short scale neck I wanted an all in one jig. Pics and a video on this to come. Still have mods to make and math to do on it.