Page 1 of 2
Telecaster to Tele Custom Build
Posted: Sat Sep 05, 2009 8:45 pm
by brandon.
So over the past year I've been collecting some cheap and decent telecaster parts with the hope to put together a cheap tele custom. I found the neck on craigslist for $75cdn and I got the body (a cheap tele copy) for $20. I ordered a custom pickguard for $30 from warmoth on monday and I got it yesterday, which I think is pretty great.
Anyways, I've been taking some pictures as I'm putting this thing together and thought maybe you guys would want to take a look...
I'm no photographer...
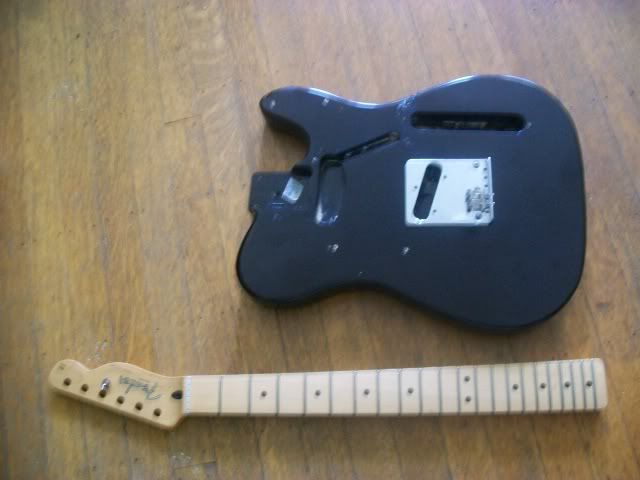
The body and the neck
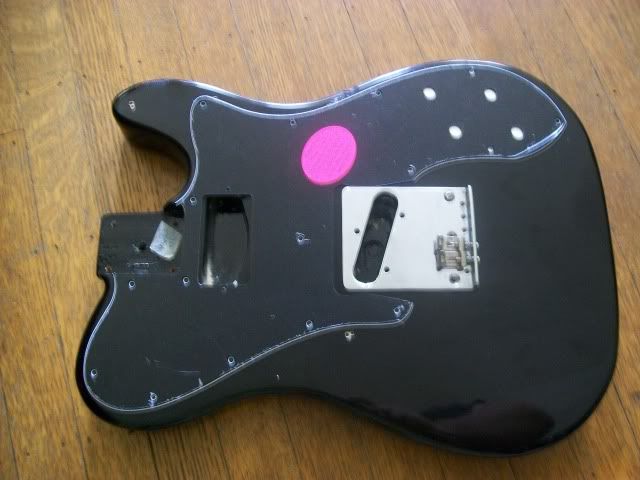
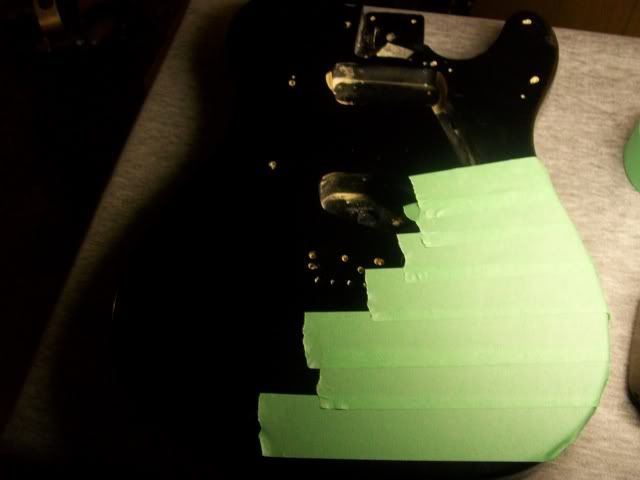
The body with the pickguard (glad that it fits so well)
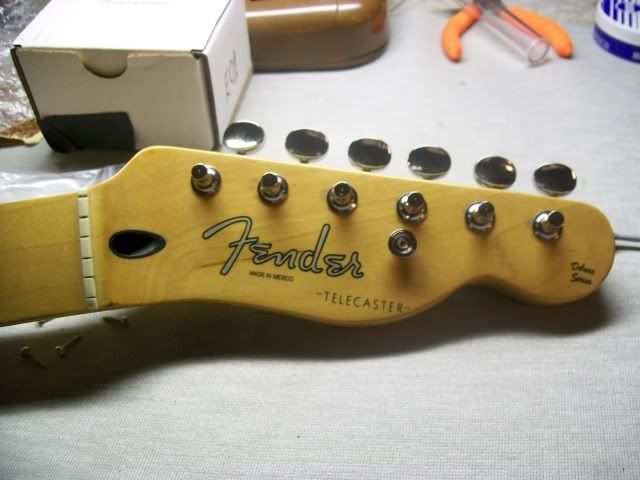
Here's the headstock after I installed the tuners, I was really pleased with how easily everything was coming together. No problems with the bushings or pickguard alignment.
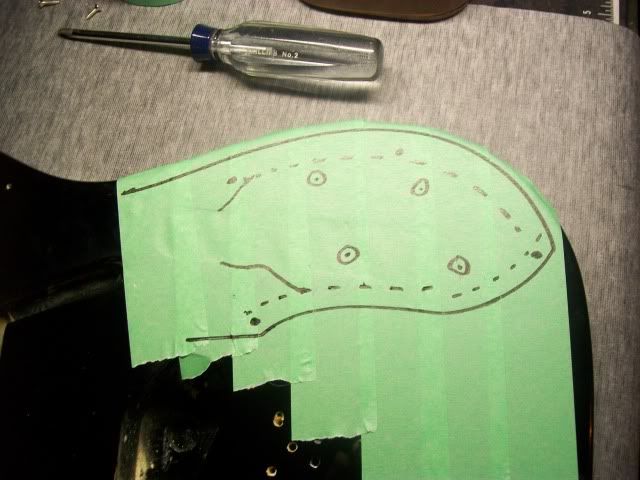
Here's where I marked out what needed to be routed...
So I plan to get the pickup cavity and control cavity routed later today and then I just have to wait for one more package from GFS and it'll all come together.
Thanks for looking!
Posted: Sat Sep 05, 2009 9:10 pm
by robert(original)
very cool, was that neck re-branded?
Posted: Sat Sep 05, 2009 9:11 pm
by paul_
Nice.
I did this too with one of those original GFS bodies but did a reet shitty job of the control cavity route.
I see you're not going with toggle switch, will save you heaps of routing. Hows it gonna be wired up? Master tone and a 3-way switch in one of the lower holes?
Posted: Sat Sep 05, 2009 9:42 pm
by brandon.
I was told the neck is just a stock mexican neck, but I suppose it could have been rebranded...
either way, the neck feels and looks fantastic with brand new frets and the price couldnt be beat.
as for the toggle, I never like them on the upper bout, so I figured I'd wire this up with whatever parts I have at the moment.
I haven't really decided how I want the wiring to be...
my volume is always on 10 so I was thinking maybe 1 master volume and 2 tones and possibly a switch? or maybe 2 volumes and 2 tones straight to the jack?
if anyone has any interesting ideas to fill the 4 holes, let me know
Posted: Sat Sep 05, 2009 9:51 pm
by robert(original)
might as well do the 2 tone 2 volume straight to jack idea.
Posted: Sat Sep 05, 2009 10:02 pm
by Mages
volume, tone, and an on/off switch for each pickup.
Posted: Sun Sep 06, 2009 6:34 pm
by brandon.
so I'm planning on routing the control cavity today...
I don't have the right amount of tools to do a "nice" job,
does anyone have any tips on getting a free hand control route to look nice?
any make-shift fence ideas I'm missing?
the guard on a tele custom is so big, im not too worried about how it'll look, I just figured I might as well ask before I fire up the tools. I plan on using an old candle to make an outline of wax around the perimeter of the guard so I know what won't be seen.
Posted: Mon Sep 07, 2009 1:19 am
by DGNR8
What are you using? I wonder if a big drill bit in the corners would work for something like that. I have gotten pretty handy with a sharp chisel plus sandpaper. It would take a lot of patience. And a Dremel.
I just made a acoustic guitar bridge using a Dremel and a drill. It's SICK!
Posted: Mon Sep 07, 2009 4:23 am
by robert(original)
lay masking tape over the entire top of the guitar.
lay the guard on, trace it.
remove guard.
and rout away, no one will see it so no worries, and its for yourself so you are the only person who it really matters to.
Posted: Mon Sep 07, 2009 1:57 pm
by cur
First off make sure that the body of the guitar is secure and can't budge. If I were to rout this freehand I would make several passes. Each getting successively deeper. Finally, leave about an 1/8 of an in inch, or so, between the final line. bore out the center of the pickup hole first. When you get it to the correct depth, then try and go to the line. Or alternatively you could use a hand chisel to do the edges.
If you have a router than I would assume you would have enough other bits of scrap wood or plywood sitting around to make a template jig. Even having one straight edge as a guide would be better than freehand.
Most of all, USE THE FORCE.
Posted: Mon Sep 07, 2009 3:18 pm
by brandon.
robert(original) wrote:lay masking tape over the entire top of the guitar.
lay the guard on, trace it.
remove guard.
and rout away, no one will see it so no worries, and its for yourself so you are the only person who it really matters to.
Awesome, I'll do this.
I just moved to a new place and recently found out I could use the basement as a workshop, so there isn't much scrap wood or enough tools and clamps to get the thing done so it looks nice.
Thanks for the other advice too!
Posted: Tue Sep 08, 2009 12:09 am
by brandon.
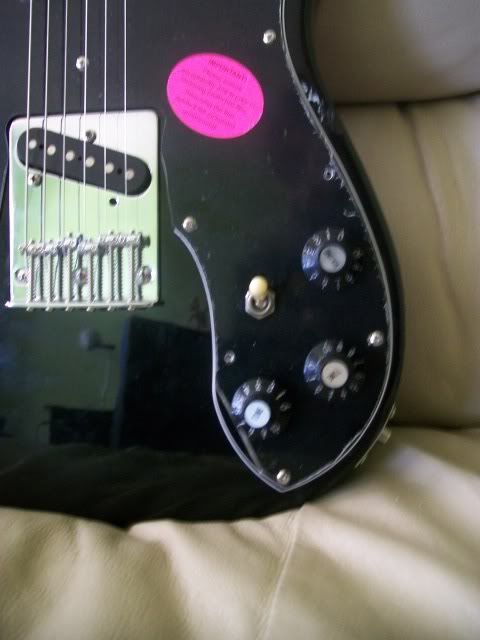
alright, so the control cavity is almost done, here are some pictures...
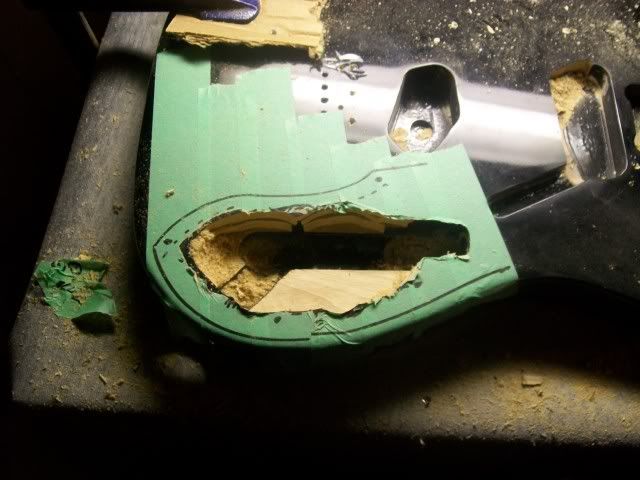
super sloppy, but totally functional.
just have to clean it up and make sure everything fits nicely... have to get myself a shop vac soon.
Posted: Tue Sep 08, 2009 1:29 am
by bassintom
Haha..That looks like some of my guitars.I don't have a router.I routed one a little with a hammer and a screwdriver.
Posted: Tue Sep 08, 2009 1:31 am
by brandon.
hey hey hey...
the picture looks extra-bad, I think I did slightly better than a hammer and screwdriver job, haha
I'll take a better picture when I clean it up.
Posted: Tue Sep 08, 2009 8:42 pm
by Joey
Everybody got a drill... be it cordless, electric or press. Spade bit sets are cheaper then $8 for a half assed set. I use spade bits to remove most of the wood I want to remove before I hit the area with a router to clean up. I rather throw away a cheap $0.50 spade bit, then a $25 router bit. I ususally trim the center pilot tip on a spade bit down some, so I don't go thru the back of the guitar by mistake.

Spade bit, pictured on top

Posted: Thu Sep 10, 2009 6:47 pm
by brandon.
just finished this today...
Here's a picture of the routed out cavity after it's been cleaned up, it doesn't look so bad to me...
the body was scuffed and bruised before I bought it.
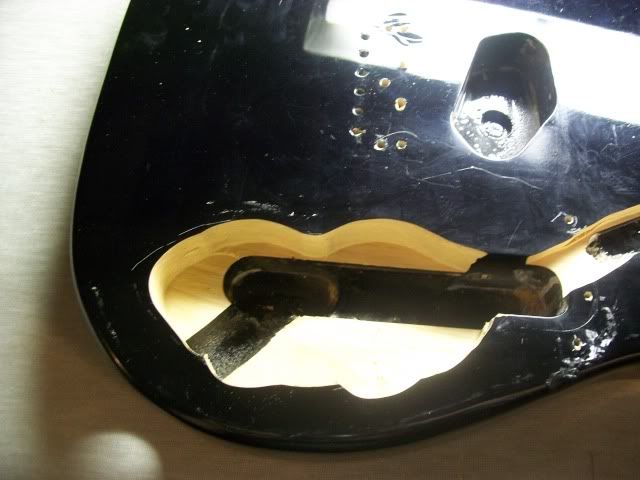
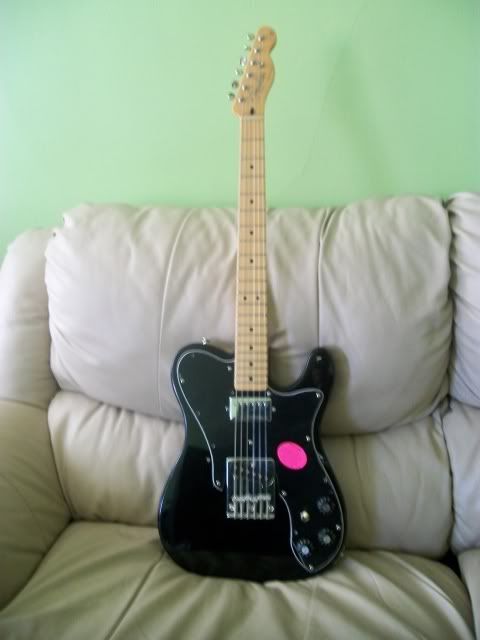
the control scheme that I settled on is a 1 volume 2 tone + 1 switch
works great for me, keeps everything out of the way.
the pickups are just space fillers at the moment, there's a squier bridge pickup
and a epiphone les paul neck humbucker. I'm eventually going to try one of the gfs retrotron humbuckers in the neck
and I'd love to get another fatbody bridge pickup.
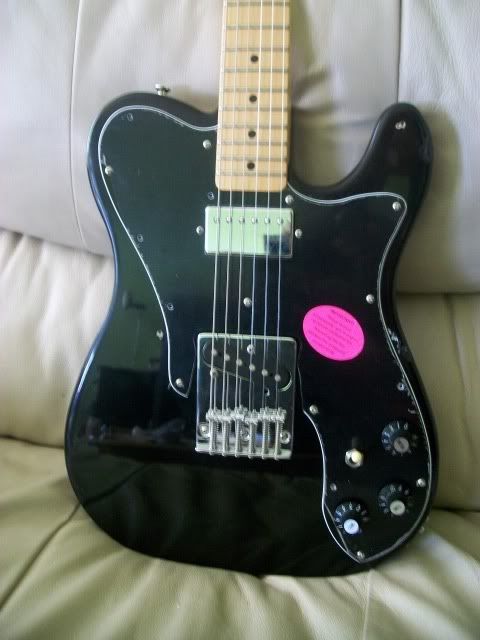
all the guitar store had were 11-49s, so it doesnt feel so great at the moment, but once it has some heavier strings I'll be sitting pretty.
super fun assembly, thanks for taking the magical journey with me!
Posted: Thu Sep 10, 2009 7:59 pm
by hotrodperlmutter
that looks fantastic. really loving that color combi.
Posted: Thu Sep 10, 2009 8:11 pm
by Mike
Great work on the route, looks very clean.
Also in Robroe parlance, the toggle switch in that place is complete bonerpants.
Posted: Thu Sep 10, 2009 8:35 pm
by Thom
Excellent work, looks great. Liking the configuation.
Posted: Thu Sep 10, 2009 8:37 pm
by JamesSmann
Thom wrote:Excellent work, looks great. Liking the configuation.
+1...too much black for my personal tastes really, but i like the work done, and it definitely looks good!