The Billy1802t

Painting? Routing? Set-up tips? Or just straight-up making a guitar from scratch? Post here, and post pics!

Moderated By: mods

User avatar
cur
.
.
Posts: 7298
Joined: Sun Jan 18, 2009 8:58 pm

The Billy1802t

Post by cur »

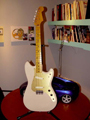
Started working on the Aria 1802t that I received from Billy3000. Ordered a bunch of parts from Guitarfetish.

First off, I did some overlays with an intact Aria 1802t to figure out the shape of the horns. Then I made a 1:1 scale print out for reference. I also doubled up a 1"x4" basswood blank for the horn restoration.
► Show Spoiler
As you can see, I was able to do a pseudo trace on the guitar of where the picguard was by following the 40 yr crud trail left on the finish. I did a wax paper trace of this with a pencil. Also, as fate would have it, portugalwillie picked up an Epiphone Electra and was kind enough to make me a PDF of the PG trace. It was not exact to the Aria, but close and I was able to make a chimeric pattern.
► Show Spoiler
Then I stripped the body, (neck was already stripped so I oiled the fret board and then applied lots of coats of Danish oil to it). I used some gel stripper that I had on hand and all it did was shine up the clear coat to its original shape. Tough stuff. I then bought some spray foam stripper that was also more broad ranged. Did not think this would work, but after 30 minutes I got some blistering. Took a lot of experimenting, on the back side of the body, but I finally figured it out. When I flipped it and did the front, I took my orbital sander with 80 grit until I was getting through the clear coat (1/16 th of an inch or so). Then the spray stripper could get the get under the clear coat and lift it up. Also found out that the body is 7/8" mahogany sandwiched with 1/4 inch maple (front and back).
► Show Spoiler
I am waiting a couple of days for the Danish oil to set and then will clear coat the neck with high gloss lacquer. In the meantime, I traced the PG pattern on some 1/2" cabinet grade ply that I had left over from the closets I built in my bedroom. Nice stuff and no voids. Made a rough cut with jig saw and then took it to the orbital spindle sander. to smooth it up. Then hand sanded the rest of the imperfections.

► Show Spoiler
Well, that's about where I am for now. Next up, rebuild the horns. If I am lucky I can get some more work done over my break, but since I was sick the week before the holidays, I have to finish my presentation for work down in Orlando next week. I would have loved to be able to shoot paint this weekend. The weather is supposed to rise to the mid 60's for a day or two.

Image
Image
User avatar
hotrodperlmutter
crescent fresh
Posts: 16665
Joined: Sat Apr 04, 2009 10:29 pm
Location: Overland Park, KS, USA

Post by hotrodperlmutter »

you may have said in the description, but where'd you get that trem unit? did billy send it with?

fucking stoked to see this work out, dude!
dots wrote:fuck that guy in his bunkhole.
User avatar
cur
.
.
Posts: 7298
Joined: Sun Jan 18, 2009 8:58 pm

Post by cur »

Yes, the trem was with it. No arm, but once I figure out the thread pattern I might be able to die thread one with some rod. I got butchered up body, neck and truss rod plate (looks like Gibson style) and trem. I bought a neck plate from GFS, but the hole pattern is different. So I will probably have to fab one from some stainless plate. Would be nice to find one the correct size with nickel plating. Have not found anything on ebay. If anyone has ideas about where to get one or has one with a 1.25" by 2" hole pattern I will trade for a shining fresh fender style one.

I am also trying to source some nickel plated machine bolts that where missing from the trem. 4-40 machine 3/8 screw (pan head philips with tapered head) and a stray one for the saddles that was wrongly replaced. Have been to several hardware places but no luck.

Image
Image
User avatar
Billy3000
.
.
Posts: 3033
Joined: Thu Apr 20, 2006 3:16 am
Location: Atlanta

Post by Billy3000 »

Wow! That bridge shined up nicely! You made a lot of progress on it really quickly! I'm really excited to see it being put to good use! It looks like the finish came off pretty well too! You'll have to let me play it when you get it all restored to glory!

For the neck plate, they came with the same "steel adjustable neck" plates that all the guitars that came out of that factory under tons of different names during the 70's had. You might be able to find one on ebay.
User avatar
cur
.
.
Posts: 7298
Joined: Sun Jan 18, 2009 8:58 pm

Post by cur »

OK I just looked on ebay for "teisco neck plate" and found one that will work. May pop into Harry's guitar shop and see if they have one on hand. They have a lot of old bits and pieces laying around and are cool for helping with this kind of stuff.

Image
Image
User avatar
cooter
.
.
Posts: 1257
Joined: Thu Nov 30, 2006 1:42 pm
Location: Blue Ridge, GA
Contact:

Post by cooter »

I'm so glad you're making a thread on this project. I have a few parts from MIJ Teiscos, Univox and such. Let me know if you run into a dead end on parts and I'll go through what I have. May not have what you need but if I do I'll donate it to the cause.

I do have a few 1 1/2" thick poplar scrapes lying around if you want them for the horns but it looks like you have that handled already.
Smells like Rock n' Roll
User avatar
Gabriel
.
.
Posts: 3178
Joined: Sun Apr 11, 2010 8:46 pm
Location: NYC

Post by Gabriel »

Cant wait to see how this is going to turn out.
User avatar
Billy3000
.
.
Posts: 3033
Joined: Thu Apr 20, 2006 3:16 am
Location: Atlanta

Post by Billy3000 »

cur wrote:OK I just looked on ebay for "teisco neck plate" and found one that will work. May pop into Harry's guitar shop and see if they have one on hand. They have a lot of old bits and pieces laying around and are cool for helping with this kind of stuff.
Harry's does have a lot of bits and pieces lying around and the tech there, Terry, is really cool and always willing to help you find what you need if you can. I would even say ask guru because they do work on a lot of those oddball guitars!

There was also another shop when I worked on my bronco, it was right around the corner from Harry's in the basement of an office building. They did tech work and repairs on all stringed instruments, and they had a huge bin of odd parts, but I don't think they are there anymore unfortunately.
User avatar
cur
.
.
Posts: 7298
Joined: Sun Jan 18, 2009 8:58 pm

Post by cur »

Well I got my presentation for next week squared away. I kept putting it off then got motivated. Then realized you should not update to the newest version of powerpoint when crunch time is on. Since that is done, I could spent more time on the refinish.

It was nice out this weekend here in North Carolina, so I was able to lacquer the neck. I did quick sand of the neck since it was already stripped. I did not sand out all of the 40 yr mojo but helped it out a bit. Started off with 4 thin coats at 1/2 hr dry time between coats. Let dry overnight and then sanded down good to 800 grit. Then hit it with 3 more coats and sanded again. Then a final 2 coats with no sanding. The neck is feeling great, but still has some of the vintage dings and blips.

Now onto fitting it out. As you can see here. Someone used an ice pick or a bent up crack pipe to try and widen the tuner holes. Nothing I could do about it but go up to 10mm holes since no original bushing would fit it. This gave me an excuse to buy an 25/64" drill bit (I can keep it in my guitar tool box for special use). Fixed the problems and then I could use the GFP conversion tuner bushings. BTW GFS is great of this kind of stuff and the parts are real nice quality.

► Show Spoiler

Since there were what looks like two different styles of tuners already used on this neck; I concluded from the screw hole pattens left behind. I wanted to cover them up with out too much fuss. I popped into Harry's Guitar shop because the have lots of old parts and will let you look through old coffee cans for bits you need. They did not have the neck plate I needed, but they had some budget chromed tuners that I had been looking to get on line from all parts. So I picked them up because I thought they looked kind of period correct and would cover up most of the screw holes. Put it all together and have been carrying it round the house making all the kids touch it and admire it :lol:
► Show Spoiler
And a couple more for fun.
► Show Spoiler
Well when I get back from FLA, I plan to start fixing the butcher job on the horns.

Image
Image
User avatar
Mages
súper crujiente
Posts: 7454
Joined: Wed Mar 26, 2008 8:34 pm
Location: MD
Contact:

Post by Mages »

yeah, those tuners are probably very similar to the ones that were on it originally. they are the classic budget MIJ tuners. easily noticed by their parallelogram footprint (the opposite direction of fender "F" tuners). I'm pretty sure they are modeled after grover sta-tites.

Image

the tuners on all the 60s MIJ guitars were the open gear type very similar to these, often six-on-a-strip. eventually they seemed to standardize into parallelograms. in the 70s it seems someone started adding the covers to give them the appearance of a sealed gear tuner. they went on to appear on nearly every budget guitar of the 80s, 90s and today. it seems their popularity has been waning recently, I guess their cost benefit over sealed gear tuners isn't as much as it used to be.
User avatar
Billy3000
.
.
Posts: 3033
Joined: Thu Apr 20, 2006 3:16 am
Location: Atlanta

Post by Billy3000 »

That looks awesome dude! You'll have to let me play it sometime when it's all finished up. Also, I don't know what you do during the weekdays if you have work or whatever, but I'm in town this week, and I might be free tomorrow afternoon if you'd like some help working on anything. My girlfriend is probably going shopping with her girl friends, so I'll just be hanging out at my dad's house until about 6 or so.
User avatar
cur
.
.
Posts: 7298
Joined: Sun Jan 18, 2009 8:58 pm

Post by cur »

Well, I get off early today and should be home around 4:00. Other than that I usually get home from work around 6:00. But you're welcome to stop buy then. Call or pm me.
Oh yea, you have an open invite to rock the guitar whenever you want. I am having a lot of fun with this project.

Image
Image
User avatar
cur
.
.
Posts: 7298
Joined: Sun Jan 18, 2009 8:58 pm

Post by cur »

Got my neck plate in the mail today. Could not find one locally so went the ebay route. 32 pages of neck plates and I found the one that would work.
► Show Spoiler
Last edited by cur on Sat Jan 08, 2011 2:14 am, edited 1 time in total.

Image
Image
User avatar
hotrodperlmutter
crescent fresh
Posts: 16665
Joined: Sat Apr 04, 2009 10:29 pm
Location: Overland Park, KS, USA

Post by hotrodperlmutter »

i briefly looked for one on your behalf, and after seeing how many results she showed, i quickly closed the tab, and didn't reply to your thread. :)
dots wrote:fuck that guy in his bunkhole.
User avatar
cur
.
.
Posts: 7298
Joined: Sun Jan 18, 2009 8:58 pm

Post by cur »

Well it wasn't so bad, half of them had laser-etched images of half nekid chicks on them.

Image
Image
User avatar
desertan
.
.
Posts: 87
Joined: Fri Oct 29, 2010 10:08 pm
Location: sf, ca

Post by desertan »

Lacquer over danish oil? Danish oil has wax in it...
User avatar
cur
.
.
Posts: 7298
Joined: Sun Jan 18, 2009 8:58 pm

Post by cur »

desertan wrote:Lacquer over danish oil? Danish oil has wax in it...
Don't think so. I used Watco natural finish original Danish Oil. On the back of the can it reads "if a topcoat such as polyurathane is desired, allow Watco Danish Oil to dry 72 fours before applying" Basically they want all the volatiles to dissipate before the final finish.

There may be different formulations of products out there that does have wax in it, but I made sure that this would be good for what I wanted to do before hand.

Image
Image
User avatar
desertan
.
.
Posts: 87
Joined: Fri Oct 29, 2010 10:08 pm
Location: sf, ca

Post by desertan »

OK. I seem to remember using Watco's years ago under a lacquer finish and having troubles with drying. Probably my teen-aged learning curve!
User avatar
cur
.
.
Posts: 7298
Joined: Sun Jan 18, 2009 8:58 pm

Post by cur »

A little more progress. I squared up the butchered horns on the table saw. I had doubled up a 1x4 poplar blank earlier. So I thickness planed the blank and squared up the edges then traced the replacement horns on it. I cut the horns out on the band saw and glued them on. I then dowel pegged both horns both horns for strength.
► Show Spoiler
So I will try and sand and form the horns tomorrow.

Image
Image
User avatar
Bacchus
Whatever's handiest
Posts: 23590
Joined: Thu Apr 20, 2006 4:10 am
Location: wandering

Post by Bacchus »

Pics don't work, bandwidth exceeded.
Image