Page 1 of 2
No Excuses - 64 Surf Master
Posted: Fri Feb 18, 2011 9:19 pm
by Joey
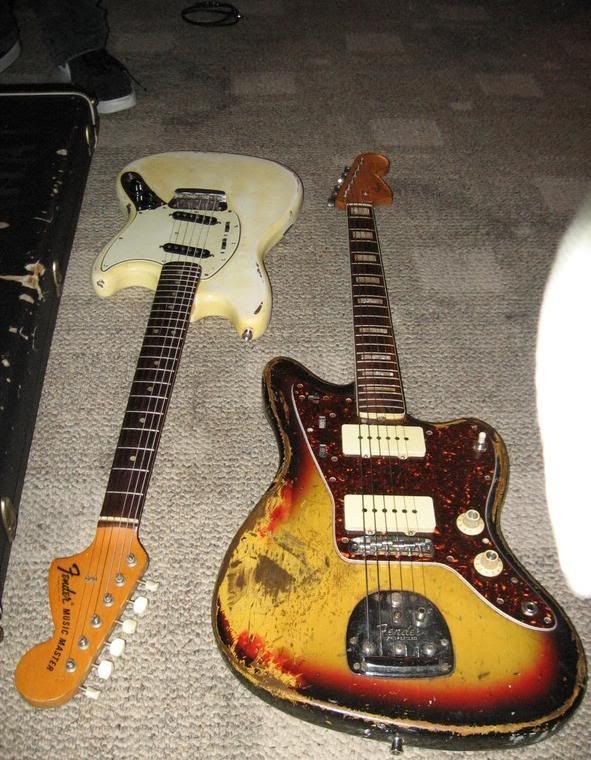
The Inspiration, figured I could do better.

I started this project at least 8 - 9 years ago. Really wanted to do something over the top... beyond my budget as a college kid. After my daughter was born, I moved... most my stuff went into boxes in storage and never saw the light of day for years.
64 Jazzmaster body & Tremolo - Refinished by previous owner
Warmoth Birdeye's Neck
Aftermarket Pickguard
Original 60's Pickups & Covers
Schaller Tuners
I did refinished the body white years ago... but ended up removing it after it was badly damaged. I didn't have the money to get the pickups rewound... the project just hit a wall and didn't move forward at all, for years.


So I decided, "no more excuses"... gotta get this thing finish, two weeks ago.
Two weeks of spraying Sealer, block sanding & curing...

Ready for primer & color... last night

Don't got $30 for 2 cans of ReRanch color... so I improvised. $8 for white lacquer pigment from StewMac, mixed into my Sealer. This is my primer coat... color will be the white pigments mixed into Clear Gloss.

Respirator & HVLP Gun

33 Gallon 5 Horsepower Compressor with a Water Trap

Home made Primer...


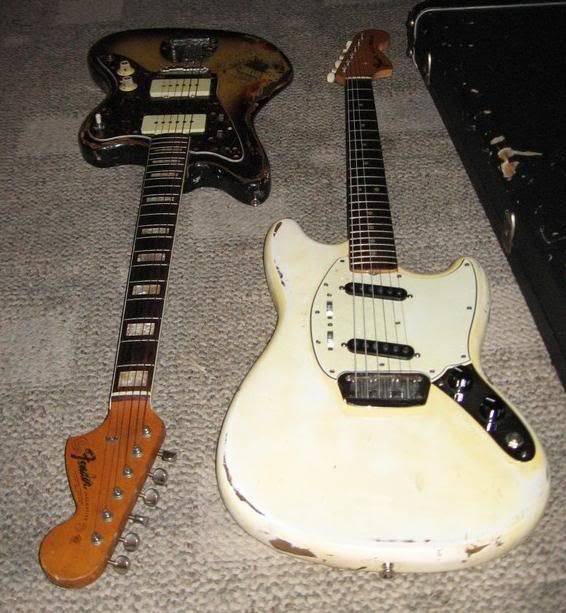
Today, quick mock up...


I'm going for the road worn effect on this guitar... some sand thru spots, yellowing, checking... left about 20 pin holes/dings/dents in the sealer for character. The guitar looks stupid stark white with em rusted yellowed pickup covers.
I sold the original broken pickups to Sublime. Local kid gave me MIJ pickups... TEMPORARY!
I just gotta spray the color, clear... wait 30 days wet sand/buff. Wire the electronics & cut/shape/file a nut for the neck. I better being playing this guitar next month... no excuses!
Posted: Sat Feb 19, 2011 3:40 am
by Mages
this looks really cool man. can't wait to see how it turns out.
Posted: Sat Feb 19, 2011 2:31 pm
by Joey
Yesterday was a bad day. My spray gun seal dissolved cause of all the acetone & thinners in lacquer. It leaked all over me and the floor, while I was spraying clear gloss with white pigment in it for the color. I switched over to Porter Cable gun and it made more overspray then paint on the guitar... so I switched back over to the leaky gun, but wrapped it up in teflon tape. It slowed the leak down enough for me to finish. But in all the confusion, I managed to get a 6" sag of paint on the front. I'm gonna wetsand it out Sunday... and spray a one more coat of color... then clear coat it... followed by a amber coat.
I wired the pickguard up for the most part. Gotta test it out. Both my pickups measured out 7.05K... that's odd. Figured there would be a bigger difference between neck/bridge pu.
I'm gonna cheat and see if I can pick up a precut nut locally... rather not make my own nut.
Posted: Sat Feb 19, 2011 3:05 pm
by cur
This is really cool looking. I must say that pick guard really sets it off. What type of material is it made of.
Also, are you going to keep it as a 22 fret extension neck?
Do you have experience with HVPL set ups? Is your compresser big enough for that?
Great projects you have been working on.
Posted: Sat Feb 19, 2011 5:38 pm
by Joey
This is really cool looking. I must say that pick guard really sets it off. What type of material is it made of.
Jeanie Pickguard made it for me, just regular ol' pg material
Also, are you going to keep it as a 22 fret extension neck?
The neck is killing me... that extension, ugly big tuners (I prefer small Klusons), the big clown foot headstock. I could pull that fret out, and trim the board flush but the fretslot is gonna have to be filled. I may end up letting this neck go... I dunno, I'm not gonna fret about it now, I just wanna finish.
Do you have experience with HVPL set ups? Is your compresser big enough for that?
I've gotta 33 Gallon, 5 Horsepower Craftsmen Compressor. I'm using two Mini HVLP with a 4oz cup (Grizzly $20 & Porter Cable $70). I get better results with the cheap Grizzly gun, it lays paint down "wet" with minimal overspray. I have to wear a respirator, cause paint guns are terrible about overspray... but they lay down finishes that have minimal orange peel. I'm also using a Craftsmen Water Trap on the compressor to catch all the water droplets in the tank.
At the moment I'm using Parks Sealer, McFadden Clear. I have always had great results with Parks Sealer... but the clear coat never would fully cure (maybe I didn't wait long enough). I'm gonna try using McFadden (gibson, fender uses it) Clear coat for now.
I mix all my stuff down with lacquer thinner... usually start with a 50/50 ratio (lacquer/thinner). But I usually use 40/60 - 30/70 (lacquer/thinner)... I honestly eyeball my mixture in a mason jar. As I'm spraying I may make adjustments by adding more thinner to my mixture. I do add a splash of "retarder", but I think it's kinda useless in the winter time. I reserve retarder for the summer time, when high humidity is an issue.
Compressor

Water Trap $20, I need to plumb it out father so it's vertical and does a better job of catching water.
Respirator $30 & Grizzly Mini HVLP $20
I also gotta Ridgid Bandsaw, Delta Table Saw & Jet Jointer

Scroll Saw, Drum Sander, Belt Sander & Drill Press...

My pickguard wired, shielded (carbon paint) & tested. When I touch the ground, noise level drops slightly... as it should. When I roll the tone down, the noise level also reduces. It's not gawd awful noisey, just not humbucker quiet. I'm gonna shield the shit outta the cavities with copper tape. I used a tuning fork and a small practice amp to check it all.

Posted: Sat Feb 19, 2011 5:44 pm
by Fran
Good work Joey, as ever.

Posted: Sun Feb 20, 2011 8:46 pm
by weed_killer
I really like that white/blue combo, it's a cool change from typical white/black/tort.
Posted: Mon Feb 21, 2011 6:09 pm
by James
This is a great project. Fender were close to a good thing with the original but the pin-up girl and strat pickups killed it (at least they didn't give it a strat jack). The white + light blue combination is sexy as hell.
Posted: Thu Mar 03, 2011 7:28 pm
by DICHOTOMY
wow looks up to snuff to the inspiration. great job

Posted: Thu Mar 03, 2011 10:14 pm
by JohnnyTheBoy
Great build fella! nice results so far

Lots of good gear to work with by the look of it, and a firey passion..splendid stuff!...
Ive gotta similar set-up to you, and have had great results with the cheaper sprayguns...as long as you dont rush things in prep the end result is usually marvellous!...Must get me one of them water trap thingies!!
Posted: Sat Mar 05, 2011 7:08 pm
by Joey
Thanks
I sprayed over the color coat using a sealer, it yellowed the finish up nicely. I'm gonna redo the color coat one more time and use ReRanch amber neck tint over the color. The sealer is a bit blotchy over the color in some spots. I'll post some pictures later. The stark white finish was a bit overkill, and hopefully will go better with the original pickup color. I'm still torn about doing a small sand through on the front/back... with some dings/dents here and there. I don't wanna overdo but just give it a little character.
Posted: Sat Mar 05, 2011 9:40 pm
by Joey
I took a stab at relicing. This is just a practice run. I used 150 grit & water. I gotta find better pixs of relics to get a better idea of where my wear marks should be.
The sealer really toned the white finish down.

I tossed some lacquer thinner in the freezer. I'm gonna heat the body up with a blow dryer and spray it with some cold thinner... hopefully it'll check... never tried it before.
Posted: Sun Mar 06, 2011 10:14 am
by JohnnyTheBoy
Liking that look

I'd give it a bit of bucklerash on the back and call it a day!
Saw a telecaster copy relic in my local muso shop yesterday, and even tho it was cheap, it looked way too relic'd..
Using that tinted sealer works really well..and that pickguard looks class!!
Posted: Sun Mar 06, 2011 10:40 am
by ultratwin
Joey wrote:I took a stab at relicing. This is just a practice run. I used 150 grit & water. I gotta find better pixs of relics to get a better idea of where my wear marks should be.
The sealer really toned the white finish down.
Looking fantastic, I love where you've taken this.
A bit of a side note, but I recently asked CK (Moollon) what he does to "age" exposed wood without sweat/dirt/time, and he said that mixing grain filler with water color(brown/black, I'm guessing) can do the trick, although there is a risk with things getting blotchy. Just mentioning.
Posted: Sun Mar 06, 2011 4:26 pm
by Joey
Less is definitely more when it comes to relics. Will do the buckle rash.
I'm gonna respray the color, sand through then spray the sealer over top everything. If you look at the forearm contour you can see the color go from yellow/white/wood, cause I sanded through the sealer. I'm just gonna have to count my spray passes when I do the sealer carefully to avoid the blotchyness.
I'm gonna chip out some paint with a pick. I don't have the heart to beat a vintage guitar with a pair of pliers. And will add some checking. I baked the guitar in a small bathroom yesterday with a space heater and stuck lacquer thinner in the freezer... but it didn't check. Not hot/cold enough, or most likely cause the finish is still to elastic/fresh. I guess I'll have to buy some compressed air and flip the can over as I spray to get it to check after the guitar has cured.
Will try that wood filler/water mix too.
Posted: Sun Mar 06, 2011 5:36 pm
by holyCATS1415
i love that pickguard. and the pickup covers look awesome.
Posted: Sun Mar 06, 2011 7:14 pm
by kim
lovely
when it's finished, do an picture bomb !!
Posted: Sun Mar 06, 2011 7:59 pm
by Joey
Jeez, it's harder to decide how to paint a fucked up guitar then a good one. This is the only white vintage guitar I have been able to find so far. Maybe white/yellow blotchyness is a good thing after all.
Posted: Mon Mar 07, 2011 3:48 am
by Lucamo
I woukdl leave both those as is... SO GORGOUS
Posted: Thu Mar 10, 2011 9:09 am
by gaybear
Joey wrote:I gotta find better pixs of relics to get a better idea of where my wear marks should be.
Okay, first off, this project is doing great, though i'm not a fan of relic'ing at all.
that said, rather than look at pictures of old guitars, and especially of fake relic'd guitars, just pay attention to where/how YOU play. you can pretty well predict where wearing would occur, and it would be at least more yours, then generic.