Page 1 of 1
DIY Etching- Populated Board
Posted: Tue Nov 15, 2011 8:44 pm
by Stuart
Not sure if this is a project or what..Not sure if I'll do it yet..
A Mates of mines Dad has sold me a etching tank, light box, dremel stand and a load of other gubbins for £80. I think he paid a couple of hundred for it all and wanted if for HiFi projects or amps or some such but didn't really use it or something. But anyway my friend new I did the odd pedal I offered me the gear.
For 80 quid I couldn't really say no, as I'm no Mr Mike as far as perf love goes.
This by way of saying I might put some self etch projects up here at some point.
Posted: Tue Nov 15, 2011 8:54 pm
by Pens
Well, that's pretty rad. I only got into the old iron-on etching stuff myself, I for one am curious how easy/clean these end up being. I hated doing the other kind of etching as it was really messy and tedious.
Posted: Tue Nov 15, 2011 9:47 pm
by gaybear
totally looking forward to results!
Posted: Wed Nov 16, 2011 8:43 am
by Mike
Very cool, I'll probably never do it myself as I don't have space for all the chemicals and faff but I'm always impressed when people do!
Posted: Wed Nov 16, 2011 11:43 pm
by Stuart
Actually got the stuff today. All in new looking condition as promised, plus some etching solution pellets and what looks like shoe polish but is actually developer that I didn't know I was getting. I think all I need now is some photo board. It actually kindled a dim memory of etching something in school.
I'll probably give it a run at the weekend, I've been messing around with Fritzing for layouts, but I might end up just doing something from GGG if that proves too annoying to master by Sunday afternoon.
Will post pics.
Posted: Thu Nov 17, 2011 1:59 am
by hotrodperlmutter
my custom etched Dwarfcraft BBT/HAX:
dunno how it's done, but very interested to see what you work up, stu!
Posted: Tue Nov 22, 2011 8:27 pm
by Stuart
Got on with this today. The board is made and looks fine, the continuity checked with a meter is good apart from in one spot where I miss drilled and broke a connection but I think I can work around that by glooping up the solder, or using some of the component lead, or something.
I'll probably get the board populated tonight and soldered tomorrow. I've taken some pictures and I'll thrown them up here when I get the chance.
Posted: Tue Nov 22, 2011 8:32 pm
by Pens
How much would you charge to do a one off board for me if I send you the PCB layout?
Posted: Wed Nov 23, 2011 3:47 pm
by Stuart
Pens wrote:How much would you charge to do a one off board for me if I send you the PCB layout?
hhhmmm. Well I'd want to do a few more to get the process down first and I'll probably get the chemicals necessary for tinning, which I don't have at the moment but supposedly makes soldering easier and more durable. What I'd probably work out is the cost of materials which isn't likely to more than a few dollars + $5 or $10 for me depending on the exchange rate and now much drilling is required as thats the only part that takes any particular skill/time and then postage. So just at a guess some where between $10 and $20.
I'm really happy with out the first one has turned out, pics tonight when I get chance to sit down and upload, probably.
Posted: Wed Nov 23, 2011 4:03 pm
by hotrodperlmutter
ha ha, i thought this was about etching the case, not the PCB.
< am stupid.
Posted: Mon Jan 16, 2012 2:22 am
by Stuart
Finally got back to working on this, I've been hit hard at work recently with trade union duties but found some time tonight...
Forgot to take a shot of the board on its own but here is one with only a few components in, I actually went back and neatened up all of that soldering after seeing how shoddy it was on the photo but it gives you the idea.

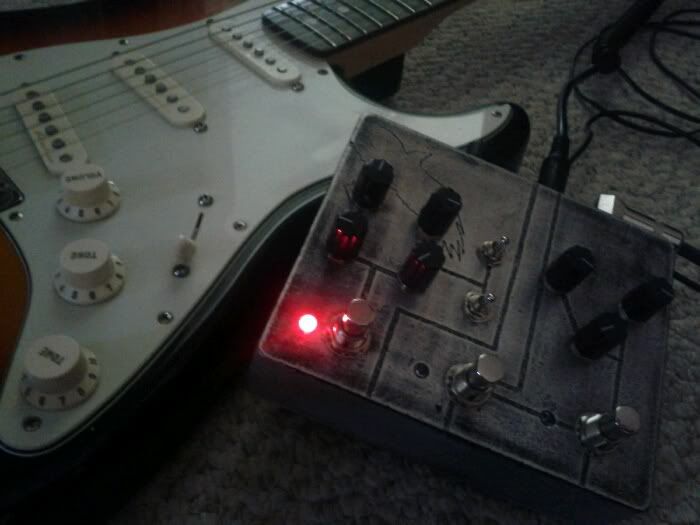
And here is the finished thing. I cut the actual board down to size using a dremel free hand. I should have clamped it down really but given that I wasn't 100% sure if my layout design was going to work and it is just for me, I thought fuck it and half arsed it by eye.

But the layout was ok. Actually I messed up in one place but I was able to scrape the copper away and fixed the problem. Tomorrow I'll bang it in a box.
Also word to the wise, do not let your multimeter get tangled with your soldering iron, I have a nasty burn across three fingers because I was careless in just such a way.
Posted: Mon Jan 16, 2012 9:53 am
by timhulio
Cool stuff. What effect is it? Does it work?
You might find your etchant lasts longer if you fill-in the gaps, eg:

Posted: Mon Jan 16, 2012 10:56 am
by Stuart
Oh yeah I never did say what is actually was. It is clean boost based on two 2n5457s and a 2n3094. So pretty much the boost section of one of the versions of the Ea Tremolo, except the input cap has been changed to 10n and maybe a couple of other little changes. Really impressed with the circuit, I was doing a thing where I had the pedal on, then switched if off and turned the amp volume up to the same level and it sounded almost identical to the boost. It is quite a lot of components for a boost but definitely worth it.
Oh good suggestion on the block etching or whatever you'd call it. I'm not sure about the practicality of making that transparency on the software I have but definitely something to think about before I do any more. I'll also probably properly tin any further boards I make but as I think I've said before I don't have the chemicals at the moment and wanted to check I could actually produce something before I put more money into it.
Posted: Mon Jan 16, 2012 11:30 am
by timhulio
I used to use DIY layout creator (the Java version is the better one as it lets you drag stuff around) to produce the pcb layout, then fill all the gaps using Paintshop Pro or Gimp. Big areas are cool as it cuts-down the chances of traces lifting off or having breaks in em.
Posted: Mon Jan 16, 2012 3:28 pm
by Stuart
Cool Cool. I used Fritzing for the layout but the same principles apply.
Posted: Mon Feb 06, 2012 5:24 pm
by Stuart
I bough some as seen on TV sheers for cutting the better quality boards down to size. They were discounted by 85(ish) quid because they had been used in an episode of that show Gadget Geeks.