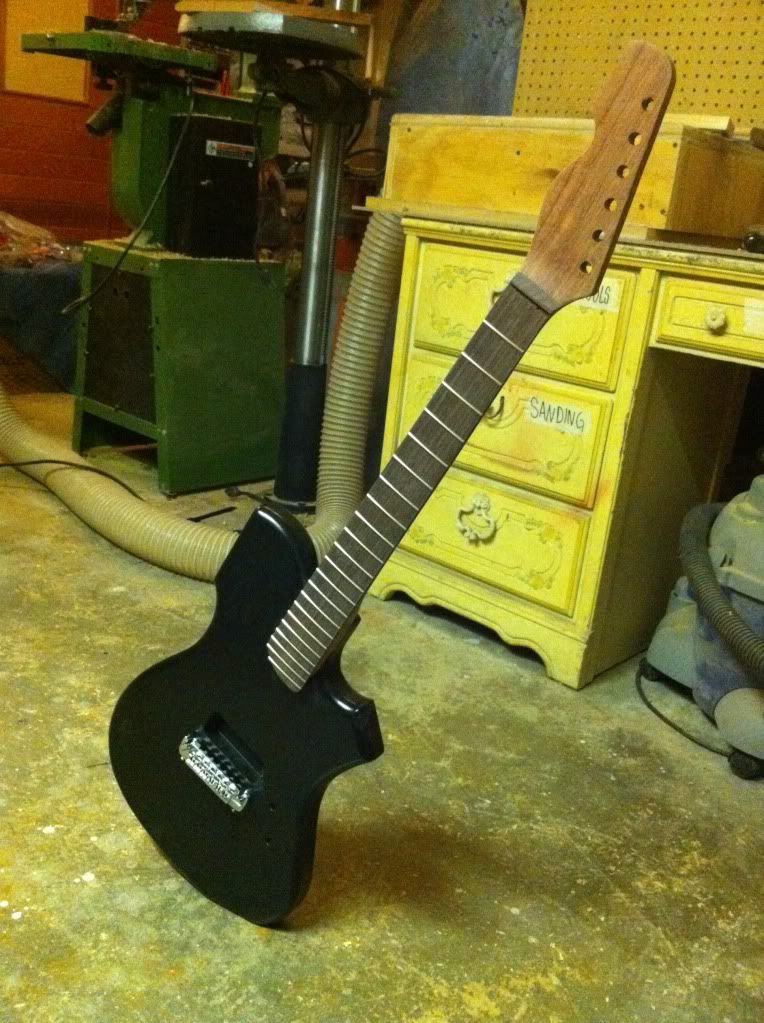
Page 1 of 2

24" scale LPJRDC

Posted: Sun Oct 07, 2012 4:27 pm
by andrewdoeshair
I've been posting this build on a few other forums, but I figured since it's a shorty, you guys might want to see it, too. I'm actually making two at once, one is 24" scale with a rosewood board, and the other is 25.5" scale with a maple board. These are my first set necks, and my first angled headstocks. It's been a learning experience, for sure! I don't plan on making these guitars "pretty" necessarily, just trying to learn the building techniques as simply as I can. Here goes :)

Image

Didn't get around to making the body today. Went template crazy instead...

First I took my master template, which is (as far as I can assume) vintage correct, and I moved a few things around to make this work for me. Like I mentioned, I want this to have the bridge placed in a way that I can use the same fret slotting template to make either a 24", 25.5" or 28.625" scale guitar. So I made a copy of the template, but I didn't drill the bridge holes or cut the bridge pickup yet. After lining up a Tele neck to the end of this body, I was able to measure and determine where the 25.5" mark would be, with a Fender scale protruding down the neck. So I moved the whole template back to match that mark, and I drilled the bridge and routed the pickup based on a 25.5" scale length. It HARDLY looks any different; you'd have to compare it directly to the original to notice. I think it's a difference of about 1/2" or so...

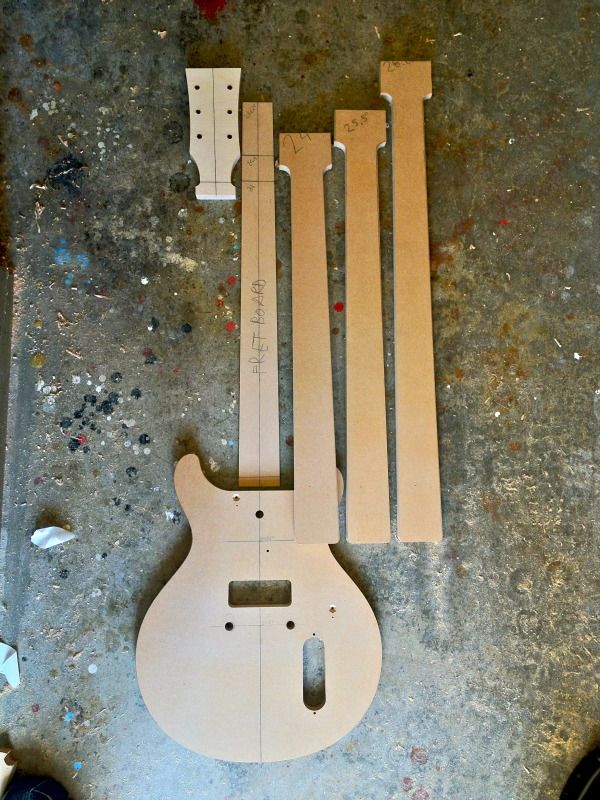
The reason I want to make a set of templates to work this way, is not only to use the same fret scale template for all builds, but to have as little templates as possible, to create as many different guitars as possible. In this train of thought, I decided that if I made one fretboard template, I could make it long enough to do baritone fretboards, then anything shorter I could just cut it off at ashorter fret (see the various lines drawn near the end of the fretboard template) and then the heel of each neck would be identical, which would mean I could use one neck pocket template for all of these scale lengths. The only down side, if you think it's one, is that the shorter the neck is, the wider the nut will be. I made this template 1 5/8" wide at the nut of the baritone scale, and 2 3/16" at the heel. So a 25.5" scale would be as wide at the nut as the baritone is at the 2nd fret, and a 24" scale would be as wide at the nut as the baritone would be at the 3rd fret... What I didn't consider, until I was already burned out on making stuff today, is that this will then require 3 different headstock templates, to match the varying nut widths. But still, that's not as bad (to me) as having to make 3 fretboard templates and 3 neck pocket templates.

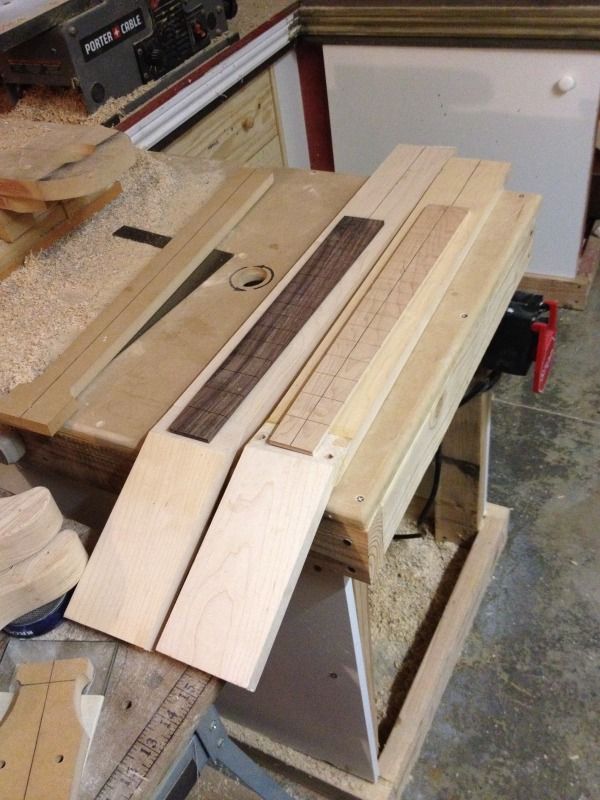
Here's what I have so far

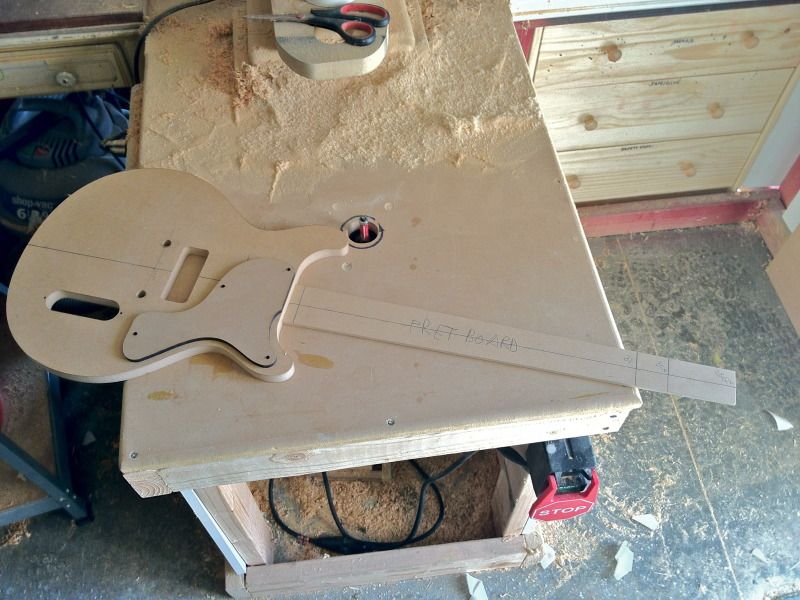
Body template (made for 25.5" scale), fretboard template (made to work with all 3 scales), and a neck template made for each of the 3 scales (which will all intonate on this one body template). The flares on the headstock end are just to steer the router bearing away from the part of the blank that will become the headstock. I'll use a separate template for the headstock (check out my oh so clever headstock design )
Image

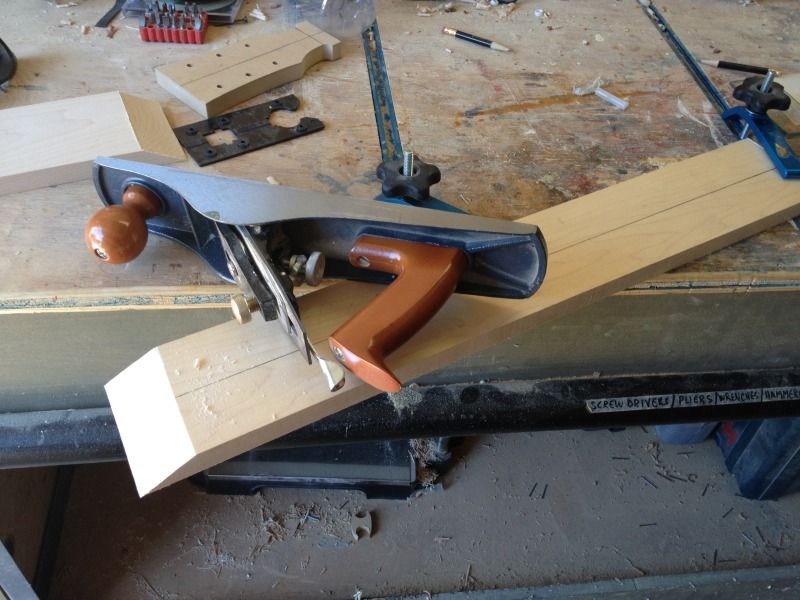
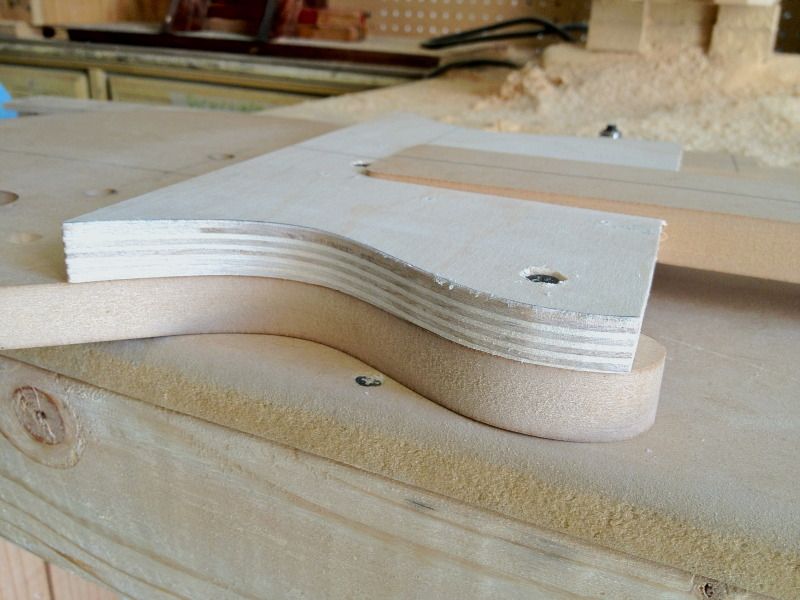
I double sided taped a, angled neck pocket template I'd gotten from Paul to a flat board, and I double sided taped my template to the top of that, then fed it through my planer until my template matched the angle of his. My tenon is wider than the one on Paul's template, so I made the mortise template from scratch by lining up one of my neck templates on it, then screwing pieces of straight-edged scrap around the neck to act as a guide for my router to cut a perfect pocket. It's very snug. It will be aligned and held in place by screws into the pickguard screw holes.
Image

So that's where I am now. I need to make headstock templates to match the width's of these neck templates, and I need to make side profile templates. I will most likely have a volute on this, as I would hate to ever break the headstock...
Image

Posted: Sun Oct 07, 2012 4:28 pm
by andrewdoeshair
I'm about to host these from Instagram, so I hope it works...

I got a rosewood board from Rockler, and I slotted it with my Paul Rhoney custom fret slotting template. It's like 27 frets and 28.265", so within the scale length I can just lop off frets from either end to make a ton of different scale lengths. The table saw was $60 at Lowes, the blade was $75 or so at Stewmac (I don't remember the exact price). The sled thing cost like $3 to make. Use plenty of dry lube spray (from home depot) when you do this.
Image

Here is that fretboard shape template I made, with the various scale lengths marked. I chopped off the boards I'm using at the appropriate frets. The rosewood board will be 24" and the maple will be 25.5"
Image

I roughly cut out each board
Image

Then flush trimmed them to the template.
Image

Made the bodies as I would any others. I was surprised at how much work actually went into them, for having so little cavities. But to put the template from front (pickup) to back (control cavity) then use totally different templates (neck pocket, control cover) it proved to be no joke of a build. This first pic is of the template being traced, after I planed the blanks.
Image

Band saw
Image

Flush trim, downhill only...
Image
Image

I taped the control cover template to a piece of MDF that was trimmed to match the shape of the body, that way I could have it lined up identically every time. It also gave me more clearance to have my router bit make the cut very very shallow.
Image

Neck pocket template has a 3º angle to it, and is secured with screws that align with the pickguard screws. I made these 1" deep at the deepest end, so I think when I make my neck templates I'll make the heel about 1" thick without the fretboard, then plane off the piece of the neck that sticks up above the body... I dunno. I'll learn it as I do it..
Image

I'm a dirt-ball.
Image

This is what the bodies currently look like. They're made identically.
Image

The necks will be made differently from each other, one short scale and one regular scale. Shown here with neck templates filling in for real necks...
Image


These are going to be WAY simple. I'm not going to spend a ton of time on the finishes, or even on putting inlays on them (they will have side dots). I just want to learn how to do a set neck, how to do a vintage style truss rod from scratch, and to do an angled headstock. Then later I'll care about finishes again...

Posted: Sun Oct 07, 2012 4:29 pm
by andrewdoeshair
I wore a mask today. Stocked up.

So, like I mentioned, I am using one fretboard shaping template for all three possible scales that will fit this same one body, and so to make a shorter scale I will lop frets off of the end of the board. Because of this, the nut will be wider as the scale gets shorter. So I used my original headstock template, with a standard width, to decide the width for my baritone length, and I made all the other neck templates off of that. So what happens is the original headstock is way narrower than the nut would be on the 24" scale (like this)
Image

I used the original template, and a set of calipers, to draw up a wider headstock, to fit. The original was made from very thin MDF, because it's way easier to shape than the thick stuff, then that was used to flush trim the good thick stuff.
Image

It fits the short scale like this
Image

And looks like this beneath the original
Image

This is when I found my next dilemma. Because I've been fabricating these neck templates myself, I have been sort of picking dimensions I like. I wanted the mortise and tenon to reach 3" into the body, just because that's what I was used to, working with Fender style neck pockets. I didn't think to check it against the pickguard template. The joint is exposed.
Image

I marked on the original pickguard template, where the joint was sticking out. Then I traced it, and transferred the mark onto a sheet of MDF. This way I could know where I had to alter the pickguard shape. I thought about doing some insane, radical new design, but decided I wanted it to still look original enough.
Image

Now, because the only goal I have with these builds is to learn set necks, I am not going to put inlays on the neck, not going to grain fill to perfection, not going to wet sand/buff, and I'm not going to spend a penny more than I have to. I had some scrap pickguard material, and so I didn't care what color it was. So it's not a Gibson type of material. But this is a 24" scale swamp ash guitar, so why the heck not use a mint guard?
Image
The other one will have a one ply white guard.

The neck template fits like a glove. I can't wait to get the neck made. I have to dig up some wood to make it, though... I also still have to make some side profile templates... That'll be part of my next garage day.
Image

Posted: Sun Oct 07, 2012 4:30 pm
by andrewdoeshair
So I buys some cheap maple. Got enough for two necks, about $20... I saw, on another thread, that a builder used a jig to cut the 14º angle for the scarf joint. I didn't want to make a jig. Not at first anyways. I used my mitre gauge dealie, set as shallow as I could get it (which was pretty damn steep, still, actually).

Made a cut.
Image

Checked it out
Image

Cleaned it up.
Image

Had a HELL of a hard time trying to glue it, gave up, decided that next week I'll make my own mitre jig dealie to get a better headstock angle, and use dowels or something to align the pieces whilst glueing (as I tried to do briefly here, before giving up- note the holes in the sides of the one blank).
Image

Posted: Sun Oct 07, 2012 4:30 pm
by andrewdoeshair
Was going to give the necks another shot today, but instead I deep cleaned my workspace... It needed it, bad...
Image

The reason I was going to do the scarf joints with the headstock above the neck, was that I figured the headstock would then be adhered to both the back of the neck, and to the fretboard, giving it more support. I didn't think it would really cause any problems... But I still haven't glued anything, yet. Anything can happen.

I'll be getting this in the next few weeks, and it might make this build go a little differently (maybe it'll be way sweeter to flush trim the neck with a pin router, as opposed to a bearing-guided bit? We'll see. I've wanted this for a long time now, and this deal jumped up and bit me)
Image

Posted: Sun Oct 07, 2012 4:32 pm
by andrewdoeshair
Gave the scarf joint another try... I made a quick sled/jig thingie to cut a more shallow angle than my band saw's mitre thingie was able to. I don't know what the angle is, I just eyeballed it. It would take me 4 minutes to alter the jig to any angle later, this is just what I did for now, to learn...
Image

I clamped the headstock piece over the neck piece and planed them both together. I still want to go buy a super nice plane, as this tool tends to get more use than my jointer, and almost as much use as my router... I love the feeling of a job well done with hand tools. Like a total MAN. Especially when I'm dripping with sweat afterward.
Image

And here is a dry run to see if I could clamp the thing okay. It seemed alright. I didn't get a pic of it with the glue. I still need to glue on a piece to make the heel thicker (aiming for about 1")
Image

Posted: Sun Oct 07, 2012 4:32 pm
by andrewdoeshair
The headstock wasn't totally flat, because the joint shifted as it was drying, so there was a step. I removed material from the headstock piece, using a jack plane, so that it was flat and straight, flush with the neck half of the joint. I'll say again, this is my favorite tool.
Image

Used my curved channel jig and a 1/4" spiral bit on my router. Worked like a charm, except that I cut the channel too long... Oh well, the extra cut will still hide under the fretboard...
Image

Trimmed and adjusted a rod I had previously made for a baritone neck, so that it would fit my short scale neck, here... I sort of put the second guitar on hold, because a lot of this is so foreign and new to me, I want to see if it works, before I try doing multiples at once... Before this, I've only used pre-made rods that require a straight channel.
Image

Drilled and chiseled to fit the anchor.
Image

This guy was supposed to help me drill the truss access area, but I forgot that my hand drill isn't at my workshop right now, because I took it home for another project (Ps, look at all the gross glue and gunk on the handles of my clamps... Sick, man...)
Image

This is where I am so far... This just might work! That template there is for the filler strip thingie that goes over the truss rod. I also need to glue on a piece of maple to make the heel thicker, but I might do that after the neck is flush trimmed... Not too sure...
Image

Posted: Sun Oct 07, 2012 4:33 pm
by andrewdoeshair
I made a jig to drill the truss rod access (jig complete with drilled out viewing area, so I don't drill too deep), but I used a bit that was smaller than the washer (epic fail) and since the area was then bored out, I couldn't simply drill it again with a bigger bit, because there was nothin there for the bigger bit to grab onto, so it would have skipped all over the place and made a big mess. I ended up using a very sharp chisel to enlarge the access area. It was a lot of fun, actually...
Image

Flush trimmed the neck on the ol' router table (forgot to get a pic of the band saw action, which occurred first)
Image

I also forgot to get a pic of the Wagner SafeT planer, that I used on the back of the headstock.
Image

I mocked it up again, then just wanted to stare at it all night...
Image

Gluing in the little fillet strip thingie. I forgot to add a piece of maple to the heel, to make it thick enough, so I slapped on a piece of scrap rosewood to get the job done. The heel area is going to look like an ice cream sandwich
Image

I think the volute was supposed to go further up the headstock... Oops... Learning as I screw up!
Image

MY nut and washer are too big to fit under a truss rod cover, so I'm just not going to use a cover. This build is NOT intended to look pretty. I just want to learn how to do a set neck. I know how to make a pretty guitar, I've already done that. Maybe my next couple of set necks will have binding, carved tops, blah blah blah. This one is even going to show the big joint in the middle of headstock. Also, the router bit left a step on the side of the heastock, but that will be easy to sand out.
Image

Posted: Sun Oct 07, 2012 5:26 pm
by finboy
Awesome work Andrew, nice to see you are still making oddballs that fender/Gibson wouldn't put out.

Posted: Sun Oct 07, 2012 5:57 pm
by HNB
That Mustang body with the Jazzmaster tremolo and pickups were made by Andrew too FYI. (Because I have had a few questions about that guitar here. :))

Posted: Sun Oct 07, 2012 8:48 pm
by paul_
NICE!!!

My first scratch-build will definitely be a DC Jr, my first two set-neck builds were and they're what I play most of the time now.

Posted: Mon Oct 08, 2012 3:17 am
by cur
This is great! a 24" scale Joan Jett rock machine. Love everything about it. The switchable scale design is a good idea. Good stuff as always.

Posted: Mon Oct 08, 2012 10:25 am
by timhulio
Excellent stuff! I'm a long-time admirer of your work on OSG. Thanks for posting this project here.

Incidently, is this how you make a living? Have you considered going into series production or would you find that too repetitive? Sketched any original designs we could see?

Sorry for all the Qs, but I'm intrigued :D

Posted: Mon Oct 08, 2012 10:54 am
by cooter
Great stuff. I've learned and I'm still learning a lot from your build threads. I appreciate that you share this stuff.
The sheer volume of work you knock out is pretty amazing as well.
Thanks for posting and please post more over here.

Posted: Mon Oct 08, 2012 11:18 am
by gusman2x
That's amazing work man. I really admire your skill and patience. I'd love to take the time and care to do something like this. Alas, I think I have entirely the wrong temperament.

Posted: Mon Oct 08, 2012 4:56 pm
by andrewdoeshair
timhulio wrote:Excellent stuff! I'm a long-time admirer of your work on OSG. Thanks for posting this project here.

Incidently, is this how you make a living? Have you considered going into series production or would you find that too repetitive? Sketched any original designs we could see?

Sorry for all the Qs, but I'm intrigued :D
Thanks. I actually make a living by cutting hair
Image
Image

But about 2 years ago I went through a phase where I was convinced that I was meant to be a guitar maker for a living. I didn't grow up with ambitions of building guitars, but I did grow up obsessed with guitars in general. I used to draw them instead of doing school work. I've had GAS since like 8th grade. I made my first guitar about 3 or 4 years ago, after stumbling across OSG while GASing for a JM. It was hideous, but it functioned. I ended up selling it and making like $19 profit, then I happened to win a drill press on eBay for that exact amount. So my second guitar had straight holes. The next year or so, I was driven by the desire to outdo my previous build. Each one was a little cleaner, but wasn't good enough. I couldn't imagine making a guitar that could me mistaken for the real deal; at that time they all screamed "HOME MADE" and that bugged me. But each one I made fetched a few bucks, and every few that I sold bought me a new tool, then every new tool I got led to a cleaner result. Finishes were (are) the hardest part. Here's a Duo Sonic (25.227" scale) that I made from scratch around that time (I hope the pic shows, it's hosted via FB)
Image


Around that time I began doing haircuts for a new client, who happened to be a long time employee of the custom shop at the guitar factory in my town (starts with an F). I'd get tips and tricks from him, and would bring in my guitars when he'd get haircuts, so I could have him give me advice. Eventually he asked me if I'd be interested in furthering my skills with the support of this certain musical instrument corporation, and he hooked me up with an interview in the custom shop. I brought in a few guitars I'd made (pictured here. Again, hosted via FB, so I hope they show)
Image
Image

and I had a little interview with the manager of said custom shop, along with 2 of the master builders. I was a nervous wreck. It didn't go well.

Long story shortened, I didn't get hired. But for a split second there, I thought it all seemed too perfect; the kid who grew up obsessed with guitars got a random job, then had a guy walk into said job and put his dream job in his lap. I feel like I could have gotten in with that company, if I'd tried harder, and had been willing to sweep and get coffee. Unfortunately, at the time this all happened, I was in the process of getting married and buying my first house, so I couldn't afford to quit doing 3 $30 haircuts per hour to sweep up sawdust at the F factory for minimum wage :(

But it later occured to me, that had I gotten hired, I would have had deadlines to meet, I would have had to make Strats all day, and I would have began to hate guitars (the way my client hated guitars). This client has a son about my age, who needed a job, and when I asked why he doesn't get him set up in there, the guy told me "No way in hell I'd let my son work for them. They suck out your soul." The more I talk to this guy, the less I'd ever want to work for a giant company.

I haven't seriously considered starting my own brand or whatever, mostly because of the business end. I honestly just love this process, and adding too much importance to it will ruin it. I used to take custom requests, but it gave me anxiety. Now I make what I want, when I want, and it turns out as nice or as shitty as I please. Here is my one 'original design' that I've made. I never completed it, but I gave it to a friend who is a guitar maker, so he's going to make it sweet.
Image
Image

Posted: Mon Oct 08, 2012 4:57 pm
by andrewdoeshair
gusman2x wrote:That's amazing work man. I really admire your skill and patience. I'd love to take the time and care to do something like this. Alas, I think I have entirely the wrong temperament.
Doing this changes your temperament. That's why I love it. My first builds were rushed like crazy. The more I do this, the more patient I become.

Posted: Mon Oct 08, 2012 5:44 pm
by HNB
I agree. I have learned to rush my work much much less than when I first started. I can't wait to get to body making. :)

Posted: Mon Oct 08, 2012 10:15 pm
by speedfish
I love this post. Informative and inspiring!

Posted: Mon Oct 08, 2012 10:50 pm
by andrewdoeshair
So, the rosewood piece wasn't totally flat, and on one side the joint ended up a little ugly... I hope this is something that the height adjustment on the bridge might be able to compensate for... But otherwise, I planed part of the neck at an angle to match the flat face of the body. See...
Image

Then I put that neck on hold, while I caught up on the second neck. I'm glueing an ash cap on the headstock of neck number two, so that it can be stained or painted or whatever to match the body...
Image

Moar tomorrow...