Page 1 of 3
1979 Gibson Marauder Project
Posted: Sun Mar 03, 2013 2:32 pm
by cooter
I got this project in a trade with punkacc awhile back. I wanted to wait until I had enough progress to show before I posted since it’s probably going to take me quite some time to finish.
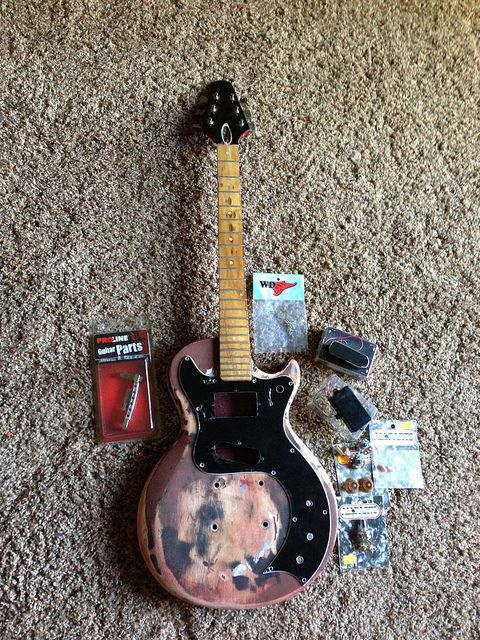
In my mind the key to this whole restoration would be the neck. If I could get the neck back in shape then everything else would fall into place.
The problems that needed to be addressed were.
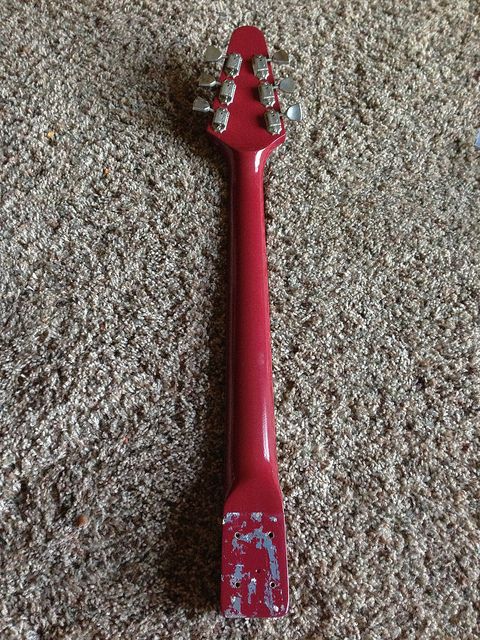
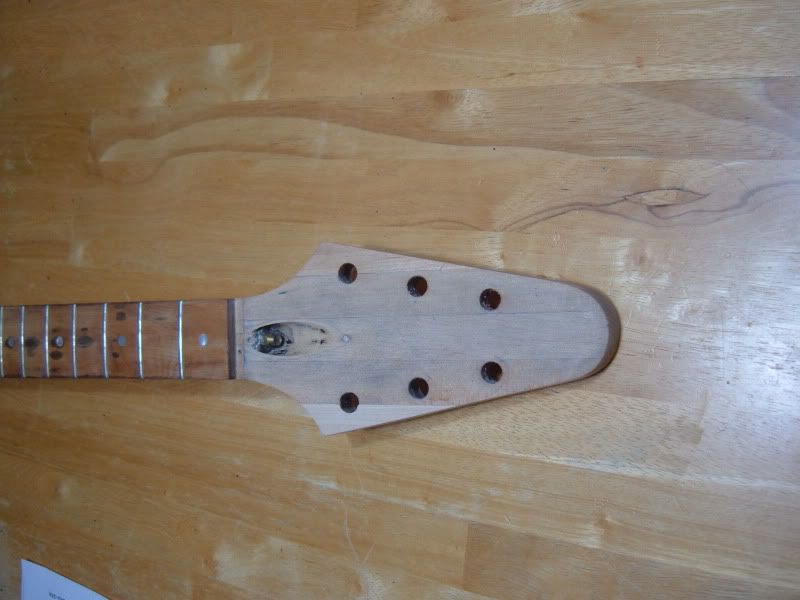
One, these necks were finished natural in 1979, so the crappy red enamel spray paint would have to go.
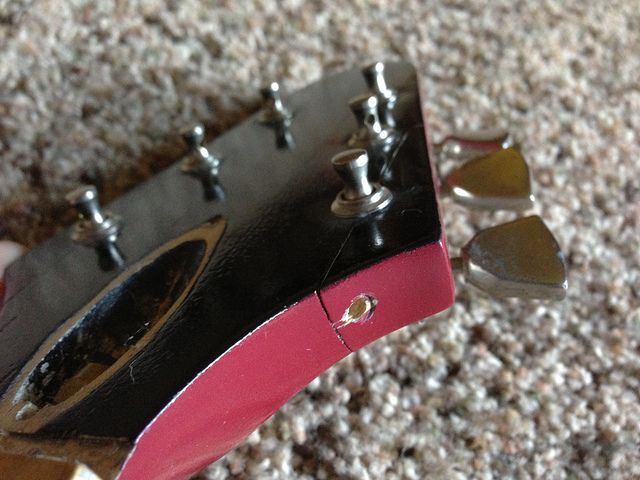
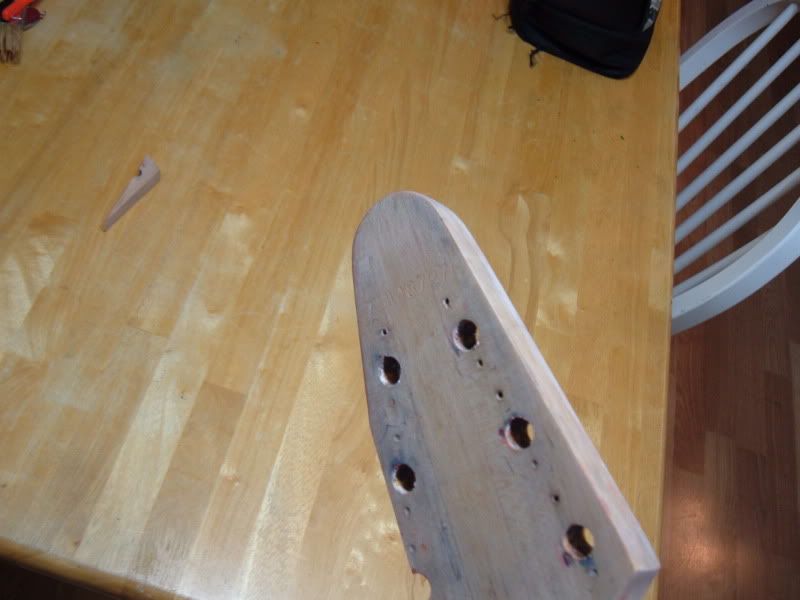
Two, the headstock had a hole drilled in it where someone tried to repair it. The glue had started to separate on one of the headstock wings. It could have been steamed off and reglued but now it has a hole drilled in it where they were using a screw instead.
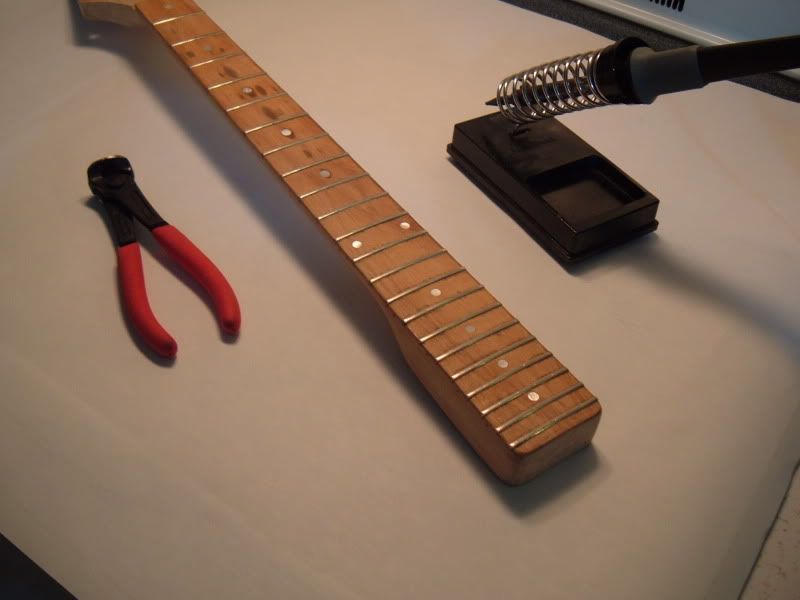
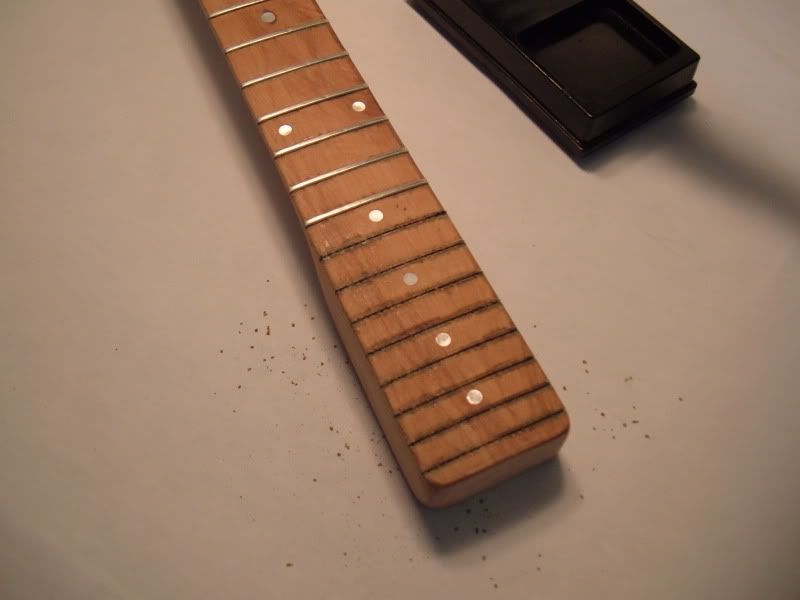
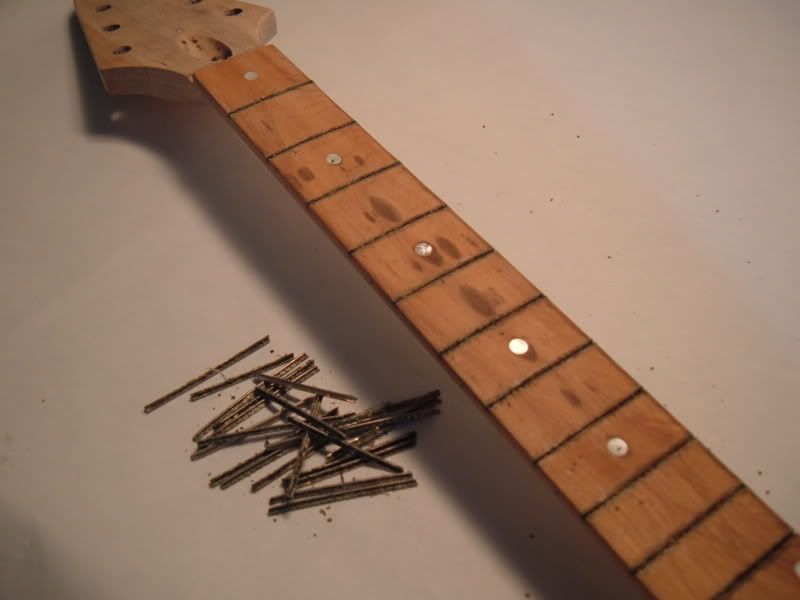
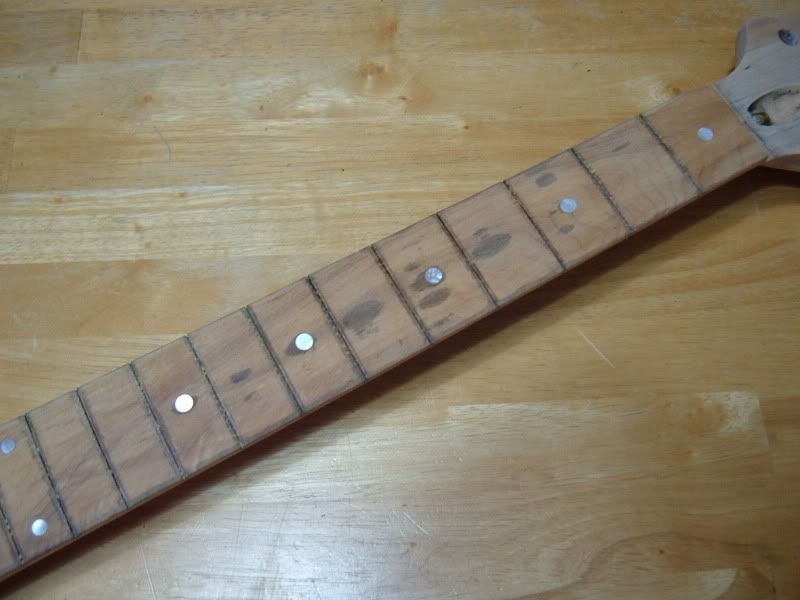
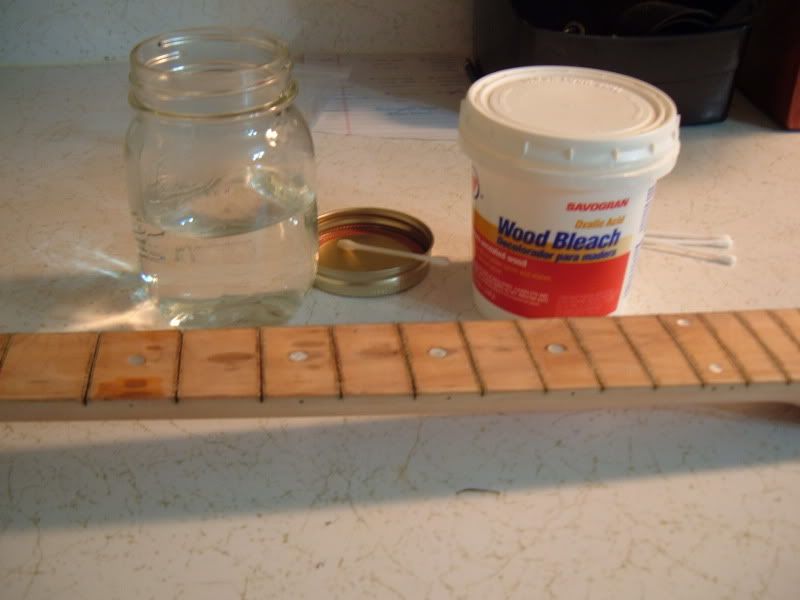
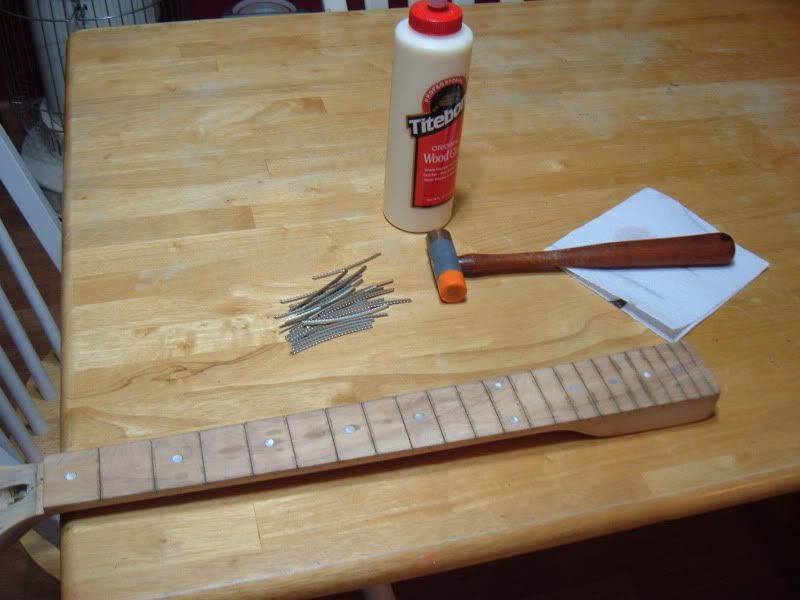
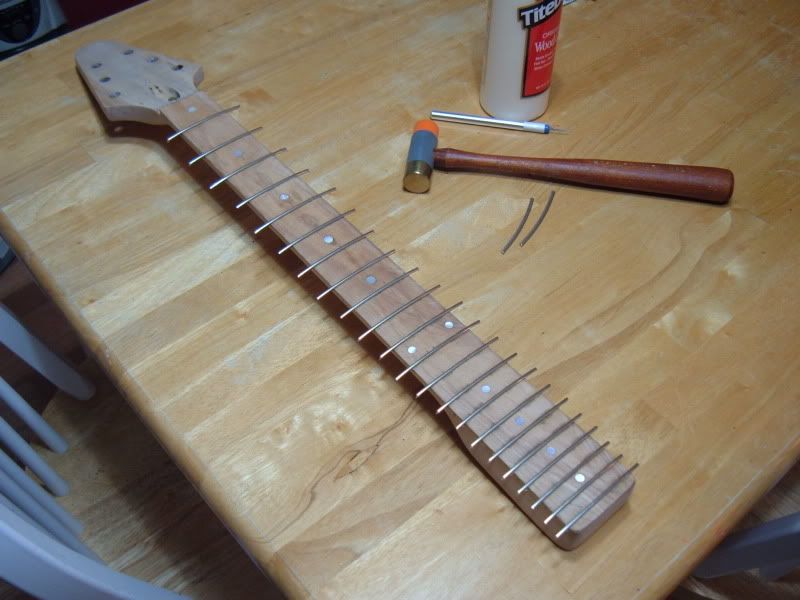
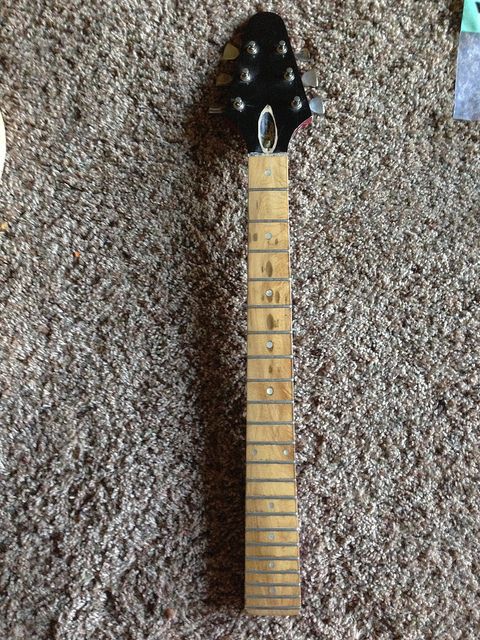
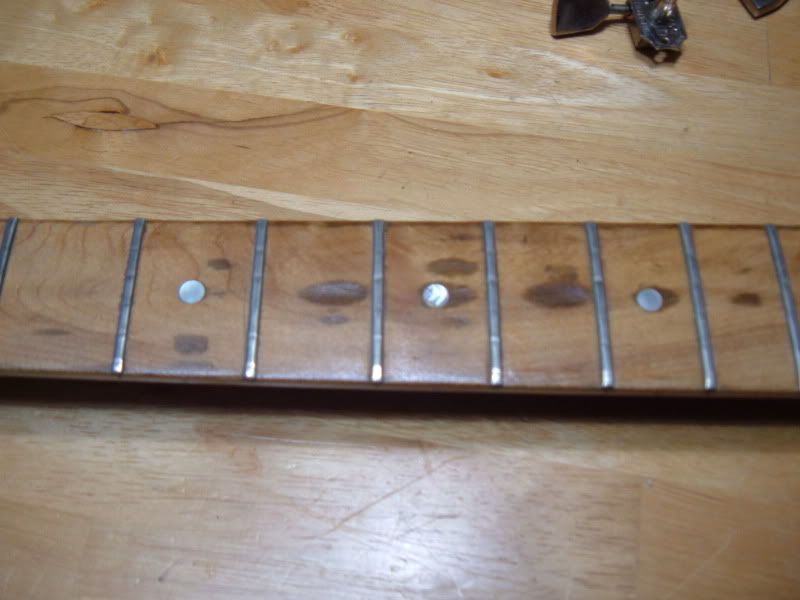
Three, it needs a refret and the fretboard has some nasty divots in it.
Posted: Sun Mar 03, 2013 2:46 pm
by cooter
Step 1: Strip the paint.

After one application.
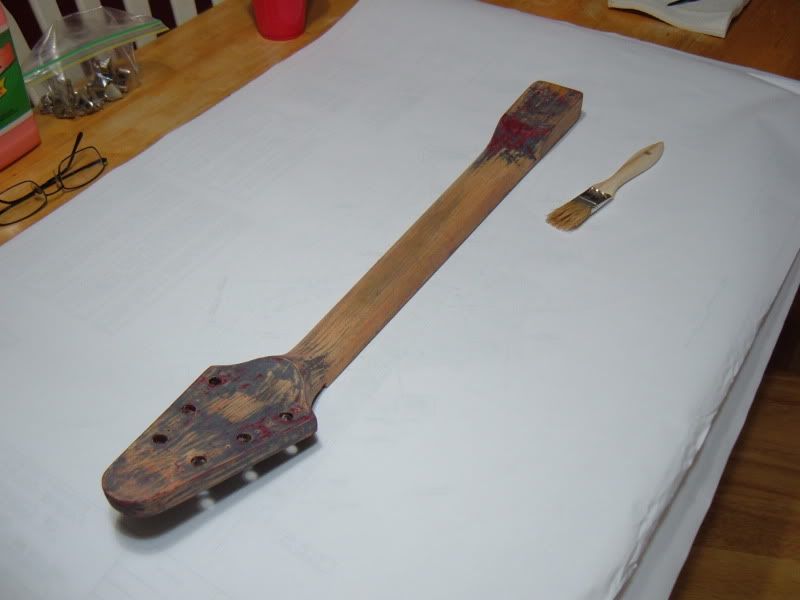
After the second application the glue on the separated headstock gave way and fell off. That was a plus since I was going to have to remove it anyway.
You can see the serial number a little better now. There’s still some finish down in the stamp but it’s getting a little more legible.
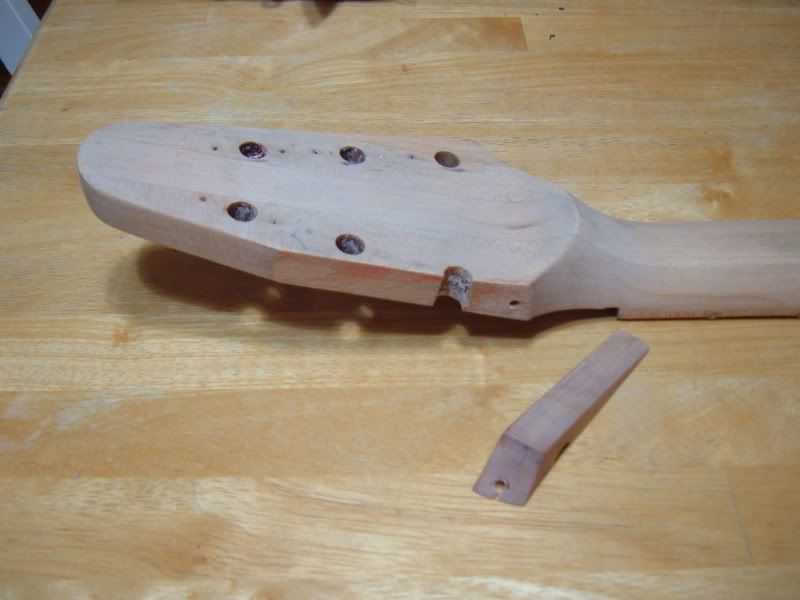
Step 2: Headstock repair.
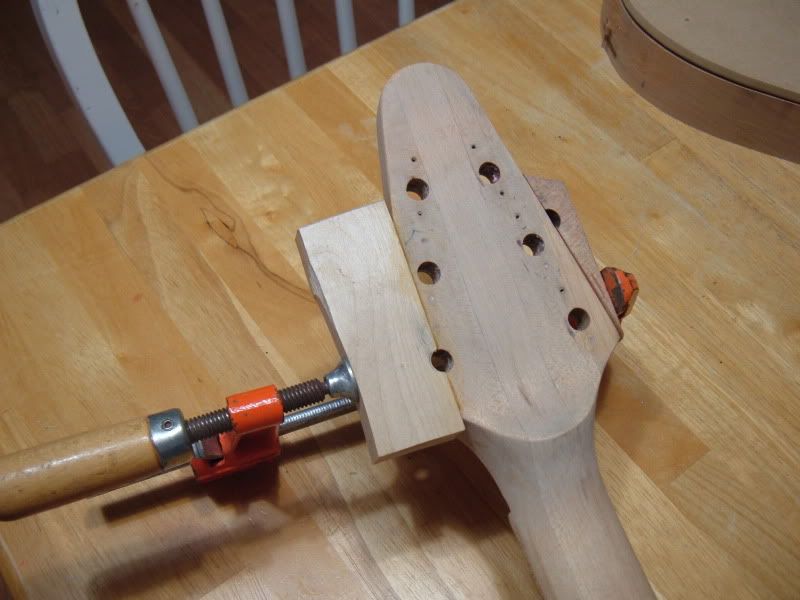
My wife had asked if I could cut her maple cutting board down a little because it was too big to for her to handle easily. I was happy to oblige. I cut a small donor block from the cutting board scrape to glue to the headstock. I routed one edge of the block perfectly flat and routed half of a tuner hole in it. It would have been a major pain to plug and redrill half a tuner hole if I hadn’t.
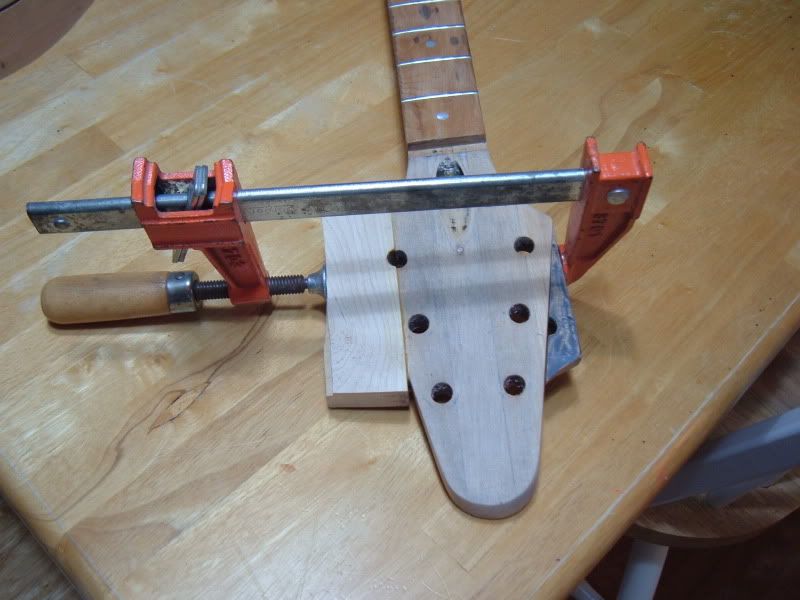
Cut and rough sanded to shape.
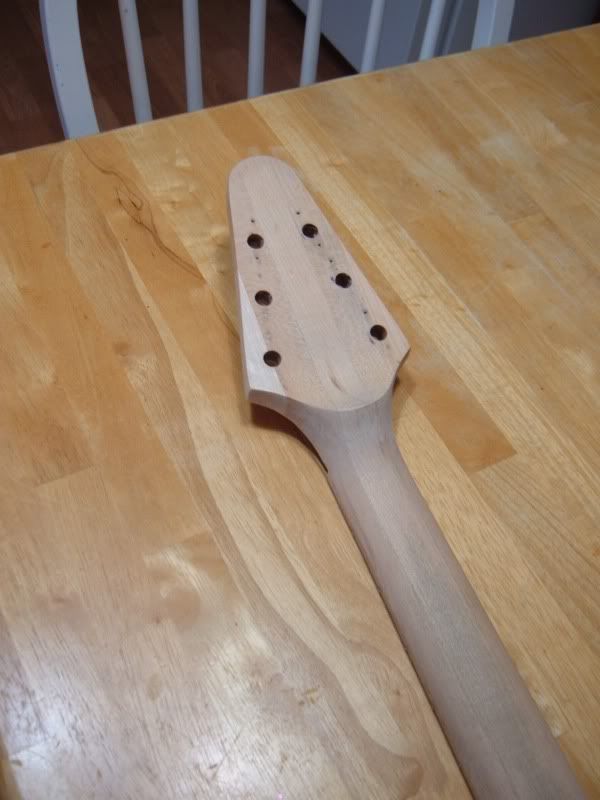
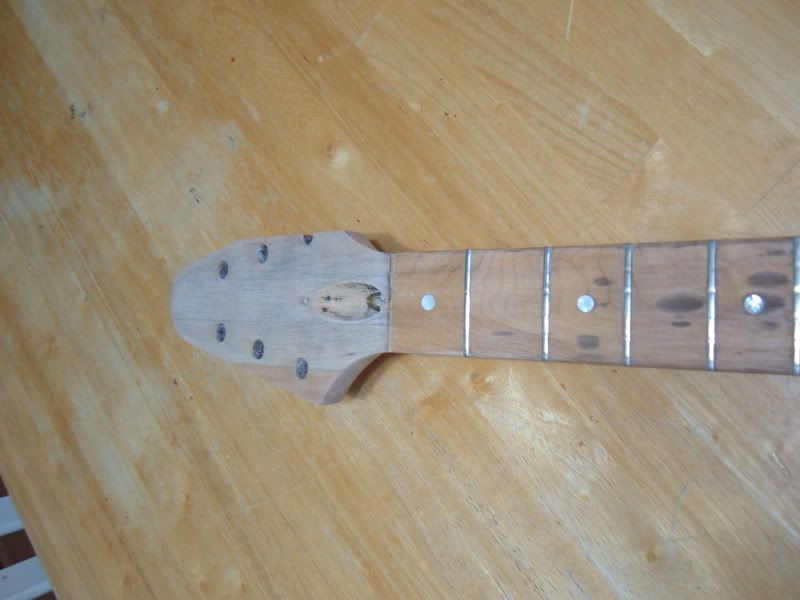
Tweaked a little and repair is done. While working on the headstock I also cleaned the paint out of the stamped serial number on the back. I took a mechanical pencil and lightly filled in the stamp to make sure I hadn’t messed them up any.

Posted: Sun Mar 03, 2013 2:54 pm
by cooter
Posted: Sun Mar 03, 2013 3:52 pm
by Awstin
Finally! This is so awesome. Can't wait to see it finished!
Posted: Sun Mar 03, 2013 4:22 pm
by James
For so many of your projects and repairs I look at the start point and wonder what on earth you're going to do to get to the end result. Every single time I find myself impressed with how simple, neat and well executed your solution is. Sometimes you mention having tried something and finding it not to be the best way and then trying something else, but without fail you get the job done in a way that has me smiling to myself at how good the outcome is.

Posted: Sun Mar 03, 2013 4:26 pm
by astro
Wow, amazing work! I'm stoked to see this project unfold. You got mad skillz!
Posted: Sun Mar 03, 2013 5:31 pm
by Awstin
This is making me regret the trade. Haha. I knew you would do it justice though.
Posted: Sun Mar 03, 2013 5:42 pm
by taylornutt
Cooter never ceases to amaze. I learn so much by watching him work.
Posted: Sun Mar 03, 2013 5:56 pm
by Pens
taylornutt wrote:Cooter never ceases to amaze. I learn so much by watching him work.
Posted: Sun Mar 03, 2013 6:38 pm
by cooter
Thanks guys. I really appreciate the encouraging words.
James wrote:For so many of your projects and repairs I look at the start point and wonder what on earth you're going to do to get to the end result. Every single time I find myself impressed with how simple, neat and well executed your solution is. Sometimes you mention having tried something and finding it not to be the best way and then trying something else, but without fail you get the job done in a way that has me smiling to myself at how good the outcome is.
There's lots of great info on these guitar forums and when I try something for the first time I
probably spend as much time researching it as putting it into practice.
I do think the key for me is to stop when something isn't going as planned and
just sleep on it until I figure what I want to try next.
I've screwed up so many times when I would try to get just one more thing done before I quit for the day.
Posted: Sun Mar 03, 2013 6:59 pm
by iCEByTes
amazing man amazing
bare can hold my self to see it done
paint it Gibson White!

Posted: Sun Mar 03, 2013 8:08 pm
by Awstin
Instead of doing the stain like you were thinking I think you should get a good piece of walnut and make a new body. Then just clear coat that.
Posted: Sun Mar 03, 2013 10:25 pm
by robert(original)
I APPROVE!
this is why shortscale is badass! we have folks that know what the fuck is up with thier git-boxes and aren't afraid to take on some shit manland style.
i personally would have left the fretboard wear n tear, but since you refretted it(it needed it too) then it does seem rather appropraite.
Posted: Sun Mar 03, 2013 11:00 pm
by cooter
robert(original) wrote: this is why shortscale is badass!
I remember following your build threads and thinking the same thing.

Posted: Sun Mar 03, 2013 11:13 pm
by cur
this guitar is going to get you laid, a lot.
Posted: Mon Mar 04, 2013 1:19 am
by Joey
I'm glad you picked this one up cooter
Posted: Mon Mar 04, 2013 2:36 am
by mixtape
Amazing work, and a very educational thread. Well done.
Posted: Mon Mar 04, 2013 3:10 am
by DGNR8
That thing looked like a Marauder! Stellar work.
Posted: Tue Mar 05, 2013 12:19 am
by JohnnyTheBoy
Genius fretboard-ironing fix

I would never have thought of that in a million years!
This will be fab...i can feel it!
Posted: Thu Mar 07, 2013 4:41 am
by DGNR8
I have a scuzzy 70s Fender neck without frets. Should I sand it clean before installing new frets, or leave it gross and fucked up? It's smooth enough. It just looks dirty, which I am fine with.