Page 4 of 8
Posted: Thu Feb 17, 2011 2:23 pm
by tomin8r
Knobs look a bit cramped to me from the pic, but everything else is fantastic. Great build!
Posted: Thu Feb 17, 2011 3:18 pm
by cur
tomin8r wrote:Knobs look a bit cramped to me from the pic, but everything else is fantastic. Great build!
I think you are correct. I looked back at the white on white one and it is more spread out.
My next step is to figure out how to make a square hole for the on-on slider switch. This will be used for an in-series and parallel switch for the two pickup combo. The original used it for a mid boost, but I have not looked up how this is done. I figure I will just drill a hole of the correct diameter and then take a small square file to it. A chisel may work as well to square the hole, but I don't know if I have one that small.
Posted: Thu Feb 17, 2011 4:13 pm
by Addam
I *think* it's a bass cut switch, like a jaguar. I have an epiphone ET270, i'm pretty sure i took photo's of the insides, i'll post them here when i find them.
I say *think* because they were billed as 'bass boost' which wouldn't really work with a passive circuit.
Flick the switch one way, then turn the tone right down, it goes very quiet. I assume the Jag is the same?
Posted: Thu Feb 17, 2011 4:37 pm
by cur
Thanks.
Posted: Thu Feb 17, 2011 11:17 pm
by Addam
Hope you can decipher something from this.
I don't know what to cap value is, I would try the same as a Jaguar though.
Posted: Fri Feb 18, 2011 12:36 am
by cur
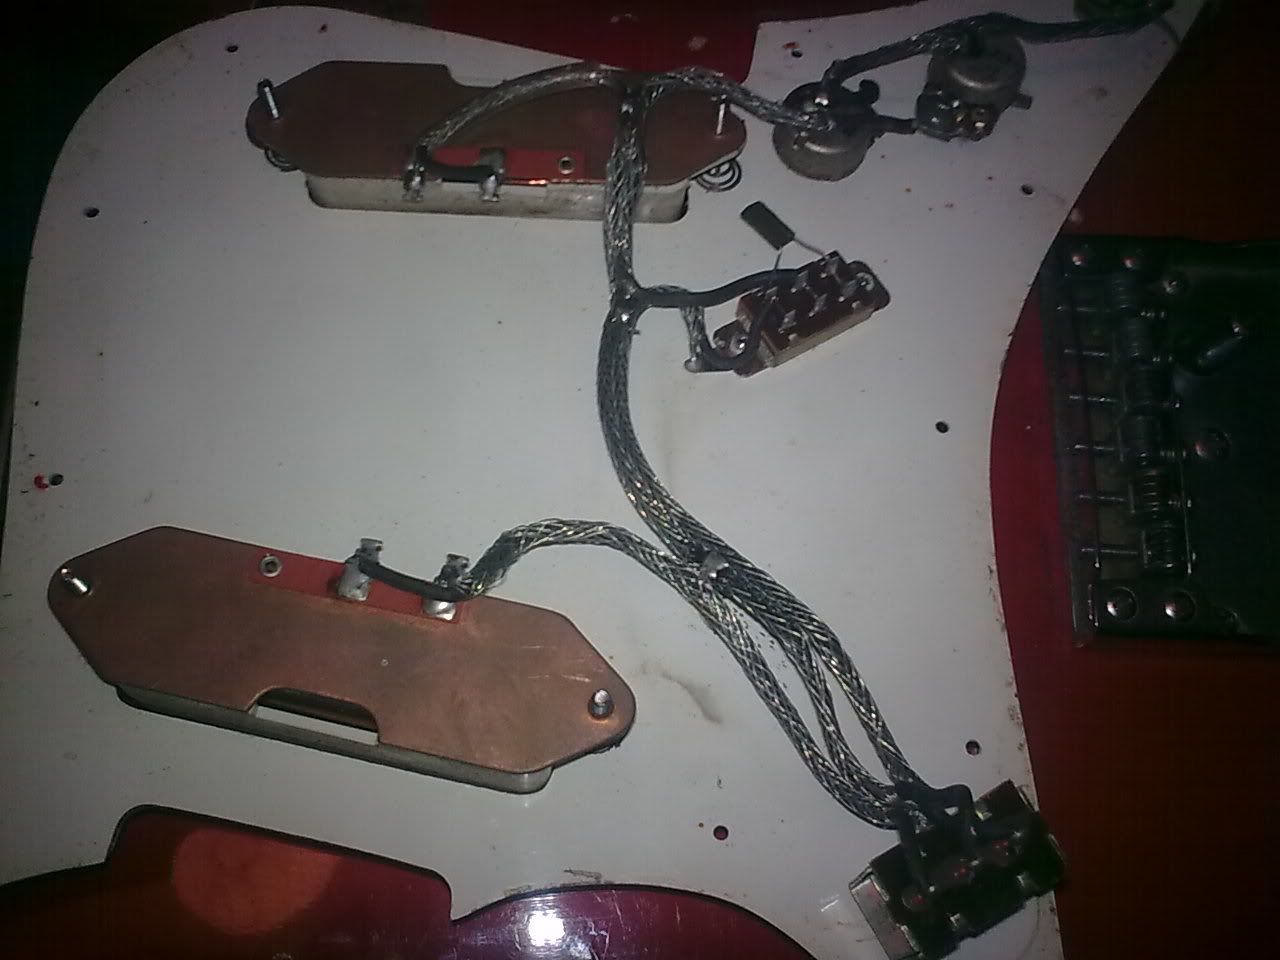
wow that is cool, love the shielded wire.
Posted: Mon Feb 21, 2011 5:48 pm
by cur
Made some progress. Wired up the pickguard. I cut the square hole for the switch. I did a test on a piece of scrap material. I traced the size of rectangle I needed and then found a drill bit that would be the same diameter. I then drilled two holes and that removed about 80% of the hole. I took a sharp wood chisel and squared and shaped it. Just put it on a block of wood and used hand pressure the make the cuts. Worked very nice since I was only shaving off little bits. I wired the mini DPDT so that in the up position both pickups in series. This will totally override the 3 way toggle switch. Then when you put the switch in the down position, both pickups are in parallel and the 3 way toggle switch will function normally as a pickup selector. Both pots are 250k and I used 0.047 uf orange drop cap. I just looked at what GFS used with their Brighton Rock kit to get the specs on the guts.
I came across a tremolo arm that looked like it was the correct one for this guitar.
LINK
It said the thread pattern was 10/32. So I dropped a dime and picked up a tester bolt. But it did not thread because there was a broken trem arm piece already up in it. I drilled it out, but did not have a small enough extractor on hand. I found a torx driver that slightly too big for the drilled hole and tapped it in with a hammer. Then I was able to unscrew it with a pliers. I took my 10/32 tap and cleaned up the threads. The tester bolt worked perfect and I ordered the part.
Posted: Mon Feb 21, 2011 5:53 pm
by mathiasx
cur wrote:
I love the wood grain on this thing.
Posted: Mon Feb 21, 2011 8:43 pm
by Gabriel
I'm getting excited to see how this all turns out, really interesting project that I've enjoyed following so far.
Keep up the good work!
Posted: Mon Feb 21, 2011 11:08 pm
by weed_killer
This is going to look great in the white you chose.
Posted: Wed Feb 23, 2011 4:53 am
by cur
So here is where I am at now. Except I installed the chrome strap buttons; not in pictures.
Been working on the setup. Had to lower the bridge all the way and also shim the neck. Action is pretty low. I adjusted the truss rod and intonation was pretty much spot on. Slight buzz on 13th fret, but it might go away with a little more tweaking. So small adjustments from hear on. It also needs a new nut. It seems like it has a left handed nut on it. It is a stock plastic nut, but the high e string side of the nut is noticeably higher than the low E. The low E is about right. The high side is awkwardly high from the G to e. So I will bring it into Gurus and have a bone nut made (treat myself).
Posted: Wed Feb 23, 2011 5:06 am
by hotrodperlmutter
what a looker. project of the year.
i would've done jag pickups, but the ones you picked are growing on me.
Posted: Wed Feb 23, 2011 5:13 am
by cur
I still can. Actually I have enough pickguard material left to cut another one. Was thinking of doing this and cut it for humbuckers or something else. Then all I would have to do is slack the strings and use a quick connect to swap ground.
Oh, I also used that adhesive copper shielding. The thing was humming pretty good with out it.
Posted: Sat Feb 26, 2011 6:10 pm
by cur
Install reverb bar: Check!
Now on the way to get an nut cut by a pro (sounds dirty).
Posted: Sat Feb 26, 2011 6:18 pm
by Addam
This build is total genuis!
Gonna love seeeing it painted.
Posted: Sat Feb 26, 2011 7:13 pm
by serfx
dude thank you so much for keeping us all updated on this, i'm digging every picture you post.
Posted: Sat Feb 26, 2011 9:05 pm
by Thom
hotrodperlmutter wrote:project of the year.
+1 all kinds of awesome.
Posted: Sat Feb 26, 2011 9:08 pm
by Billy3000
Thom wrote:hotrodperlmutter wrote:project of the year.
+1 all kinds of awesome.
agreed with this. it just keeps getting better and better!
Posted: Sat Feb 26, 2011 11:55 pm
by cur
Well dropped it off at Guru Guitars. At minimum I am getting a fret level and a new nut cut. Frets are kind of wonky after 40 years. I told them to figure out what need to be done and let me know. The neck is cool. It starts out as a round c-neck at the nut and flattens out to a flat D shape at the butt of the guitar.
It looks like it is going to warm up around here soon enough. So I might get to painting in the near future.
Posted: Sun Feb 27, 2011 12:15 am
by hotrodperlmutter
cur wrote:Now on the way to get an nut cut by a pro (sounds dirty).
not as dirty as the fact that an amateur busted your old nut.


